Moonlit Marshmallow Ghost Pillow Free Pattern – A Plush Knitted Companion
Moonlit Marshmallow Ghost Pillow Free Pattern – A Plush Knitted Companion
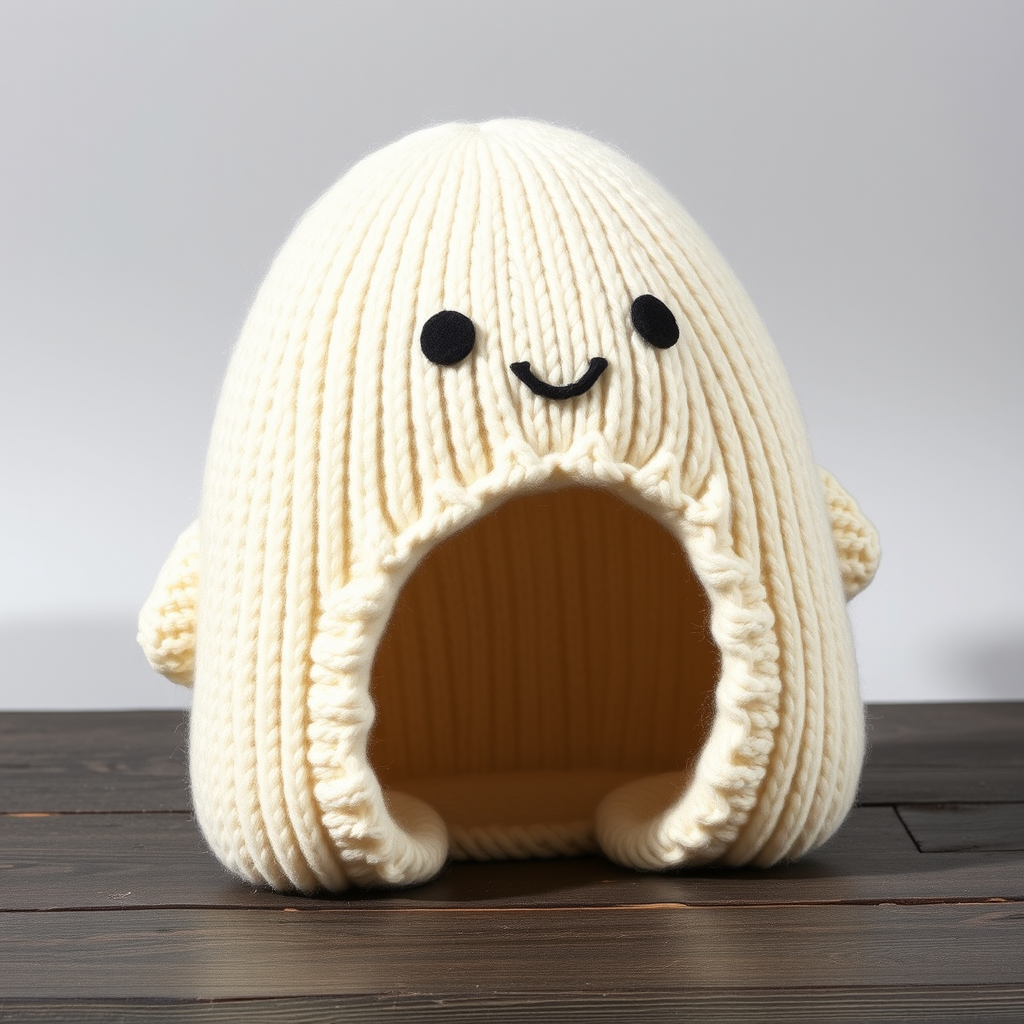
Are you ready to add a touch of whimsy and cozy charm to your home decor? Look no further than this ethereal, cloud-soft ghost pillow! With its gentle curves, plush texture, and hand-stitched sleepy face, this knitted companion is the perfect project for beginners and seasoned crafters alike. Whether you're looking for a unique gift, a seasonal decoration, or just a cuddly new friend for your sofa, this pattern is sure to delight. Let's dive into creating your very own Moonlit Marshmallow Ghost!
Materials Needed
Before we begin, gather the following supplies to ensure a smooth and enjoyable knitting experience:
- Yarn: Super bulky weight yarn (approx. 250g) in cream/off-white. A small amount of black yarn for the face embroidery.
- Needles: US 11 (8mm) knitting needles, or circular needles if you prefer the magic loop method.
- Notions: Tapestry needle for seaming and embroidery, stitch markers (optional), scissors.
- Stuffing: Polyester fiberfill or your preferred stuffing material (approx. 1-2 bags depending on size).
Gauge: 10 stitches and 14 rows = 4 inches in stockinette stitch. (Gauge is important for achieving the correct size, but this project is forgiving—don't stress too much!)
Step-by-Step Instructions
This ghost pillow is knitted flat in two pieces (front and back) and then seamed together. It uses simple knit and purl stitches, along with basic increases and decreases. Perfect for a confident beginner!
Abbreviations
- CO: Cast on
- K: Knit
- P: Purl
- K2tog: Knit two stitches together (decrease)
- Kfb: Knit front and back (increase)
- St(s): Stitch(es)
- BO: Bind off
- RS: Right side
- WS: Wrong side
Make the Front Piece
Step 1: CO 30 sts.
Step 2: Work in stockinette stitch (Row 1 RS: K all; Row 2 WS: P all) until the piece measures 6 inches from the cast-on edge, ending with a WS row. This forms the base of the ghost's body.
Shape the Head (Increase Section)
Now we'll begin shaping the rounded head of the ghost by increasing stitches.
- Row 1 (RS): Kfb, K28, Kfb (32 sts)
- Row 2 (WS): P all
- Row 3 (RS): Kfb, K30, Kfb (34 sts)
- Row 4 (WS): P all
- Row 5 (RS): Kfb, K32, Kfb (36 sts)
- Row 6 (WS): P all
After completing Row 6, you will have 36 stitches. Now, work straight in stockinette stitch (K on RS, P on WS) until the piece measures 10 inches from the cast-on edge, ending with a WS row.
Shape the Top of the Head (Decrease Section)
Now we'll decrease stitches to close the top of the head, creating that classic ghostly dome.
- Row 1 (RS): K2tog, K32, K2tog (34 sts)
- Row 2 (WS): P all
- Row 3 (RS): K2tog, K30, K2tog (32 sts)
- Row 4 (WS): P all
- Row 5 (RS): K2tog, K28, K2tog (30 sts)
- Row 6 (WS): P all
- Row 7 (RS): K2tog, K26, K2tog (28 sts)
- Row 8 (WS): P all
- Row 9 (RS): K2tog, K24, K2tog (26 sts)
- Row 10 (WS): P all
- Row 11 (RS): K2tog, K22, K2tog (24 sts)
- Row 12 (WS): P all
- Row 13 (RS): K2tog, K20, K2tog (22 sts)
- Row 14 (WS): P all
- Row 15 (RS): K2tog, K18, K2tog (20 sts)
- Row 16 (WS): P all
- Row 17 (RS): K2tog, K16, K2tog (18 sts)
- Row 18 (WS): P all
- Row 19 (RS): K2tog, K14, K2tog (16 sts)
- Row 20 (WS): P all
- Row 21 (RS): K2tog, K12, K2tog (14 sts)
- Row 22 (WS): P all
- Row 23 (RS): K2tog, K10, K2tog (12 sts)
- Row 24 (WS): P all
- Row 25 (RS): K2tog, K8, K2tog (10 sts)
- Row 26 (WS): P all
- Row 27 (RS): K2tog, K6, K2tog (8 sts)
- Row 28 (WS): P all
- Row 29 (RS): K2tog, K4, K2tog (6 sts)
- Row 30 (WS): P all
- Row 31 (RS): K2tog, K2, K2tog (4 sts)
- Row 32 (WS): P all
- Row 33 (RS): K2tog, K2tog (2 sts)
- Row 34 (WS): P2tog (1 st)
Cut the yarn, leaving a long tail (about 8 inches). Pull the tail through the remaining stitch to secure it. Your front piece is complete!
Make the Back Piece
Step 1: CO 30 sts.
Step 2: Work in stockinette stitch (K on RS, P on WS) until the piece measures 10 inches from the cast-on edge, ending with a WS row. This is a simple rectangle that will form the back of the pillow.
Step 3: BO all sts loosely. Weave in the cast-on end, but leave the bind-off edge open for now.
Finishing and Assembly
Step 1: Seam the Pieces. Place the front and back pieces with right sides (the smooth stockinette side) facing each other. Using a tapestry needle and a length of yarn, sew the sides and bottom edges together using a mattress stitch or whip stitch. Leave the top edge open.
Step 2: Turn Right Side Out. Carefully turn the pillow right side out through the top opening. Use a blunt tool (like a knitting needle) to gently push out the corners and shape the head.
Step 3: Stuff the Pillow. Firmly stuff the pillow with polyester fiberfill. Pay special attention to the head area, shaping it into a nice, round dome. The body should be plump but not overly stretched. Leave the top opening accessible for closing.
Step 4: Close the Top. Once you're happy with the stuffing, sew the top opening closed using a whip stitch. Weave in the yarn end securely.
Embroider the Face
Now for the fun part—giving your ghost its charming personality!
Step 1: Thread a tapestry needle with the black yarn.
Step 2: Locate the center of the front piece. The eyes should be positioned approximately 3 inches below the top point of the head.
Step 3: Embroider two oval eyes. Each eye should be about 1 inch wide and 1.5 inches tall. Use a satin stitch or a series of straight stitches to fill in the ovals. For a sleepy, friendly look, tilt the eyes slightly outward at the top.
Step 4: Add a small, gentle smile. Below the eyes, embroider a curved line using a backstitch or stem stitch. Keep the smile subtle and sweet.
Step 5: Weave in all remaining yarn ends on the inside of the pillow.
Optional Finishing Touch
If you'd like to hang your ghost, create a small loop of yarn at the top. Simply thread a piece of yarn through the top seam, tie it into a loop, and secure the ends inside the pillow.
Congratulations! You've just created your very own Moonlit Marshmallow Ghost Pillow. This plush companion is perfect for snuggling, decorating, or gifting. Its soft, dreamy expression is sure to bring a smile to anyone's face. Happy knitting!



