Mythic Mushroom Sprite Amigurumi Free Pattern
Mythic Mushroom Sprite Amigurumi Free Pattern
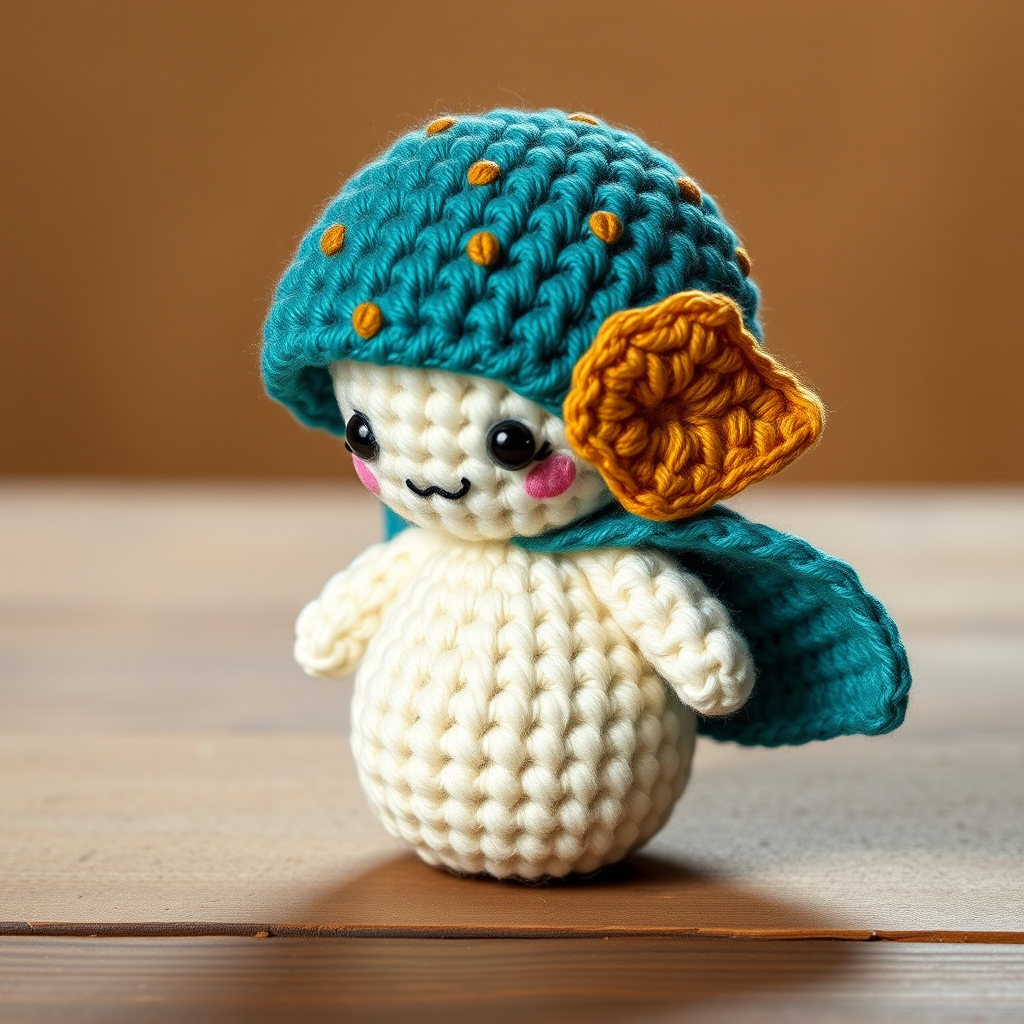
Bring a touch of enchanted forest whimsy to your shelf with this adorable mushroom sprite, complete with a speckled cap and tiny leaf cloak. This soft, squishable companion is a joy to crochet and even more delightful to gift. Whether you're a seasoned amigurumi maker or just starting your crochet journey, this pattern is designed to be accessible, rewarding, and utterly charming. Let's dive into the magic!
Materials Needed
Before you begin, gather the following supplies. This project uses simple, readily available materials, making it perfect for a weekend crafting session.
- Yarn: Worsted weight cotton or acrylic yarn in the following colors:
- Cream (for head & body)
- Deep teal (for mushroom cap)
- Warm brown (for speckles)
- Soft gold (for leaf cloak)
- Small amount of black (for face embroidery)
- Hook: 3.5mm (E) crochet hook
- Stitch marker (to track your rounds)
- Yarn needle (for sewing and weaving in ends)
- Stuffing: Polyester fiberfill or your preferred amigurumi stuffing
- Scissors
Note on gauge: Gauge is not critical for amigurumi, but aim for tight stitches to prevent stuffing from showing through. Approx 4 sc = 1 inch is a good target.
Step-by-Step Instructions
Work in continuous rounds unless stated otherwise. Use a stitch marker to track your rounds. Let's begin!
Head & Body (worked as one piece)
Start with cream yarn.
- R1: Magic ring, 6 sc (6)
- R2: Inc in each st around (12)
- R3: (sc in next st, inc) around (18)
- R4: (sc in next 2 sts, inc) around (24)
- R5: (sc in next 3 sts, inc) around (30)
- R6-10: sc in each st around (30) — 5 rounds of straight single crochet
- R11: (sc in next 3 sts, dec) around (24)
- R12: (sc in next 2 sts, dec) around (18)
- R13: (sc in next st, dec) around (12)
- Stuff the head firmly with fiberfill. Make sure it's nice and plump but not overstuffed to the point of stretching the stitches.
- R14: dec around (6)
- Fasten off, leaving a tail. Weave the end through the remaining 6 stitches and pull tight to close. Weave in the end securely.
Mushroom Cap
Use deep teal yarn.
- R1: Magic ring, 6 sc (6)
- R2: Inc in each st around (12)
- R3: (sc in next st, inc) around (18)
- R4: (sc in next 2 sts, inc) around (24)
- R5: (sc in next 3 sts, inc) around (30)
- R6: (sc in next 4 sts, inc) around (36)
- R7-9: sc in each st around (36) — 3 rounds of straight single crochet
- R10: (sc in next 4 sts, dec) around (30)
- R11: (sc in next 3 sts, dec) around (24)
- R12: (sc in next 2 sts, dec) around (18)
- Fasten off, leaving a long tail for sewing. Stuff the cap lightly — you want it to keep its dome shape but remain soft. Sew the cap onto the head, slightly overlapping the top. Position it at a jaunty angle for extra charm, as shown in the visual details.
Speckles (make 5-6)
With warm brown yarn, make small French knots or embroider tiny circles randomly on the cap. To make a French knot: bring the needle up through the cap, wrap the yarn around the needle 2-3 times, then insert the needle back down close to where it came up. Pull gently to secure. Space them out evenly for a natural mushroom look.
Leaf Cloak
Use soft gold yarn.
- R1: Magic ring, 3 sc (3)
- R2: Inc in each st (6)
- R3: (sc in next st, inc) around (9)
- R4: (sc in next 2 sts, inc) around (12)
- R5: (sc in next 3 sts, inc) around (15)
- R6: (sc in next 4 sts, inc) around (18)
- R7: (sc in next 5 sts, inc) around (21)
- R8: (sc in next 6 sts, inc) around (24)
- Fasten off, leaving a long tail. Fold the piece in half to create a leaf shape. Sew the bottom edge to the back of the sprite's body, letting the point drape down like a tiny cape. Make sure it's centered and secure.
Arms (make 2)
Use cream yarn.
- R1: Magic ring, 5 sc (5)
- R2-4: sc in each st around (5) — 3 rounds of straight single crochet
- Fasten off, leaving a tail. Sew the arms to the sides of the body, positioning them slightly below the cap. They should be small and stubby, adding to the sprite's cute proportions.
Face
With black yarn, embroider two small eyes using a satin stitch (or simple straight stitches) on the front of the head. Then, using a backstitch, create a tiny smile just below the eyes. Keep the face simple and sweet — the charm is in the minimalism.
Finishing
- Weave in all ends securely using your yarn needle.
- Optionally, add a small loop of yarn at the top of the cap for hanging. Simply chain 10-12 stitches, fasten off, and attach to the top of the cap.
- Give your sprite a gentle squeeze to shape it, and admire your handiwork!
Your Mythic Mushroom Sprite is complete! This little companion stands about 4 inches tall, perfect for shelf display, gifting, or adding to a magical collection. The soft, squishable texture and handmade charm make it a treasure. Happy crocheting!



