Sunburst Meadow Granny Square Throw Free Pattern – Radiant Crochet Blanket
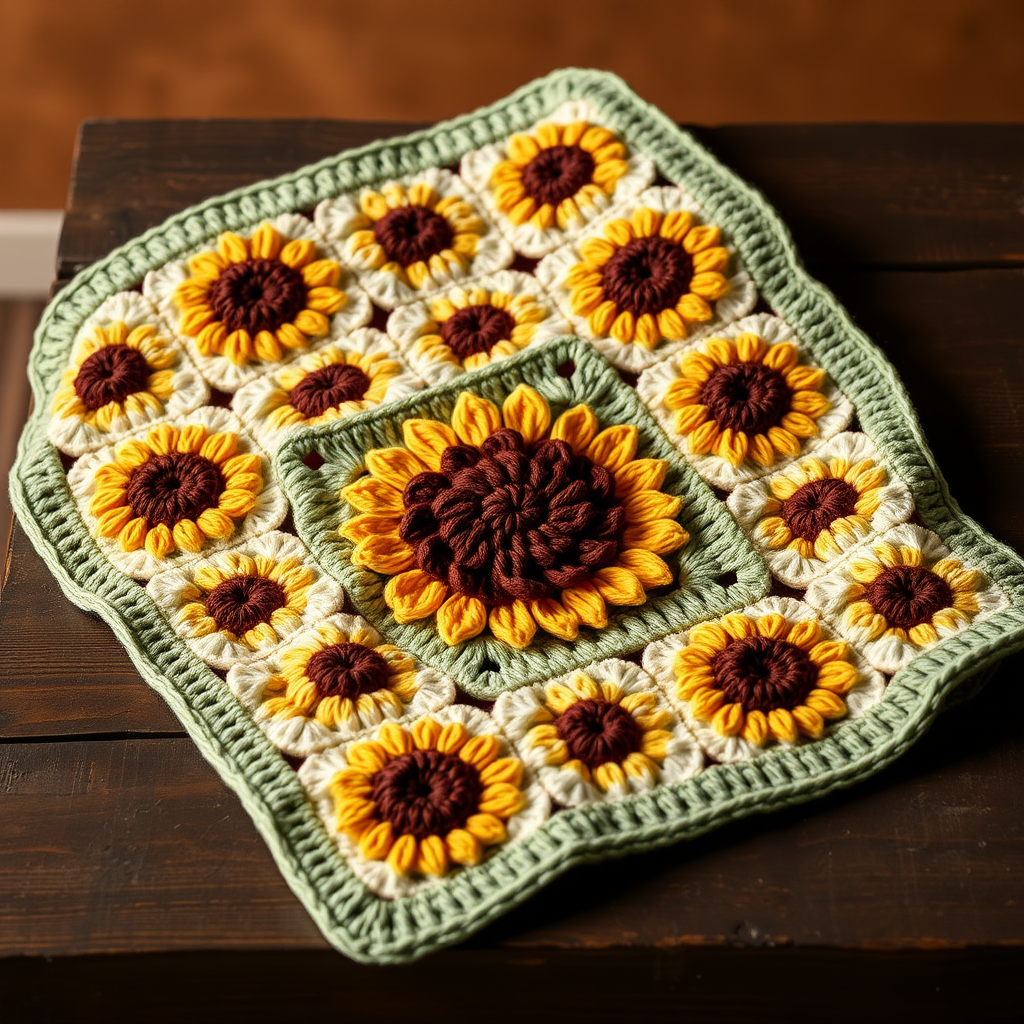
Wrap Yourself in Sunshine: The Sunburst Meadow Granny Square Throw
Imagine curling up on a cool evening under a blanket that feels like a sun-drenched meadow. That's the magic of the Sunburst Meadow Granny Square Throw. This free crochet pattern takes the beloved classic granny square and elevates it into a lush, textured landscape of golden yellows, burnt oranges, and earthy greens. Each of the 25 individual squares features a radiant sunflower motif, creating a dense, almost three-dimensional fabric that is as beautiful to look at as it is cozy to snuggle under. Whether you're a seasoned crocheter looking for a new project or a confident beginner ready for a challenge, this pattern is your ticket to creating a stunning, handcrafted heirloom. Let's dive into this radiant crochet blanket pattern and start building your own personal meadow.
Materials Needed for Your Crochet Blanket
Before you begin, gather your supplies. This project is wonderfully portable, and the worsted weight yarn makes for a quick and satisfying stitch. Here’s what you'll need to get started:
- Yarn: Worsted weight cotton or acrylic blend (e.g., Lion Brand Cotton-Ease) in the following colors:
- Golden Yellow (for petals)
- Burnt Orange (for petals)
- Chocolate Brown (for the sunflower center)
- Cream (for the inner border)
- Sage Green (for the outer border and final edging)
- Hook: 5.0 mm (H-8) crochet hook
- Notions: Tapestry needle for weaving in ends and joining squares, scissors.
Gauge: One completed sunflower granny square measures 6 inches (15 cm) across before joining. This gauge is crucial for ensuring your final throw is the correct size.
Step-by-Step Instructions: The Sunflower Granny Square Motif
This pattern is built on a simple, repetitive rhythm. You will make a total of 25 identical squares. Take your time with the first one to get the hang of the stitch placement, and the rest will fly by!
Round 1: The Sunflower Heart
With your chocolate brown yarn, make a magic ring. Chain 3 (this counts as your first double crochet). Work 11 double crochets (dc) into the ring. Slip stitch (sl st) to the top of the beginning chain-3 to join. You should have 12 dc stitches in total.
Round 2: Growing the Center
Chain 3 (counts as first dc). Work 1 dc in the same stitch (this is an increase). Work 2 dc in each dc around. Slip stitch to the top of the beginning chain-3 to join. You will now have 24 dc stitches. Fasten off the brown yarn and weave in the end.
Round 3: First Layer of Petals
Join your golden yellow yarn in any stitch. Chain 3 (counts as first dc). Work 1 dc in the same stitch. Chain 1, skip the next stitch. *Work 2 dc in the next stitch, chain 1, skip the next stitch.* Repeat from * around the entire round. Slip stitch to the top of the beginning chain-3 to join. You will have created 12 petal bases (each base is a 2-dc cluster).
Round 4: Building the Petal Clusters
Slip stitch into the next chain-1 space. Chain 3 (counts as first dc). Work 2 dc in the same chain-1 space. Chain 1. *Work 3 dc in the next chain-1 space, chain 1.* Repeat from * around. Slip stitch to the top of the beginning chain-3 to join. You now have 12 petal clusters of 3 dc each. Fasten off the yellow yarn.
Round 5: Adding Depth with Burnt Orange
Join your burnt orange yarn in any chain-1 space. Chain 3 (counts as first dc). Work 2 dc in the same space. Chain 2. *Work 3 dc in the next chain-1 space, chain 2.* Repeat from * around. Slip stitch to the top of the beginning chain-3 to join. Fasten off the orange yarn. Your sunflower is really starting to take shape!
Round 6: Framing with Cream
Join your cream yarn in any chain-2 corner space. Chain 3 (counts as first dc). Work 2 dc in the same space. Chain 2. Work 3 dc in the same space. This creates your first corner. *Chain 1. Work 3 dc in the next chain-2 space. Chain 1. Work 3 dc in the next chain-2 space. Chain 1. Work (3 dc, chain 2, 3 dc) in the next chain-2 space (this is your next corner).* Repeat from * around, ending with a chain 1. Slip stitch to the top of the beginning chain-3 to join. Fasten off the cream yarn.
Round 7: The Sage Green Finish
Join your sage green yarn in any corner chain-2 space. Chain 3 (counts as first dc). Work 2 dc in the same space. Chain 2. Work 3 dc in the same space. *Chain 1. Work 3 dc in the next chain-1 space. Chain 1. Work 3 dc in the next chain-1 space. Chain 1. Work 3 dc in the next chain-1 space. Chain 1. Work (3 dc, chain 2, 3 dc) in the next corner space.* Repeat from * around, ending with a chain 1. Slip stitch to the top of the beginning chain-3 to join. Fasten off and weave in all ends. Congratulations! You've completed your first square. Repeat this entire process to make 24 more squares.
Assembling Your Meadow: Joining the Squares
Once you have all 25 squares, it's time to assemble your throw. Arrange them in a 5x5 grid. For a dynamic, organic look, alternate the orientation of the squares—some with the sunflower petals pointing up, some pointing sideways. This adds a subtle, playful texture to the finished blanket.
Using your cream yarn and a tapestry needle, whip stitch the squares together. Work through the back loops only of the edge stitches, matching corner to corner and edge to edge. This creates a nearly invisible seam on the front. Ensure all your seams are flat and secure.
Adding the Finishing Touch: The Border
With the right side of your assembled throw facing you, join your sage green yarn in any corner.
- Round 1: Chain 3 (counts as first dc). Work 2 dc in the same corner. Chain 2. Work 3 dc in the same corner. *Work 3 dc in each side space across to the next corner. Work (3 dc, chain 2, 3 dc) in each corner space.* Repeat from * around. Slip stitch to the top of the beginning chain-3 to join.
- Round 2: Chain 3 (counts as first dc). Work 1 dc in each dc around, working (2 dc, chain 2, 2 dc) in each corner chain-2 space. Slip stitch to the top of the beginning chain-3 to join.
Fasten off and weave in all ends.
Finishing Your Handmade Throw
The final step is to block your throw. This is essential for evening out the stitches and giving your blanket a professional, polished look. Pin the throw to your desired dimensions on a blocking mat or a clean towel. Gently steam it with an iron (without touching the yarn directly) or lightly mist it with water. Allow it to dry completely before unpinning. This will help your sunflower meadow lay flat and drape beautifully.
Your Sunburst Meadow Granny Square Throw is now complete! This 30-inch by 30-inch textured blanket is perfect for draping over a couch, snuggling under while reading, or giving as a heartfelt, handmade gift. Enjoy the fruits of your labor and the warm, sunny glow it brings to any room.


