Sunny Snuggle Bear Costume Free Pattern – Crochet Care Bear Hoodie with Rainbow Belly Patch
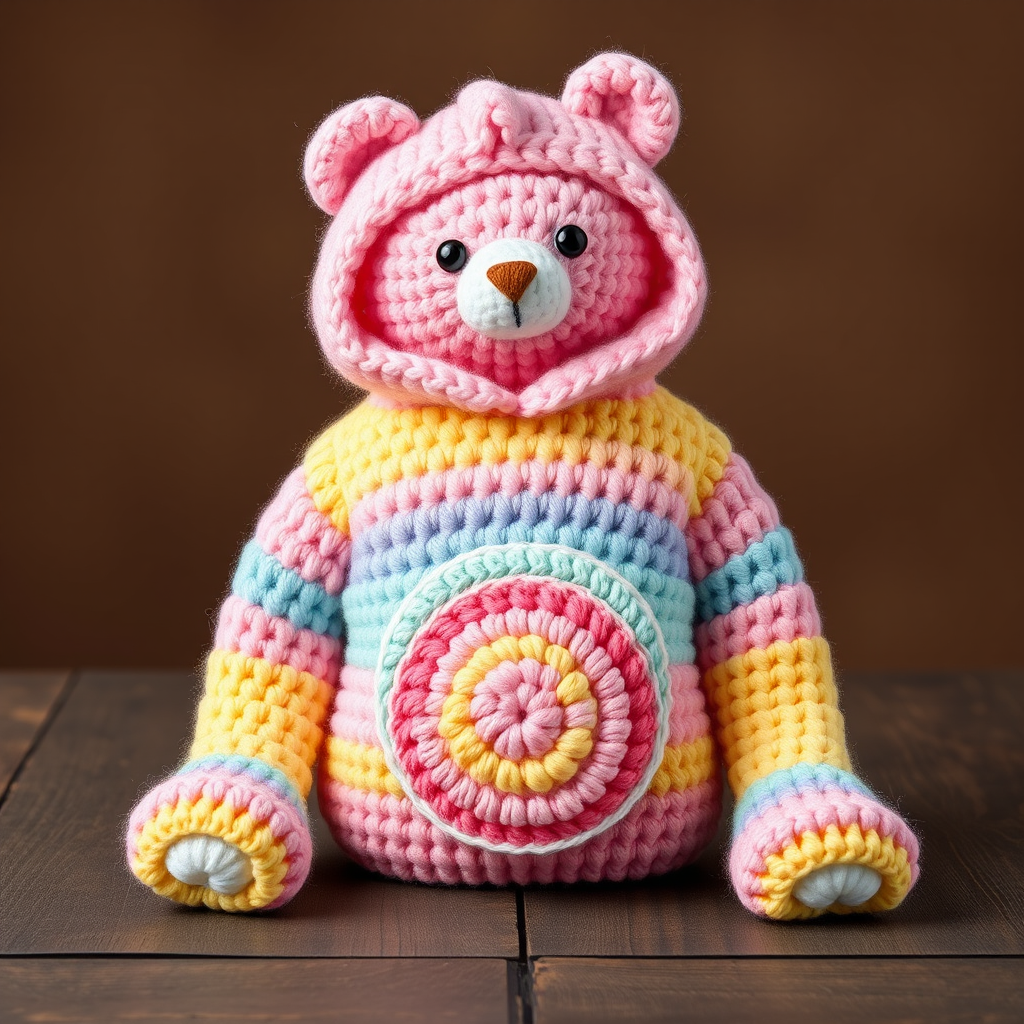
Crochet the Sunny Snuggle Bear Costume: A Care Bear Hoodie with Rainbow Belly Patch
Wrap your little one in cloud-soft cheer with this crochet Care Bear-inspired hoodie, complete with a sunny belly patch and cozy ear flaps. This pattern turns a classic costume into a wearable hug, perfect for playdates, photo shoots, or just snuggly days. The pastel rainbow stripes and adorable bear face make it an instant heirloom piece, and because it's worked in simple single crochet, even a confident beginner can create this magical garment. Let's get started on making a memory they'll treasure!
Materials Needed
Before you begin, gather these supplies to ensure a smooth crochet session. All yarn is worsted weight, and the gauge is crucial for the perfect fit.
- Yarn: Worsted weight yarn in the following colors:
- Pastel Pink (main body, hood, ears, and final belly patch round)
- Sunny Yellow (stripe and belly patch center)
- Sky Blue (stripe and belly patch)
- Mint Green (stripe and belly patch)
- Lavender (stripe and belly patch)
- White (small amount for optional eye highlights)
- Black (small amount for embroidered eyes)
- Dark Brown (small amount for embroidered nose and mouth)
- Hook: 5.0 mm crochet hook (or size needed to match gauge).
- Notions: Stitch markers, yarn needle for weaving in ends and sewing pieces, scissors.
- Optional: Button or snap for the back neck closure.
Gauge: 16 sc x 18 rows = 4 x 4 inches. Always check your gauge to ensure the hoodie fits as intended.
Step-by-Step Instructions
Notes: Work in continuous rounds unless stated. Use a stitch marker to track rounds. The hoodie is worked from the bottom up, then the hood is added. The belly patch is worked separately and sewn on. All stitches are single crochet (sc) unless otherwise noted.
HOODIE BODY (Worked in one piece from bottom edge up)
This section creates the main tube of the sweater, which you will later divide for the armholes.
- Foundation: With pink yarn, ch 56. Join with a sl st to form a ring, being careful not to twist the chain.
- Rounds 1-12: sc in each ch around. (56 sc). This creates the pink base of the sweater.
- Round 13: Switch to yellow yarn. sc in each st around. (56 sc).
- Round 14: Switch to blue yarn. sc in each st around. (56 sc).
- Round 15: Switch to mint yarn. sc in each st around. (56 sc).
- Round 16: Switch to lavender yarn. sc in each st around. (56 sc).
- Round 17: Switch to pink yarn. sc in each st around. (56 sc).
- Divide for Armholes: Mark 12 sts on each side for the sleeves. You will now work back and forth on the front 32 sts only.
- Front Panel:
- Row 1: sc in next 32 sts, turn.
- Rows 2-10: ch 1, sc in each st across, turn. (32 sc). Fasten off.
- Back Panel: Attach yarn to the back 32 sts (the remaining sts between armhole markers) and repeat Rows 1-10 for the back. Do not fasten off.
- Join Front and Back: With right sides facing, sl st the shoulder seams (top 6 sts on each side). Leave the center 20 sts open for the neck. Turn right side out.
SLEEVES (Make 2)
These are worked in the round directly from the armhole opening.
- Attach Yarn: Attach pink yarn at the underarm of one armhole.
- Round 1: Work 24 sc evenly around the armhole. Place a marker.
- Rounds 2-8: sc in each st around. (24 sc).
- Round 9: Switch to yellow, sc in each st around.
- Round 10: Switch to blue, sc in each st around.
- Round 11: Switch to mint, sc in each st around.
- Round 12: Switch to lavender, sc in each st around.
- Round 13: Switch to pink, sc in each st around.
- Fasten off. Repeat for the second sleeve.
HOOD
This is worked flat from the neck opening, then seamed at the top.
- Attach Yarn: Attach pink yarn at the back neck edge.
- Row 1: Work 20 sc across the neck opening. Turn.
- Rows 2-12: ch 1, sc in each st across, turn. (20 sc).
- Row 13 (Increase): ch 1, 2 sc in first st, sc in next 18 sts, 2 sc in last st, turn. (22 sc).
- Rows 14-16: ch 1, sc in each st across, turn. (22 sc).
- Row 17 (Increase): ch 1, 2 sc in first st, sc in next 20 sts, 2 sc in last st, turn. (24 sc).
- Rows 18-20: ch 1, sc in each st across, turn. (24 sc).
- Finish: Fold hood in half and sl st the top seam together. Turn right side out.
EARS (Make 2)
These cute little circles are sewn onto the top of the hood.
- Start: With pink yarn, make a magic ring.
- Round 1: 6 sc in ring. (6).
- Round 2: 2 sc in each st around. (12).
- Round 3: (sc in next st, 2 sc in next st) around. (18).
- Rounds 4-5: sc in each st around. (18).
- Fasten off, leaving a long tail. Sew ears to the top of the hood, about 4 sts apart.
BELLY PATCH (Rainbow Oval)
This is the signature Care Bear feature, worked in an oval shape with concentric color rounds.
- Foundation: With yellow yarn, ch 6.
- Row 1: sc in 2nd ch from hook, sc in next 3 ch, 3 sc in last ch. Working on the other side of the chain, sc in next 3 ch, 2 sc in first ch. (12 sc).
- Round 2: 2 sc in each of next 2 sts, sc in next 3 sts, 2 sc in each of next 3 sts, sc in next 3 sts, 2 sc in last st. (18 sc).
- Round 3: Switch to blue. (sc in next st, 2 sc in next st) twice, sc in next 3 sts, (sc in next st, 2 sc in next st) three times, sc in next 3 sts, (sc in next st, 2 sc in next st) once. (24 sc).
- Round 4: Switch to mint. (sc in next 2 sts, 2 sc in next st) twice, sc in next 3 sts, (sc in next 2 sts, 2 sc in next st) three times, sc in next 3 sts, (sc in next 2 sts, 2 sc in next st) once. (30 sc).
- Round 5: Switch to lavender. (sc in next 3 sts, 2 sc in next st) twice, sc in next 3 sts, (sc in next 3 sts, 2 sc in next st) three times, sc in next 3 sts, (sc in next 3 sts, 2 sc in next st) once. (36 sc).
- Round 6: Switch to pink. sc in each st around. (36 sc).
- Fasten off, leaving a long tail. Sew the belly patch onto the front of the hoodie, centered below the chest.
FACE DETAILS
Bring your bear to life with simple embroidery.
- Eyes: With black yarn, embroider two small oval eyes on the belly patch, centered horizontally.
- Nose & Mouth: With dark brown yarn, embroider a small triangular nose and a smiling mouth below the eyes.
- Highlights (Optional): Add a small white highlight to each eye with white yarn for extra cuteness.
FINISHING
Your Sunny Snuggle Bear Costume is almost ready to wear!
- Weave in Ends: Carefully weave in all loose yarn ends with your yarn needle.
- Closure (Optional): Add a button or snap at the back neck if desired for easy dressing.
And there you have it—a huggable, handmade Care Bear hoodie that's sure to become a fast favorite. The soft pastel stripes and cheerful face are pure joy, and because you made it yourself, it's filled with love. Happy crocheting!



