The Aurora Borealis Cable Throw Pillow Free Pattern – Crochet a Northern Lights Dream
The Aurora Borealis Cable Throw Pillow Free Pattern – Crochet a Northern Lights Dream
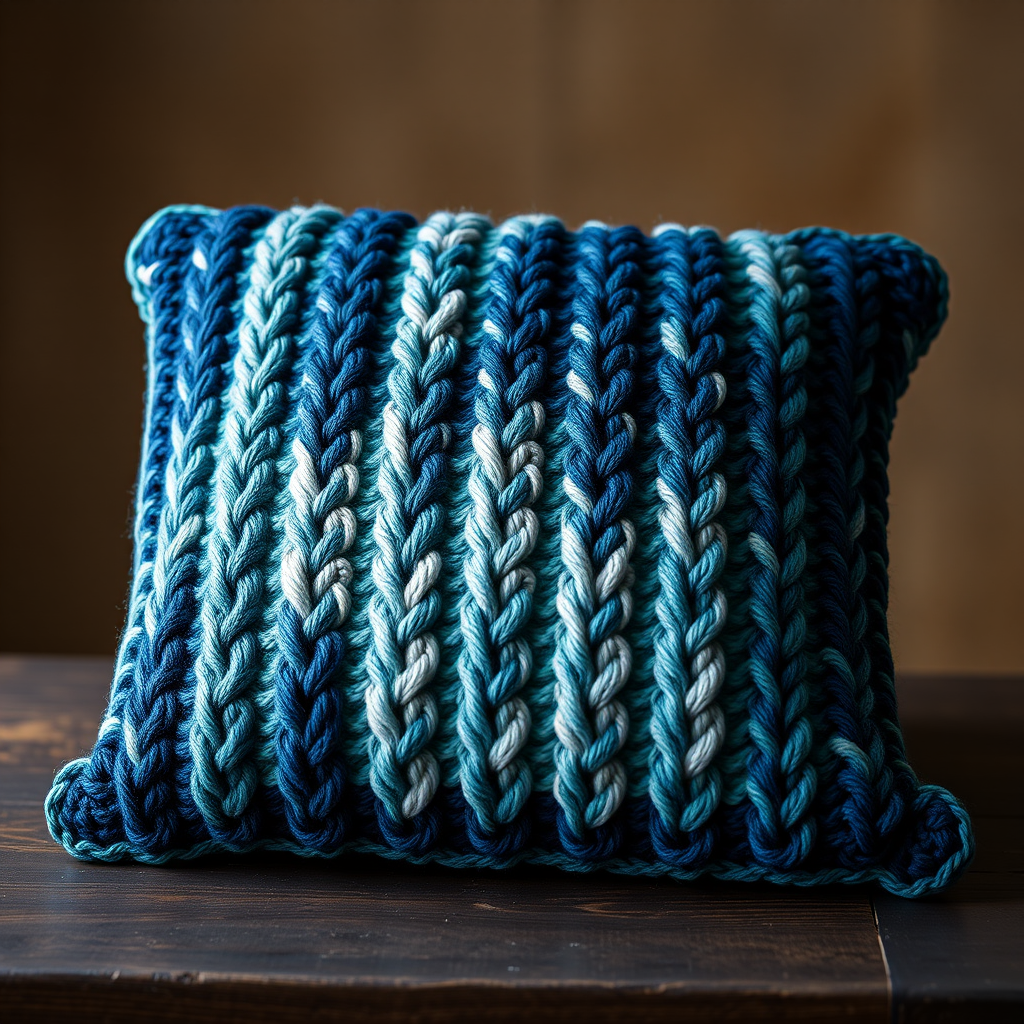
Imagine wrapping your living space in the ethereal glow of the Northern Lights—without ever leaving your couch. This stunning cabled throw pillow captures the swirling, celestial beauty of the aurora borealis in a cozy, textured masterpiece. With intricate braided cables and a mesmerizing gradient of deep teal, midnight blue, and soft silver, this pillow is more than just home decor; it's a handmade work of art that brings a touch of winter magic to any sofa, bed, or reading nook.
Whether you're a seasoned crocheter looking for a satisfying project or a confident beginner ready to tackle cables for the first time, this free pattern is designed to guide you every step of the way. The result? A plush, 16-inch square pillow that feels luxurious, looks celestial, and will be the conversation starter of your home. Let's dive into creating your very own Northern Lights dream.
Materials Needed
Before we begin, gather your supplies. This project is wonderfully portable and requires only a few essentials:
- Yarn: Worsted weight yarn in 3 colors:
- Color A: Deep Teal (approx. 100g)
- Color B: Midnight Blue (approx. 100g)
- Color C: Soft Silver (approx. 100g)
- Crochet Hook: 5.5mm hook (US I-9)
- Tapestry Needle: For weaving in ends and seaming
- Pillow Form or Stuffing: 16-inch pillow form or polyester fiberfill
- Scissors
- Optional: Decorative buttons or tassels for extra flair
Gauge: 14 stitches x 10 rows = 4 inches in half double crochet. Always check your gauge to ensure your pillow measures correctly.
Step-by-Step Instructions
This pillow is worked in two identical panels, then seamed together and stuffed. Each panel features a central cable motif flanked by textured ridges. Don't be intimidated by the cables—once you master the special stitches, the rhythm of the pattern will feel meditative.
Special Stitches
Before you start, familiarize yourself with these three essential stitches:
- Front Post Double Crochet (fpdc): Yarn over, insert hook from front to back around the post of the stitch (not through the top loops), yarn over, pull through, complete as a regular double crochet. This creates a raised ridge.
- Back Post Double Crochet (bpdc): Yarn over, insert hook from back to front around the post of the stitch, yarn over, pull through, complete as a double crochet. This creates a recessed ridge.
- Cable Twist (CT): Skip the next 2 stitches, fpdc in the next 2 stitches, then go back and fpdc in the 2 skipped stitches. This crossing motion creates the beautiful braided cable effect.
Panel 1 (Make 2)
Foundation: With Color A (Deep Teal), chain 42.
Row 1: Hdc in the 3rd chain from the hook and in each chain across. Turn. (You should have 40 hdc stitches.)
Row 2: Ch 2 (counts as hdc), hdc in the next 3 sts, *fpdc in the next 4 sts, hdc in the next 4 sts*, repeat from * to * across, ending with hdc in the last 3 sts. Turn.
Tip: The ch-2 at the beginning of each row counts as your first hdc, so you'll always work into the next stitch.
Row 3: Ch 2, hdc in the next 3 sts, *bpdc in the next 4 sts, hdc in the next 4 sts*, repeat from * to * across, ending with hdc in the last 3 sts. Turn.
Row 4: Ch 2, hdc in the next 3 sts, *CT over the next 4 sts, hdc in the next 4 sts*, repeat from * to * across, ending with hdc in the last 3 sts. Turn.
This is your first cable row! Notice how the fpdc stitches cross over each other to form the twist.
Rows 5-6: Repeat Rows 2 and 3. This creates the straight sections between cables.
Row 7: Ch 2, hdc in the next 3 sts, *CT over the next 4 sts, hdc in the next 4 sts*, repeat from * to * across, ending with hdc in the last 3 sts. Turn.
Rows 8-9: Repeat Rows 2 and 3.
Row 10: Change to Color B (Midnight Blue). Repeat Row 4 (the cable row).
To change colors cleanly, complete the last yarn over of the final stitch of the previous row with the new color.
Rows 11-12: Repeat Rows 2 and 3.
Row 13: Repeat Row 4.
Rows 14-15: Repeat Rows 2 and 3.
Row 16: Change to Color C (Soft Silver). Repeat Row 4.
Rows 17-18: Repeat Rows 2 and 3.
Row 19: Repeat Row 4.
Rows 20-21: Repeat Rows 2 and 3.
Row 22: Change to Color B (Midnight Blue). Repeat Row 4.
Rows 23-24: Repeat Rows 2 and 3.
Row 25: Repeat Row 4.
Rows 26-27: Repeat Rows 2 and 3.
Row 28: Change to Color A (Deep Teal). Repeat Row 4.
Rows 29-30: Repeat Rows 2 and 3.
Row 31: Repeat Row 4.
Rows 32-33: Repeat Rows 2 and 3.
Row 34: Repeat Row 4.
Row 35: Repeat Row 2. This final row ensures your panel ends with a clean, straight edge.
Fasten off and weave in all loose ends. Repeat the entire process to create your second panel.
Assembly
Now that you have two beautiful, mirror-image panels, it's time to bring your pillow to life.
- Position the Panels: Place the two panels together with right sides facing out (or in, depending on the seam look you prefer). For a cleaner, more polished edge, place right sides together and turn right side out after seaming.
- Seam Three Sides: Using Color A yarn and your tapestry needle, whip stitch around three sides of the pillow, leaving one side completely open. Keep your stitches even and snug for a professional finish.
- Insert the Pillow Form: Carefully insert your 16-inch pillow form through the open side. If using fiberfill, stuff firmly to achieve a plush, supportive shape. Be sure to push the filling into the corners for a crisp, square look.
- Close the Final Side: Whip stitch the remaining side closed, securing the seam tightly. Weave in any remaining ends.
- Add Optional Flair: For an extra touch of personality, sew a decorative button or attach a small tassel at the center of each cable twist. This adds a whimsical, handcrafted detail that elevates the design.
And there you have it—your very own Aurora Borealis Cable Throw Pillow! Place it on your favorite chair, prop it on your bed, or gift it to someone who deserves a little celestial comfort. The rich texture and gradient colors will bring warmth and wonder to any room, reminding you of the magic that happens when creativity meets the night sky.
Happy crocheting, and may your stitches always be as beautiful as the Northern Lights themselves!


