The Candy Corn Cuddle Bug: A Free Knitting Pattern for a Textured, Tri-Color Plushie
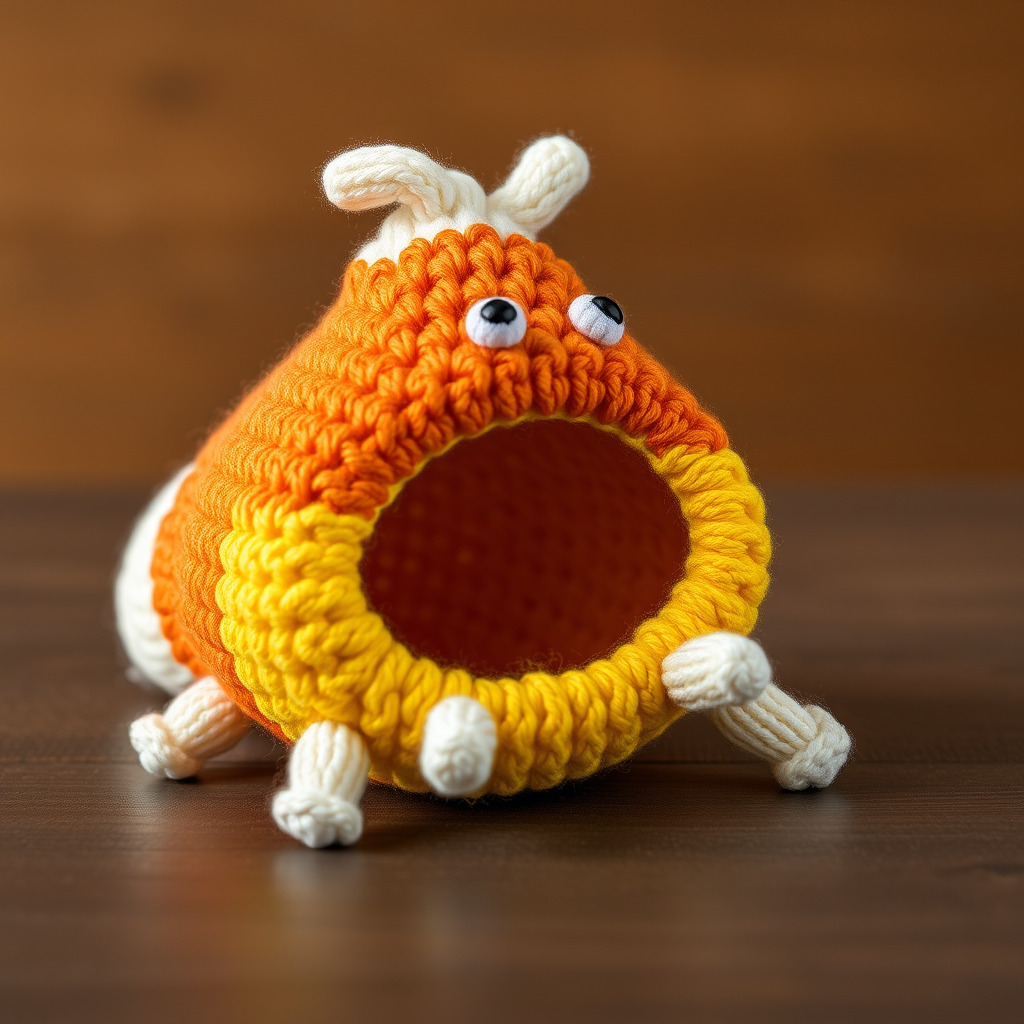
Introducing the Candy Corn Cuddle Bug
Knit a delightfully squishy Candy Corn Cuddle Bug, a whimsical amigurumi that combines the classic candy colors with a charming, bug-like shape. This free pattern uses simple stitches and clever color changes to create a unique, huggable friend. Perfect for fall, Halloween, or any time you need a little sweetness, this textured, tri-color plushie is beginner-friendly and works up quickly. The stockinette stitch body gives it a smooth, polished look, while the garter stitch legs and antennae add a playful contrast. Whether you're a seasoned knitter or just starting out, this pattern will guide you through every step to create a cuddly companion that's as fun to make as it is to hold.
Materials Needed
Before you begin, gather the following supplies. All materials are standard and easy to find at your local craft store or online.
Yarn
- Worsted weight yarn in three colors:
- Yellow (C1) – approximately 50g. Suggested: Lion Brand Vanna's Choice in Mustard.
- Orange (C2) – approximately 50g. Suggested: Lion Brand Vanna's Choice in Terracotta.
- White (C3) – approximately 50g. Suggested: Lion Brand Vanna's Choice in White.
Tools
- US Size 5 (3.75 mm) knitting needles (or size to match gauge). Straight or circular needles work fine.
- Tapestry needle for weaving in ends and seaming.
- Stitch markers (optional, for keeping track of sections).
- Polyester fiberfill for stuffing.
- Black yarn or embroidery floss for embroidering pupils and smile.
Gauge
20 stitches x 28 rows = 4 inches in stockinette stitch (unblocked). Gauge is not critical for amigurumi, but consistency ensures even shaping. If your tension is very different, adjust needle size accordingly.
Step-by-Step Instructions
This pattern is worked flat in stockinette stitch, then seamed and stuffed. The body is knit in three color sections. Follow each step carefully for a perfect result.
Body (Make 2 Identical Pieces)
Yellow Section (C1):
- Cast on 12 stitches using C1.
- Row 1 (RS): Knit all stitches.
- Row 2 (WS): Purl all stitches.
- Repeat Rows 1-2 until the piece measures 2 inches from the cast-on edge, ending with a WS row. This creates the bottom yellow tier.
Orange Section (C2):
- Switch to C2. Do not cut C1 yet; you can carry it up the side or cut and weave in later.
- Continue in stockinette stitch (knit RS, purl WS) for 2 inches, ending with a WS row. This creates the middle orange tier.
White Section (C3):
- Switch to C3. Cut C2, leaving a 6-inch tail for weaving.
- Continue in stockinette stitch for 2 inches, ending with a WS row. This creates the top white tier.
Shape Top (C3):
- Row 1 (RS): K2, k2tog (knit two together), k4, k2tog, k2. You now have 10 stitches.
- Row 2 (WS): Purl all stitches.
- Row 3: K2, k2tog, k2, k2tog, k2. You now have 8 stitches.
- Row 4: Purl all stitches.
- Row 5: K2, k2tog, k2tog, k2. You now have 6 stitches.
- Row 6: Purl all stitches.
- Row 7: K1, k2tog, k2tog, k1. You now have 4 stitches.
- Row 8: Purl all stitches.
- Cut yarn, leaving a long tail (about 12 inches). Thread the tail through a tapestry needle, then pass it through the remaining 4 stitches. Pull tight to close the top. Weave in the end securely.
Legs (Make 6)
- With C3, cast on 4 stitches.
- Knit every row (garter stitch) for 3 inches. This creates a sturdy, non-curling leg.
- Bind off all stitches. Leave a long tail (about 8 inches) for sewing.
- Repeat to make 6 legs total.
Antennae (Make 2)
- With C3, cast on 3 stitches.
- Knit every row (garter stitch) for 2 inches.
- Bind off all stitches. Leave a tail (about 6 inches) for sewing.
- Repeat to make 2 antennae.
Eyes (Make 2)
- With C3, cast on 3 stitches.
- Knit 1 row (RS).
- Next row (WS): K1, increase 1 (knit front and back of the next stitch), k1. You now have 4 stitches.
- Knit 1 row (RS).
- Bind off all stitches. Leave a tail (about 6 inches) for sewing.
- Repeat to make 2 eyes.
Assembly
- Seam the body: Place the two body pieces together with wrong sides facing. Using mattress stitch and matching yarn (C3 for the top, C2 for the middle, C1 for the bottom), sew around the edges, leaving a 2-inch opening on one side. Stuff firmly with fiberfill, ensuring the shape is even and plump. Sew the opening closed. Weave in all ends.
- Attach legs: Sew the legs to the bottom of the body (the yellow section). Place three legs on each side, evenly spaced. Use the long tails and a tapestry needle to secure them firmly. Weave in ends.
- Attach antennae: Sew the antennae to the top of the white section, about 1 inch apart. Position them slightly toward the back for a cute bug look. Weave in ends.
- Attach eyes: Sew the eyes to the front of the white section, about 1 inch apart. Center them horizontally and place them about 1 inch from the top edge. Weave in ends.
- Embroider pupils: Using black yarn or embroidery floss, embroider small French knots in the center of each eye for pupils. Optionally, embroider a small smile below the eyes using black yarn. Weave in all ends securely.
Your Candy Corn Cuddle Bug is now complete! Enjoy your new textured, tri-color plushie—perfect for gifting, decorating, or cuddling.



