The Capulin Crater Crossbody Bag Free Pattern – A Textured Crochet Sling with Woven Leather Accents
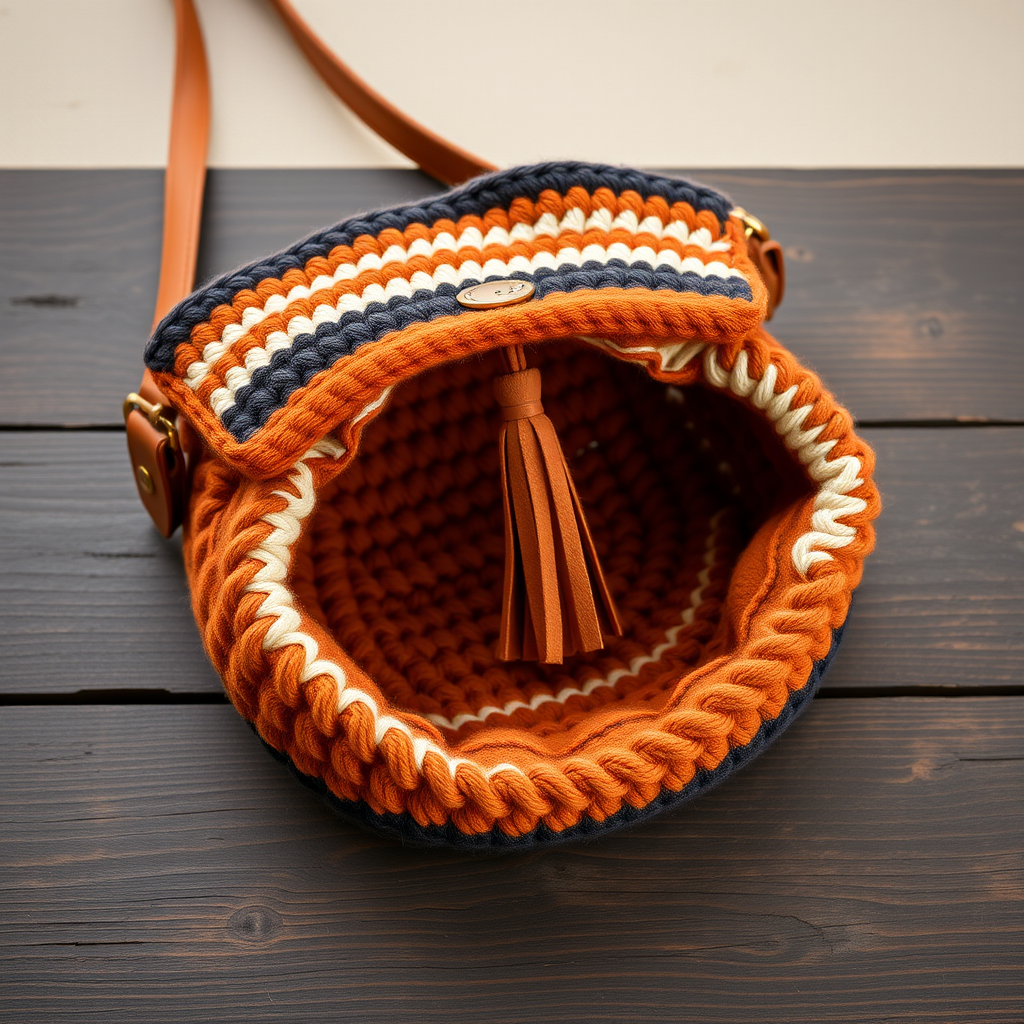
The Capulin Crater Crossbody Bag: A Free Crochet Pattern with Woven Leather Accents
Inspired by the dramatic volcanic slopes of Capulin, this crossbody bag is a celebration of earthy textures and artisanal charm. The pattern blends rich terracotta, deep basalt, and warm cream tones into a sculptural, ridged fabric that mimics the rugged beauty of the landscape. With its woven leather strap and suede tassel, this bag elevates any casual outfit with a touch of boho sophistication. Whether you're a seasoned crocheter or a confident beginner, this project is a rewarding journey into textured stitch work that results in a stunning, functional accessory.
Materials Needed
Before you begin, gather the following materials to ensure a smooth and enjoyable crocheting experience:
- Yarn: Worsted weight cotton or cotton-blend yarn in three colors:
- Main Color (MC): Terracotta – approximately 250g
- Contrast Color 1 (CC1): Charcoal – approximately 100g
- Contrast Color 2 (CC2): Cream – approximately 50g
- Hook: 5.0 mm crochet hook (or size needed to obtain gauge)
- Notions: Yarn needle for weaving in ends and seaming
- Strap: Leather strap or pre-made crossbody strap (approximately 40-45 inches long)
- Embellishments: 2 suede tassels (or one, if preferred)
Gauge: 16 single crochet (sc) x 18 rows = 4 x 4 inches (10 x 10 cm). Always check your gauge to ensure the final dimensions match the pattern.
Step-by-Step Instructions
This bag is cleverly worked in one piece from the bottom up, then folded and seamed. The textured pattern uses front post and back post double crochet to create a ridged, woven effect that is both visually striking and durable. Follow these detailed instructions carefully to create your own Capulin Crater bag.
Bag Body (Worked Flat)
Foundation Row: With MC, chain (ch) 41. Single crochet (sc) in the 2nd ch from the hook and in each ch across. You should have 40 sc stitches. Ch 1 and turn.
Row 2: Sc in each stitch across. (40 sc) Ch 1, turn.
Row 3 (Texture Row - Front Post): Sc in the first stitch. *Front post double crochet (fpdc) around the next stitch, sc in the next stitch.* Repeat from * to * across the row, ending with a sc in the last stitch. You will have 20 fpdc and 20 sc. Ch 1, turn.
Row 4: Sc in each stitch across. (40 sc) Ch 1, turn.
Row 5 (Texture Row - Back Post): Sc in the first stitch. *Back post double crochet (bpdc) around the next stitch, sc in the next stitch.* Repeat from * to * across the row, ending with a sc in the last stitch. Ch 1, turn.
Rows 6-25: Repeat Rows 3, 4, and 5 alternately. This means you will work two rows of sc between each texture row. Continue this pattern until you have completed Row 25. At this point, your rectangle should measure approximately 10 inches wide and 12 inches tall. This forms the main body of the bag.
Color Blocking and Top Section
Now we will add the beautiful striped top section using your contrast colors.
Row 26: With CC1 (Charcoal), ch 1, turn. Sc in each stitch across. (40 sc)
Row 27: With CC1, ch 1, turn. Sc in the first stitch, *fpdc around the next stitch, sc in the next stitch.* Repeat from * to * across, ending with a sc in the last stitch. Ch 1, turn.
Row 28: With CC1, ch 1, turn. Sc in each stitch across. (40 sc)
Row 29: With CC2 (Cream), ch 1, turn. Sc in each stitch across. (40 sc)
Row 30: With CC2, ch 1, turn. Sc in the first stitch, *bpdc around the next stitch, sc in the next stitch.* Repeat from * to * across, ending with a sc in the last stitch. Ch 1, turn.
Row 31: With CC2, ch 1, turn. Sc in each stitch across. (40 sc)
Rows 32-35: Continue the striped pattern by repeating Rows 26-29, but switch the colors as follows: Row 32 with MC, Row 33 with CC1, Row 34 with CC2, and Row 35 with MC. This will create a beautiful, balanced striped top section.
Finishing the Body and Seaming
Fasten off the yarn, leaving a long tail for seaming. Fold the rectangle in half so the wrong sides are together, matching the short edges. The fold will be the bottom of the bag. Using your yarn needle and the long tail of MC yarn, whip stitch the two side seams together, leaving the top edge open. Weave in the yarn end securely.
Creating the Flap
Now we will create the fold-over flap that gives this bag its distinctive silhouette.
Attach Yarn: With the right side of the bag facing you, attach MC yarn to the back top edge of the bag (the edge opposite the fold).
Row 1: Ch 1, then single crochet evenly across the top edge. You should have approximately 40 sc stitches. Ch 1, turn.
Rows 2-5: Sc in each stitch across for 4 rows. (40 sc) Ch 1, turn after each row.
Rows 6-7: Switch to CC1. Sc in each stitch across for 2 rows. (40 sc) Ch 1, turn after each row.
Rows 8-9: Switch to CC2. Sc in each stitch across for 2 rows. (40 sc) Ch 1, turn after each row.
Rows 10-11: Switch back to MC. Sc in each stitch across for 2 rows. (40 sc) Fasten off and weave in the ends.
Attaching the Strap
For a durable and professional finish, it's important to reinforce the strap attachment points.
Reinforce Corners: Using your yarn needle and a double strand of MC yarn, sew a few reinforcing stitches in the top corners of the bag where the strap will attach. This will prevent the fabric from stretching or tearing.
Attach Strap: Securely sew the leather strap to each reinforced corner using a strong whip stitch or a figure-eight stitch. Ensure the strap is evenly balanced. If you prefer a crochet strap, chain 120 stitches, then sc in the 2nd ch from the hook and in each ch across. Fasten off and attach this strap to the bag in the same manner.
Adding the Tassel
The suede tassel is the perfect finishing touch. Attach it to the center of the flap's edge using a small piece of yarn or leather cord. Tie a secure knot and weave in the ends.
Final Step: Weave in all remaining loose ends with your yarn needle. Give your bag a gentle steam block or spritz with water to help the stitches settle and the texture pop.
Congratulations! You've completed your very own Capulin Crater Crossbody Bag. This textured, earthy accessory is perfect for everyday use and is sure to become a favorite in your handmade collection.


