The Ember & Ash Pullover: A Free Knitting Pattern for a Textured, Two-Tone Yoke Sweater
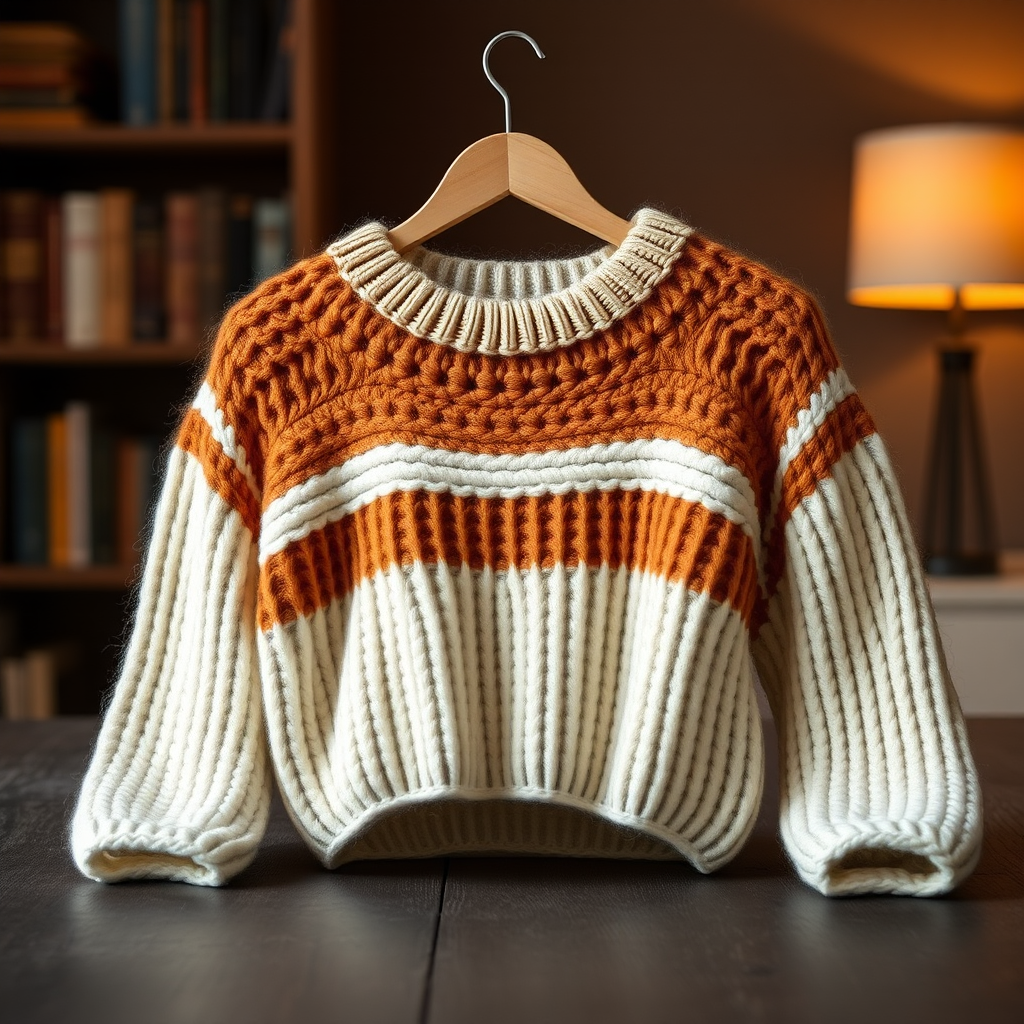
Introducing the Ember & Ash Pullover
There's something magical about a sweater that feels both classic and fresh. The Ember & Ash Pullover is exactly that—a top-down, textured yoke sweater that combines the warmth of heathered worsted weight yarn with a striking two-tone design. Knitted from the top down, this relaxed, slightly cropped pullover features alternating bands of slipped-stitch and seed stitch on the yoke, creating a rich, woven effect that draws the eye. The deep ribbed hem and cuffs add structure, while the soft, drapey fit makes it a modern wardrobe staple. Whether you're a seasoned knitter looking for a satisfying project or a confident beginner ready to tackle your first sweater, this pattern is designed to inspire and guide you every step of the way.
Materials Needed
Before you begin, gather the following supplies. All measurements are for sizes XS (S, M, L, XL), with finished chest measurements of 34 (38, 42, 46, 50) inches.
Yarn
- Worsted weight (#4) yarn in two colors:
- Color A (Main Body): 600 (700, 800, 900, 1000) yards. Sample uses Lion Brand Wool-Ease in 'Fisherman'.
- Color B (Yoke): 250 (300, 350, 400, 450) yards. Sample uses Lion Brand Wool-Ease in 'Butterscotch'.
Needles
- US 8 (5.0 mm) 32-inch circular needle and a set of double-pointed needles (or size to obtain gauge).
- US 7 (4.5 mm) 32-inch circular needle for ribbing.
Gauge
- 18 stitches and 24 rows = 4 inches in Stockinette stitch on larger needles, after blocking.
Other Supplies
- Stitch markers (at least 4)
- Stitch holders or waste yarn (for sleeves)
- Tapestry needle for weaving in ends
Step-by-Step Instructions
Abbreviations
CO = cast on, k = knit, p = purl, k2tog = knit two together, ssk = slip slip knit, yo = yarn over, sl1 = slip one stitch purlwise, pm = place marker, sm = slip marker, RS = right side, WS = wrong side, kfb = knit front and back (increase).
Special Stitches
Slipped Stitch Pattern (worked flat over a multiple of 2 sts):
- Row 1 (RS): *Sl1 wyif, k1; rep from *.
- Row 2 (WS): Purl all stitches.
- Repeat rows 1-2.
Note: When working in the round, Row 1 becomes: *Sl1 wyif, k1; rep from *. Row 2: Knit all stitches.
Yoke
Step 1: With Color B and larger circular needle, CO 80 (84, 88, 92, 96) sts. Join for working in the round, being careful not to twist. Place marker for beginning of round.
Step 2: Work in k1, p1 ribbing for 1 inch.
Step 3 – Increase Round 1: *K8 (9, 10, 11, 12), kfb; rep from * around. You will have 90 (95, 100, 105, 110) sts.
Step 4: Knit 1 round even.
Step 5 – Increase Round 2: *K9 (10, 11, 12, 13), kfb; rep from * around. You will have 100 (105, 110, 115, 120) sts.
Step 6: Knit 1 round even.
Step 7 – Begin Slipped Stitch Pattern: Work the Slipped Stitch Pattern in the round (Round 1: *Sl1 wyif, k1; rep from *. Round 2: Knit all sts.) for 2 inches. On the last knit round, increase 10 (10, 10, 10, 10) sts evenly around. You will have 110 (115, 120, 125, 130) sts.
Step 8: Switch to Color A. Knit 1 round even.
Step 9 – Seed Stitch Band: Work in seed stitch in the round (Round 1: *K1, p1; rep from *. Round 2: *P1, k1; rep from *) for 1 inch. On the last round, increase 10 (10, 10, 10, 10) sts evenly around. You will have 120 (125, 130, 135, 140) sts.
Step 10: Switch to Color B. Knit 1 round even.
Step 11 – Slipped Stitch Pattern: Work Slipped Stitch Pattern in the round for 2 inches. On the last knit round, increase 10 (10, 10, 10, 10) sts evenly around. You will have 130 (135, 140, 145, 150) sts.
Step 12: Switch to Color A. Knit 1 round even.
Step 13 – Seed Stitch Band: Work seed stitch in the round for 1 inch. On the last round, increase 10 (10, 10, 10, 10) sts evenly around. You will have 140 (145, 150, 155, 160) sts.
Step 14: Switch to Color B. Knit 1 round even.
Step 15 – Slipped Stitch Pattern: Work Slipped Stitch Pattern in the round for 2 inches. On the last knit round, increase 10 (10, 10, 10, 10) sts evenly around. You will have 150 (155, 160, 165, 170) sts.
Step 16: Switch to Color A. Knit 1 round even.
Step 17 – Seed Stitch Band: Work seed stitch in the round for 1 inch. On the last round, increase 10 (10, 10, 10, 10) sts evenly around. You will have 160 (165, 170, 175, 180) sts.
Step 18: Knit 1 round even with Color A.
Divide for Body and Sleeves
Step 19: Knit across the next 24 (25, 26, 27, 28) sts for the back. Place the next 32 (33, 34, 35, 36) sts on a holder for the right sleeve. Using the cable cast-on method, CO 6 (6, 8, 8, 10) sts for the underarm. Knit across the next 48 (50, 52, 54, 56) sts for the front. Place the next 32 (33, 34, 35, 36) sts on a holder for the left sleeve. CO 6 (6, 8, 8, 10) sts for the underarm. Knit across the remaining 24 (25, 26, 27, 28) sts for the back. You will now have 108 (112, 120, 124, 132) sts for the body.
Body
Step 20: Join for working in the round. Knit every round until the body measures 10 (10.5, 11, 11.5, 12) inches from the underarm, or desired length to hem.
Step 21: Switch to smaller circular needle (US 7). Work in k1, p1 ribbing for 2 inches. Bind off loosely in pattern.
Sleeves
Step 22: Transfer the 32 (33, 34, 35, 36) sts from the holder to double-pointed needles or a short circular needle. With Color A, pick up and knit 6 (6, 8, 8, 10) sts from the underarm cast-on. You will have 38 (39, 42, 43, 46) sts. Place marker for beginning of round.
Step 23: Knit 2 rounds even.
Step 24 – Decrease Round: K1, k2tog, knit to last 3 sts, ssk, k1. You will have 36 (37, 40, 41, 44) sts.
Step 25: Knit 5 (5, 6, 6, 7) rounds even.
Step 26: Repeat the decrease round every 6 (6, 7, 7, 8) rounds until 28 (30, 32, 34, 36) sts remain.
Step 27: Continue even until sleeve measures 12 (12.5, 13, 13.5, 14) inches from underarm, or desired length.
Step 28: Switch to smaller double-pointed needles (US 7). Work in k1, p1 ribbing for 1.5 inches. Bind off loosely in pattern.
Step 29: Repeat Steps 22-28 for the second sleeve.
Finishing
Step 30: Weave in all ends using a tapestry needle. Block the sweater to the finished measurements by soaking in lukewarm water, gently squeezing out excess water, and laying flat to dry, shaping as needed.
Your Ember & Ash Pullover is complete! Enjoy the cozy, textured beauty of your handmade sweater.


