The Enchanted Ember Fox Free Crochet Pattern – A Cozy Woodland Companion
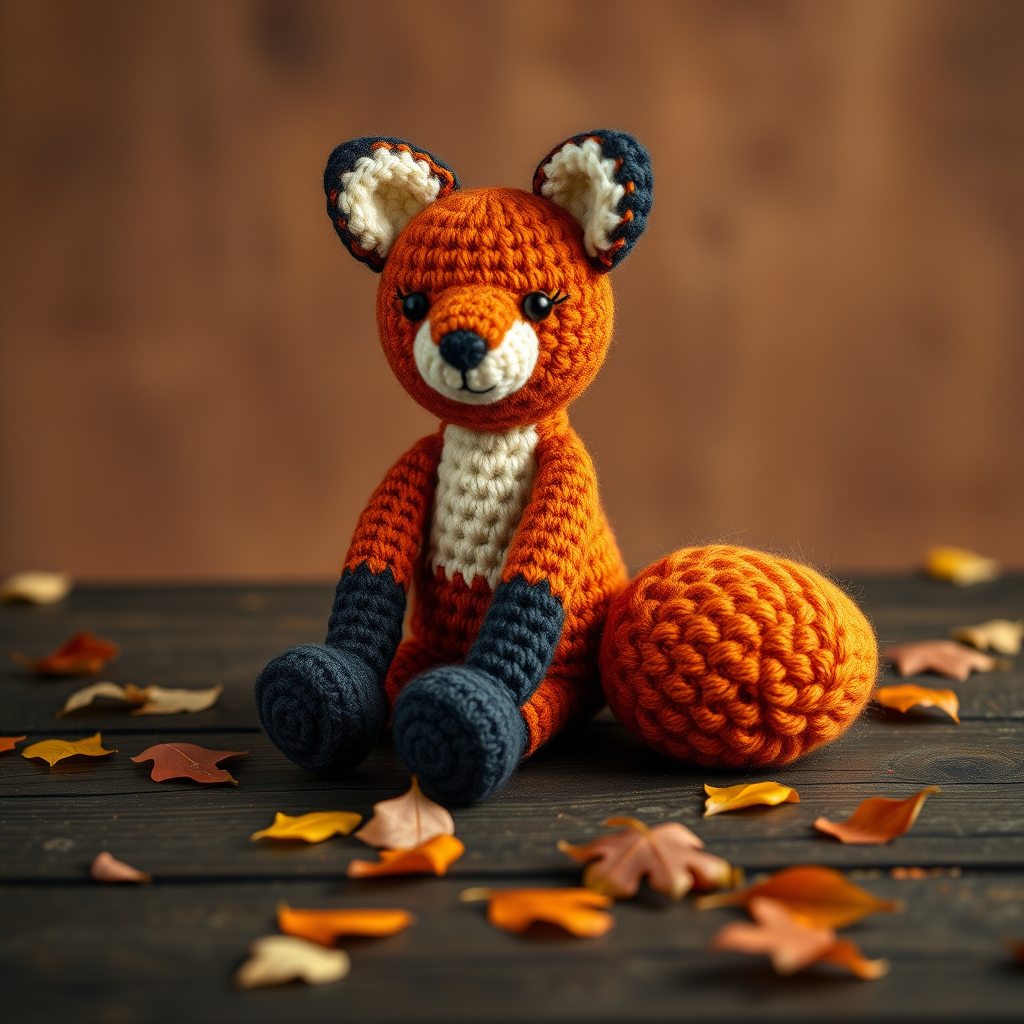
The Enchanted Ember Fox: A Free Crochet Pattern for Your Cozy Woodland Companion
Bring a touch of forest magic to your yarn stash with this whimsical, flame-tailed fox! The Enchanted Ember Fox is an original amigurumi pattern designed to capture the warmth of autumn in a plush, huggable companion. With rich burnt orange, cream, charcoal, and golden yellow hues, this little fox will become your favorite handmade friend. Whether you're a seasoned crocheter or a curious beginner, this pattern is written with clear, detailed instructions to guide you every step of the way.
This pattern is worked in continuous spirals unless otherwise noted. Use a stitch marker to track your rounds—it's a lifesaver for keeping your place! The gauge is not critical for this project, but maintaining consistent tension will ensure your fox has even shaping and a professional finish.
Materials Needed
Before you begin, gather the following supplies:
- Yarn: Worsted weight (#4) cotton or acrylic blend in four colors:
- Burnt orange (main body, head, ears, tail tip)
- Cream (muzzle and chest)
- Charcoal (legs)
- Golden yellow (tail base)
- Hook: 3.5 mm (E) crochet hook
- Stitch markers (to track rounds)
- Yarn needle (for sewing and weaving in ends)
- Stuffing: Polyester fiberfill or your preferred stuffing material
- Optional: Safety eyes (8-10 mm) or black yarn for embroidered eyes, black thread for whiskers
Step-by-Step Instructions
Head (Burnt Orange)
Start with a magic ring. If you're new to magic rings, don't worry—it's just a loop that tightens to close the center hole. Wrap the yarn around your finger, insert your hook, and pull up a loop to begin.
Round 1: Magic ring, 6 sc in ring. (6)
Round 2: 2 sc in each st around. (12)
Round 3: (Sc in next st, 2 sc in next st) repeat 6 times. (18)
Round 4: (Sc in next 2 sts, 2 sc in next st) repeat 6 times. (24)
Round 5: (Sc in next 3 sts, 2 sc in next st) repeat 6 times. (30)
Rounds 6-10: Sc in each st around. (30)
Round 11: (Sc in next 3 sts, sc2tog) repeat 6 times. (24)
Round 12: (Sc in next 2 sts, sc2tog) repeat 6 times. (18)
Stuff the head firmly with fiberfill. You want it to hold its shape but still be soft and squeezable.
Round 13: (Sc in next st, sc2tog) repeat 6 times. (12)
Round 14: Sc2tog 6 times. (6)
Fasten off, leaving a long tail. Thread the tail through the front loops of the remaining 6 stitches, pull tight to close the hole, and weave the end inside the head to hide it.
Muzzle (Cream)
This small piece will give your fox its adorable face.
Round 1: Magic ring, 6 sc in ring. (6)
Round 2: 2 sc in each st around. (12)
Round 3: (Sc in next st, 2 sc in next st) repeat 6 times. (18)
Fasten off, leaving a long tail for sewing. Attach the muzzle to the lower half of the head, centered between the ears. Use the tail to sew it securely, then weave in the end.
Ears (Make 2, Burnt Orange)
These little triangles add character and charm.
Round 1: Magic ring, 5 sc in ring. (5)
Round 2: (Sc in next st, 2 sc in next st) repeat 2 times, sc in last st. (7)
Round 3: (Sc in next 2 sts, 2 sc in next st) repeat 2 times, sc in last st. (9)
Round 4: Sc in each st around. (9)
Fasten off, leaving a tail. Fold each ear flat and sew to the top of the head, slightly angled outward for that fox-like alertness.
Body (Burnt Orange)
This plump body will be the heart of your fox.
Round 1: Magic ring, 6 sc in ring. (6)
Round 2: 2 sc in each st around. (12)
Round 3: (Sc in next st, 2 sc in next st) repeat 6 times. (18)
Round 4: (Sc in next 2 sts, 2 sc in next st) repeat 6 times. (24)
Rounds 5-8: Sc in each st around. (24)
Round 9: (Sc in next 2 sts, sc2tog) repeat 6 times. (18)
Rounds 10-12: Sc in each st around. (18)
Stuff the body firmly, shaping it as you go.
Round 13: (Sc in next st, sc2tog) repeat 6 times. (12)
Round 14: Sc2tog 6 times. (6)
Fasten off, weave the tail through the front loops, pull tight, and hide the end.
Legs (Make 4, Charcoal)
These sturdy little paws will keep your fox grounded.
Round 1: Magic ring, 6 sc in ring. (6)
Round 2: (Sc in next st, 2 sc in next st) repeat 3 times. (9)
Rounds 3-4: Sc in each st around. (9)
Stuff lightly—just enough to give them shape without making them stiff.
Fasten off, leaving a tail. Sew the legs to the bottom of the body, spacing them evenly so your fox sits upright.
Tail (Golden Yellow Base, Burnt Orange Tip)
The signature flame tail! Start with golden yellow.
Round 1: Magic ring, 6 sc in ring. (6)
Round 2: 2 sc in each st around. (12)
Rounds 3-5: Sc in each st around. (12)
Switch to burnt orange.
Rounds 6-10: Sc in each st around. (12)
Round 11: (Sc in next 2 sts, sc2tog) repeat 3 times. (9)
Round 12: (Sc in next st, sc2tog) repeat 3 times. (6)
Fasten off, leaving a tail. Stuff lightly and sew to the back of the body, curving it upward for that playful, flame-like look.
Assembly
Now it's time to bring your fox to life!
- Sew the head to the body: Position the head on top of the body and sew securely using the yarn tail from the body. Make sure it's centered and sits naturally.
- Attach the muzzle: If you haven't already, sew the muzzle to the lower half of the head, centered. Weave in all ends.
- Add eyes and nose: Embroider eyes with black yarn (or attach safety eyes before sewing the head closed) and a small nose on the muzzle. For a classic fox look, place the eyes slightly above the muzzle, about 4-5 stitches apart.
- Add whiskers: Use black thread to add a few whiskers on each side of the muzzle. Keep them subtle for a natural look.
- Weave in all ends: Use your yarn needle to hide any remaining tails inside the fox.
And there you have it—your very own Enchanted Ember Fox! This cozy woodland companion is perfect for snuggling, gifting, or adding a touch of autumn magic to your home. The tight single crochet spirals create a dense, huggable surface, and the warm color palette will brighten any room.
Happy crocheting, and may your yarn stash always be full of forest magic!



