Amigurumi Patterns
The Harvest Moon Pumpkin Trio: A Free Knitting Pattern for Textured, Heirloom Gourds
Anonymous
•
July 30, 2026
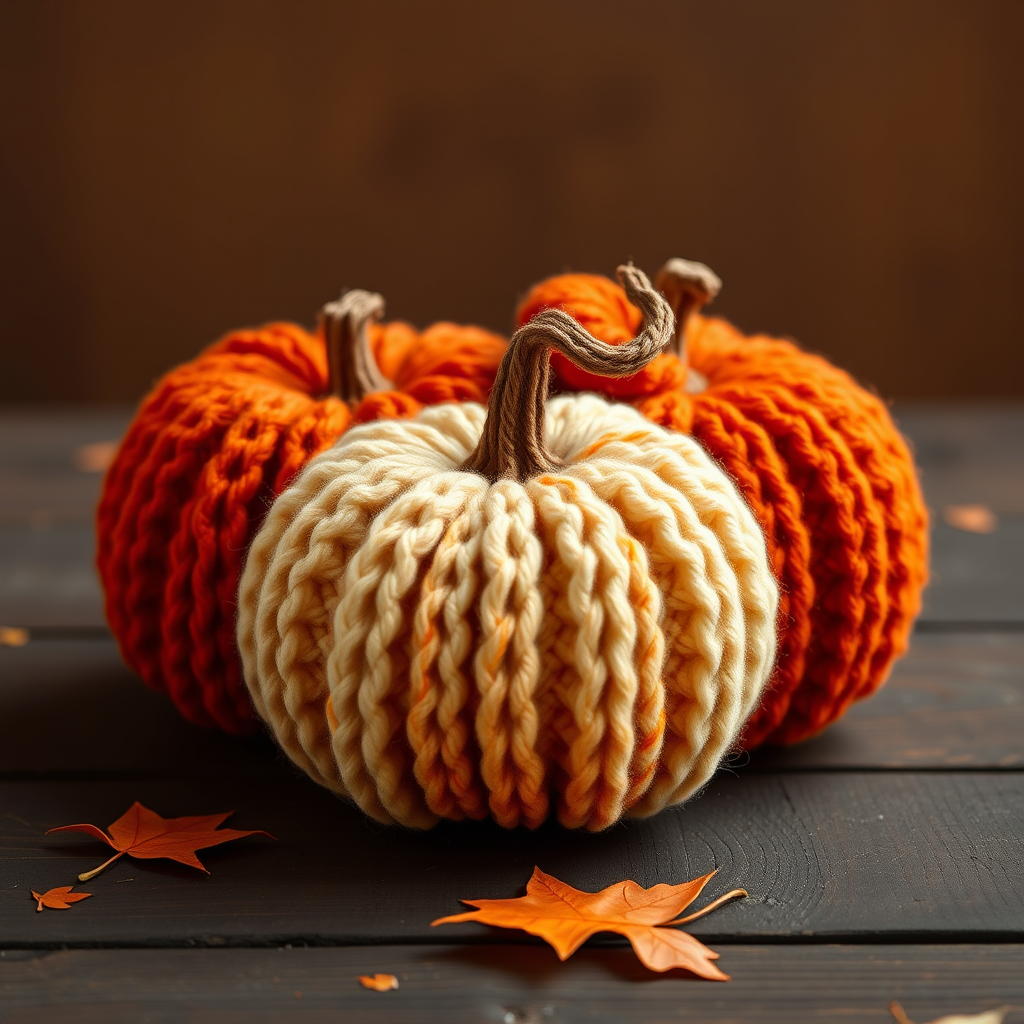
Knit a Charming Trio of Heirloom Pumpkins for Cozy Autumn Decor
Bring the warmth of the harvest season into your home with this delightful knitting pattern for a trio of textured pumpkins. Using simple stockinette stitch and clever shaping, you'll create three heirloom-quality gourds in warm, earthy tones: a deep Rust, a vibrant Burnt Orange, and a creamy Off-White. These pumpkins never rot, making them perfect for lasting fall decor. This beginner-friendly pattern is a wonderful way to practice shaping and seaming while creating a beautiful, rustic centerpiece.
Materials Needed
- Yarn: Worsted weight (Category 4) yarn in three colors:
- Color A (Rust): Approximately 50g
- Color B (Burnt Orange): Approximately 50g
- Color C (Cream): Approximately 50g
- Small amount of brown yarn for stems
- Needles: US Size 7 (4.5mm) knitting needles (or size to obtain gauge)
- Notions: Tapestry needle for weaving ends and assembly, fiberfill stuffing, scissors
- Gauge: 20 stitches and 28 rows = 4 inches (10 cm) in stockinette stitch. Gauge is not critical for this project, but consistent tension ensures even shaping.
Step-by-Step Instructions
Abbreviations
- CO: Cast on
- K: Knit
- P: Purl
- K2tog: Knit two stitches together (right-leaning decrease)
- SSK: Slip, slip, knit (left-leaning decrease)
- St(s): Stitch(es)
- Rep: Repeat
- RS: Right side
- WS: Wrong side
Large Pumpkin (Rust - Color A)
- Cast On: CO 30 sts.
- Body:
- Row 1 (RS): K all sts.
- Row 2 (WS): P all sts.
- Rep Rows 1-2 until piece measures 6 inches from cast-on edge, ending with a WS row.
- Decrease Section:
- Next Row (RS): K2tog, K to last 2 sts, SSK. (28 sts)
- Next Row (WS): P all sts.
- Rep these 2 rows until 10 sts remain.
- Finish Top:
- Next Row (RS): K2tog across. (5 sts)
- Cut yarn, leaving a long tail (about 12 inches). Thread tail through remaining sts, pull tight, and secure. This forms the top of the pumpkin.
- Seaming and Stuffing:
- Using mattress stitch, seam the side edges together, leaving the bottom open.
- Stuff firmly with fiberfill through the bottom opening.
- Gather the bottom edge closed with a running stitch, pull tight, and secure.
- Create Ridges (Segments):
- Thread a tapestry needle with a long strand of Rust yarn (about 24 inches).
- Insert needle from bottom to top through the center of the pumpkin.
- Wrap yarn around the outside to create a segment, then insert needle back through the center.
- Repeat to create 6-8 segments, pulling gently to indent the yarn into the stuffing.
- Secure at top and bottom with a small knot.
- Stem:
- CO 6 sts with brown yarn.
- Knit in stockinette stitch (K on RS, P on WS) for 1.5 inches.
- Cut yarn, thread through sts, pull tight.
- Seam the side edge of the stem using mattress stitch.
- Attach stem to the top of the pumpkin using a few stitches.
Medium Pumpkin (Burnt Orange - Color B)
- Cast On: CO 24 sts.
- Body: Work as for Large Pumpkin until piece measures 5 inches from cast-on edge, ending with a WS row.
- Decrease Section: Decrease as for Large Pumpkin until 8 sts remain.
- Finish: Finish as for Large Pumpkin, creating 5-6 segments.
- Stem: CO 5 sts with brown yarn, knit for 1 inch. Finish and attach as for Large Pumpkin.
Small Pumpkin (Cream - Color C)
- Cast On: CO 18 sts.
- Body: Work as for Large Pumpkin until piece measures 4 inches from cast-on edge, ending with a WS row.
- Decrease Section: Decrease as for Large Pumpkin until 6 sts remain.
- Finish: Finish as for Large Pumpkin, creating 4-5 segments.
- Stem: CO 4 sts with brown yarn, knit for 0.75 inches. Finish and attach as for Large Pumpkin.
Assembly
- Arrange the pumpkins together as desired. For a classic look, place the large pumpkin at the base, the medium slightly overlapping on top, and the small perched on the medium.
- Sew the pumpkins together at their contact points using a tapestry needle and matching yarn. Use small, hidden stitches to secure them.
- Add a few extra stitches to attach each stem securely to its pumpkin.
- Weave in all remaining ends using a tapestry needle.
Your heirloom pumpkin trio is now complete! Display them on a mantel, shelf, or as a centerpiece for a cozy autumn feel. Enjoy your handmade, lasting fall decor.
Also Check Out: We think you'd love this beautiful pattern on our sister site: Cabled Crochet Texture in Soft Pink



