The Honeycomb Hideaway Bee: A Free Crochet Pattern for a Textured, Three-Size Plush
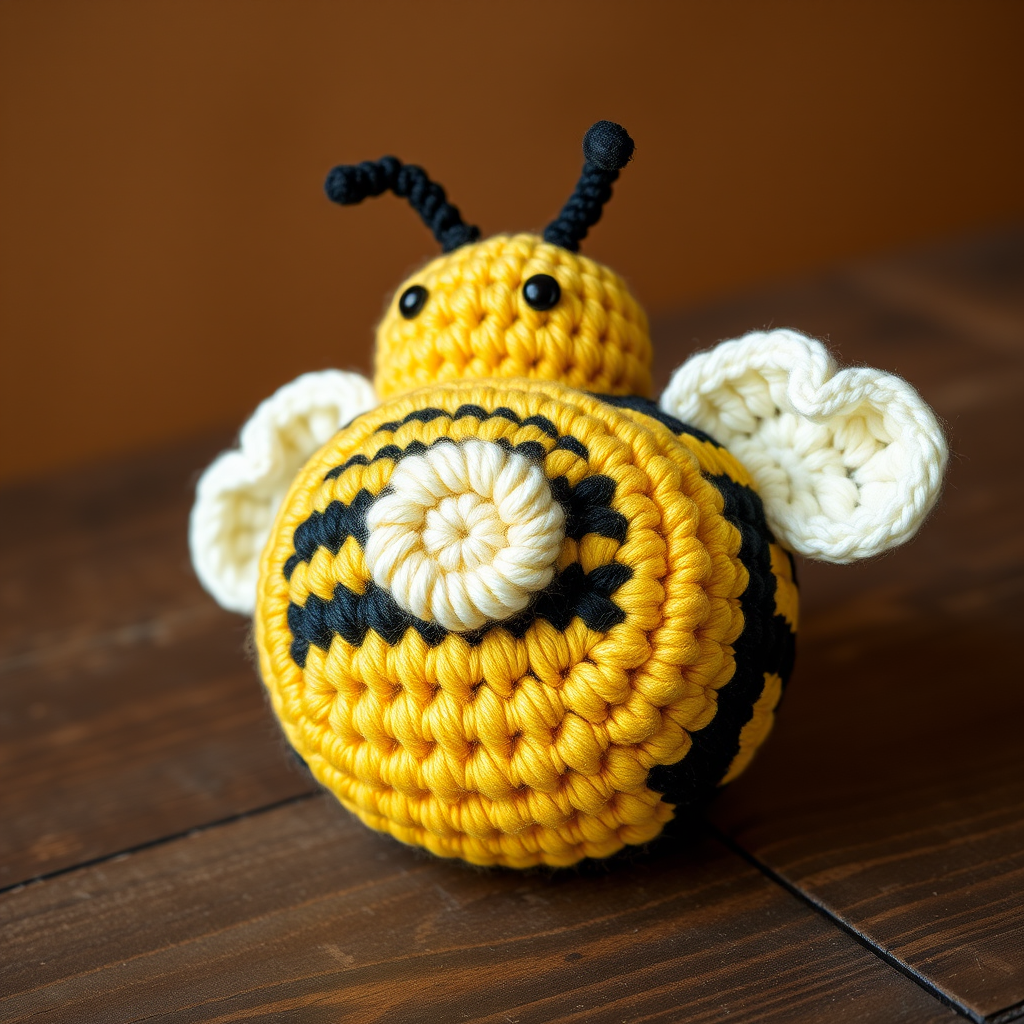
Introducing the Honeycomb Hideaway Bee
Create a cozy, textured bee amigurumi in three sizes, perfect for gifting or adding a touch of handmade charm to any space. This pattern uses soft, chunky yarn and simple stitches to build a honeycomb-inspired body. Whether you're a beginner looking for a rewarding project or an intermediate crocheter wanting a quick, satisfying make, this bee is for you. The pattern includes detailed instructions for Small (approx. 3 inches), Medium (approx. 4.5 inches), and Large (approx. 6 inches) sizes, so you can make a whole hive!
Materials Needed
To create your Honeycomb Hideaway Bee, gather the following materials:
- Yarn: Worsted weight (#4) yarn in yellow, black, and white. For a larger bee, use bulky weight (#5) yarn. Small amounts of cream or light brown for the honeycomb detail.
- Crochet Hook: Size G (4.0 mm) for worsted weight, or H (5.0 mm) for bulky weight. A smaller hook (E/3.5mm) for the honeycomb details.
- Other: Stitch marker, yarn needle, stuffing (polyester fiberfill), scissors. Optional: small black safety eyes (6mm) or black embroidery thread for eyes.
Gauge: Gauge is not critical for this project, but aim for a tight tension to prevent stuffing from showing. For worsted weight: 4 sc and 4 rows = 1 inch.
Step-by-Step Instructions
Abbreviations (US terms)
- MR: magic ring
- sc: single crochet
- inc: increase (2 sc in one stitch)
- dec: decrease (sc two stitches together)
- sl st: slip stitch
- ch: chain
- hdc: half double crochet
- dc: double crochet
- st(s): stitch(es)
- rnd: round
Notes
- Work in continuous rounds unless otherwise stated. Use a stitch marker to mark the beginning of each round.
- The pattern is written for the smallest size (S). Changes for sizes M and L are in parentheses.
- For the honeycomb detail, you will work a separate piece and sew it onto the body.
Bee Body (Make 1)
Using yellow yarn.
Size S (approx. 3 inches tall)
- Rnd 1: MR, 6 sc. (6)
- Rnd 2: inc around. (12)
- Rnd 3: (sc, inc) around. (18)
- Rnd 4: (2 sc, inc) around. (24)
- Rnd 5-8: sc around. (24)
- Rnd 9: (2 sc, dec) around. (18)
- Rnd 10: (sc, dec) around. (12)
- Stuff firmly.
- Rnd 11: dec around. (6)
- Fasten off, weave in end.
Size M (approx. 4.5 inches tall)
- Rnd 1: MR, 6 sc. (6)
- Rnd 2: inc around. (12)
- Rnd 3: (sc, inc) around. (18)
- Rnd 4: (2 sc, inc) around. (24)
- Rnd 5: (3 sc, inc) around. (30)
- Rnd 6-10: sc around. (30)
- Rnd 11: (3 sc, dec) around. (24)
- Rnd 12: (2 sc, dec) around. (18)
- Rnd 13: (sc, dec) around. (12)
- Stuff firmly.
- Rnd 14: dec around. (6)
- Fasten off, weave in end.
Size L (approx. 6 inches tall)
- Rnd 1: MR, 6 sc. (6)
- Rnd 2: inc around. (12)
- Rnd 3: (sc, inc) around. (18)
- Rnd 4: (2 sc, inc) around. (24)
- Rnd 5: (3 sc, inc) around. (30)
- Rnd 6: (4 sc, inc) around. (36)
- Rnd 7-12: sc around. (36)
- Rnd 13: (4 sc, dec) around. (30)
- Rnd 14: (3 sc, dec) around. (24)
- Rnd 15: (2 sc, dec) around. (18)
- Rnd 16: (sc, dec) around. (12)
- Stuff firmly.
- Rnd 17: dec around. (6)
- Fasten off, weave in end.
Stripes (Optional, but recommended for a classic bee look)
Using black yarn, embroider stripes around the body. You can also crochet a separate black band and sew it on. For a simpler approach, work a few rounds of black yarn in the middle of the body (e.g., for size M, work Rnds 7-8 in black, then switch back to yellow for Rnds 9-10).
Wings (Make 2)
Using white yarn.
For all sizes
- Ch 6.
- Row 1: Starting in 2nd ch from hook, sc in next 5 ch. Ch 1, turn. (5)
- Row 2: inc, sc in next 3, inc. Ch 1, turn. (7)
- Row 3: inc, sc in next 5, inc. Ch 1, turn. (9)
- Row 4: sc in all 9 sts. Ch 1, turn. (9)
- Row 5: dec, sc in next 5, dec. Ch 1, turn. (7)
- Row 6: dec, sc in next 3, dec. Ch 1, turn. (5)
- Row 7: dec, sc in next 1, dec. (3)
- Fasten off, leaving a long tail for sewing. Fold the wing in half lengthwise and sew the edges together to create a slight curve.
Honeycomb Detail (Make 1)
Using cream or light brown yarn and a smaller hook.
- Ch 6.
- Row 1: Starting in 2nd ch from hook, sc in next 5. Ch 1, turn. (5)
- Row 2: sc in all 5 sts. Ch 1, turn. (5)
- Row 3: (hdc, dc) in first st, sl st in next st, (hdc, dc) in next st, sl st in next st, (hdc, dc) in last st. Fasten off, leaving a tail.
- This creates a small honeycomb-like texture. Sew this piece onto the front of the bee body.
Antennae (Make 2)
Using black yarn.
- Ch 6.
- Starting in 2nd ch from hook, sl st in each ch across. Fasten off, leaving a tail. Sew onto the top of the bee's head.
Assembly
- Sew the wings onto the sides of the bee body, just behind the head.
- Sew the honeycomb detail onto the front center of the body.
- Sew the antennae onto the top of the head.
- Optionally, add small black safety eyes or embroider eyes with black yarn.
- Weave in all ends.
Finishing
Your bee amigurumi is complete! Make a whole hive in different sizes for a charming display.



