The Mistletoe & Pine Crochet Hat and Tree Granny Squares Free Pattern
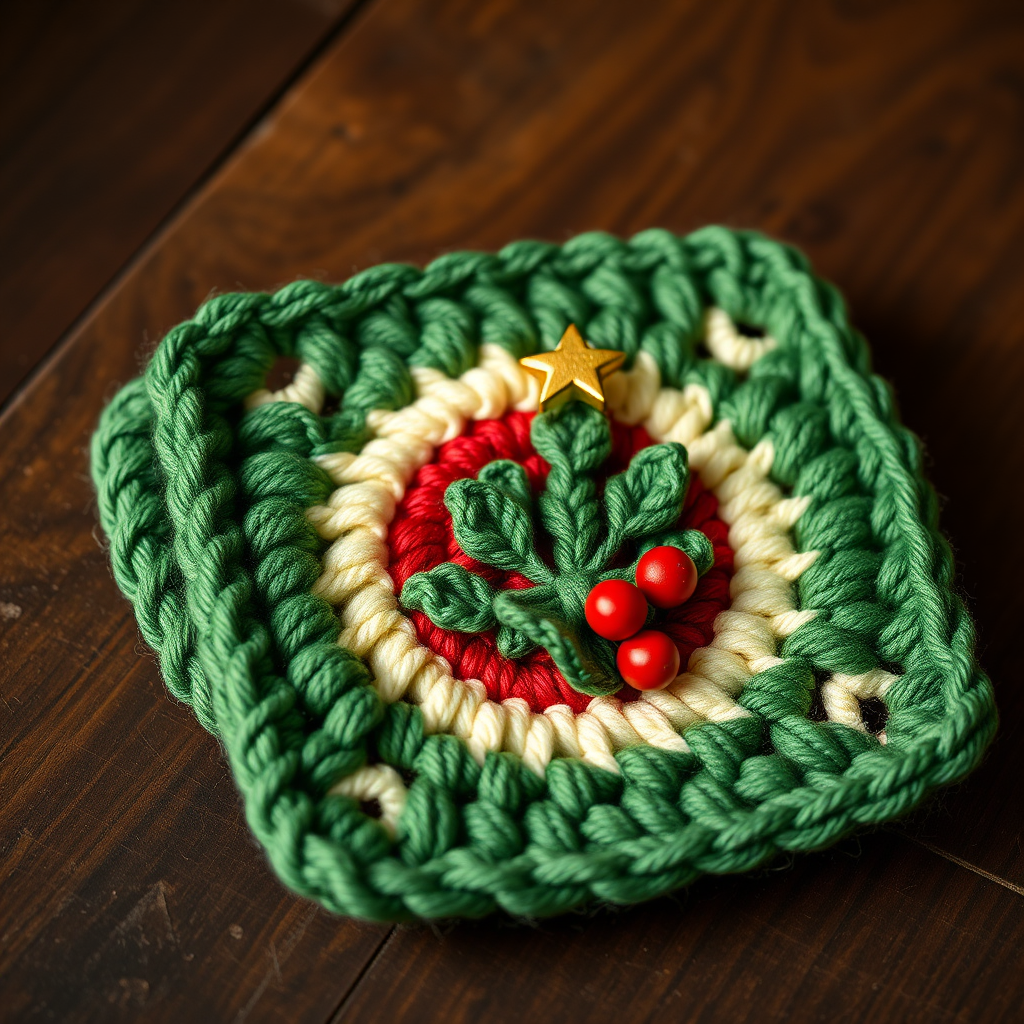
The Mistletoe & Pine Crochet Hat and Tree Granny Squares: A Cozy Holiday Pattern
Embrace the spirit of the season with this charming, beginner-friendly crochet pattern that pairs classic granny square construction with modern, minimalist holiday motifs. Create a set of woodland-inspired squares featuring a stylized Christmas tree and a sweet mistletoe sprig. Perfect for a festive garland, a patchwork pillow, or even a cozy throw blanket, these squares are a delightful way to add a handmade touch to your holiday decor. With clear, step-by-step instructions, you'll be crafting these beautiful squares in no time.
Materials Needed
Before you begin, gather the following materials to ensure a smooth and enjoyable crochet experience:
- Yarn: Worsted weight cotton or acrylic yarn in the following colors:
- Evergreen Green (for borders and accents)
- Forest Green (for motifs and details)
- Cream (for backgrounds)
- Red (for berries and accents)
- Gold (for the tree star)
- Crochet Hook: 5.0 mm (H-8) crochet hook
- Other Tools: Yarn needle (for weaving in ends and sewing motifs), scissors
Gauge: One granny square measures approximately 6 inches x 6 inches (15 cm x 15 cm) after blocking. Gauge is not critical for this project, but maintaining consistent tension will help your squares match in size.
Step-by-Step Instructions
This pattern creates two distinct granny square designs: the Christmas Tree Square and the Mistletoe Square. Each square is worked in rounds, starting with a magic ring. Let's begin!
Part 1: The Christmas Tree Square
Round 1: The Foundation
With evergreen green yarn, make a magic ring. Chain 3 (this counts as your first double crochet). Work 2 double crochet (dc) into the ring. Chain 2. Now, work (3 dc, ch 2) three more times into the ring. You should have a total of 12 double crochets and 4 chain-2 spaces. Join with a slip stitch to the top of the beginning chain-3. Fasten off the evergreen yarn.
Round 2: Adding the Forest Green
Join forest green yarn in any of the chain-2 corner spaces. Chain 3 (counts as first dc). Work (2 dc, ch 2, 3 dc) into the same corner space. This creates your first corner. *Chain 1. Work (3 dc, ch 2, 3 dc) into the next chain-2 corner space. Repeat from * around, but for the last corner, omit the first 3 dc (since you already made them at the start). Join with a slip stitch to the top of the beginning chain-3. Fasten off. You should now have 24 double crochets, 4 corners, and 4 chain-1 spaces.
Round 3: The Cream Center
Join cream yarn in any corner space. Chain 3 (counts as first dc). Work (2 dc, ch 2, 3 dc) into the same corner space. *Chain 1. Work 3 dc into the next chain-1 space. Chain 1. Work (3 dc, ch 2, 3 dc) into the next corner space. Repeat from * around, omitting the last corner's first 3 dc. Join with a slip stitch to the top of the beginning chain-3. Fasten off. You'll now have 36 double crochets, 4 corners, and 8 chain-1 spaces.
Round 4: The Evergreen Border
Join evergreen green yarn in any corner space. Chain 3 (counts as first dc). Work (2 dc, ch 2, 3 dc) into the same corner space. *Chain 1. Work 3 dc into the next chain-1 space. Chain 1. Work 3 dc into the next chain-1 space. Chain 1. Work (3 dc, ch 2, 3 dc) into the next corner space. Repeat from * around, omitting the last corner's first 3 dc. Join with a slip stitch to the top of the beginning chain-3. Fasten off. You should have 48 double crochets, 4 corners, and 12 chain-1 spaces. Your square base is complete!
Creating the Tree Motif
Now, let's make the adorable Christmas tree that will sit in the center of your square. With forest green yarn, chain 6.
- Row 1: Single crochet (sc) in the 2nd chain from the hook and in each chain across. Turn. (You will have 5 single crochets.)
- Row 2: Chain 1. Work a single crochet decrease (sc2tog) over the first two stitches. Single crochet in the next stitch. Work another sc2tog over the last two stitches. Turn. (You will have 3 single crochets.)
- Row 3: Chain 1. Work a single crochet decrease over all three stitches (sc3tog). Turn. (You will have 1 single crochet.)
- Row 4: Chain 1. Single crochet in the single stitch. Fasten off, leaving a long tail for sewing.
Assembling the Tree Square
Using the long tail from the tree motif and a yarn needle, sew the tree onto the center of your granny square, positioning it vertically. Make sure it's centered and secure. Then, using the gold yarn and a tapestry needle, embroider a small star at the top of the tree with a few straight stitches. Your Christmas Tree Square is finished!
Part 2: The Mistletoe Square
Rounds 1-4: The Colorful Base
Work Rounds 1 through 4 exactly as you did for the Christmas Tree Square, but with a different color scheme for a festive pop:
- Round 1: Use cream yarn.
- Round 2: Use red yarn.
- Round 3: Use cream yarn.
- Round 4: Use evergreen green yarn.
Follow the same stitch counts and instructions as above. When you finish Round 4, fasten off and weave in the ends.
Creating the Mistletoe Motif
Now for the charming mistletoe sprig. With forest green yarn, make a magic ring. Chain 3. Work 2 double crochets into the ring. Chain 2. Work 3 double crochets into the ring. Chain 2. Slip stitch into the ring. Fasten off, leaving a long tail. This creates a small leaf cluster. Make two of these leaf clusters in total.
Assembling the Mistletoe Square
Using the long tails and a yarn needle, sew the two leaf clusters side by side in the center of the square. Position them so they look like a sprig of mistletoe. Then, using the red yarn, embroider three small red berries in a cluster between the two leaf clusters. Use a few small straight stitches or French knots to create the berries. Your Mistletoe Square is complete!
Finishing Touches
Once you've completed your squares, weave in all remaining ends with your yarn needle. To ensure your squares are perfectly flat and uniform, block them to 6 inches square. You can do this by pinning them to a blocking mat and lightly steaming them or spraying with water, then allowing them to dry completely.
Now, the creative part begins! Use your beautiful squares however you like:
- Garland: Sew or crochet several squares together to create a festive holiday garland.
- Pillow: Create a patchwork pillow cover by making multiple squares and joining them.
- Blanket: Make a set of squares and join them for a cozy, handmade throw.
These versatile and charming squares are a wonderful project for beginners and experienced crocheters alike. Happy crafting, and enjoy adding a touch of handmade holiday cheer to your home!