The Moonlit Moth Cocoon: A Free Crochet Pattern for a Textured, Heirloom-Quality Moth Amigurumi
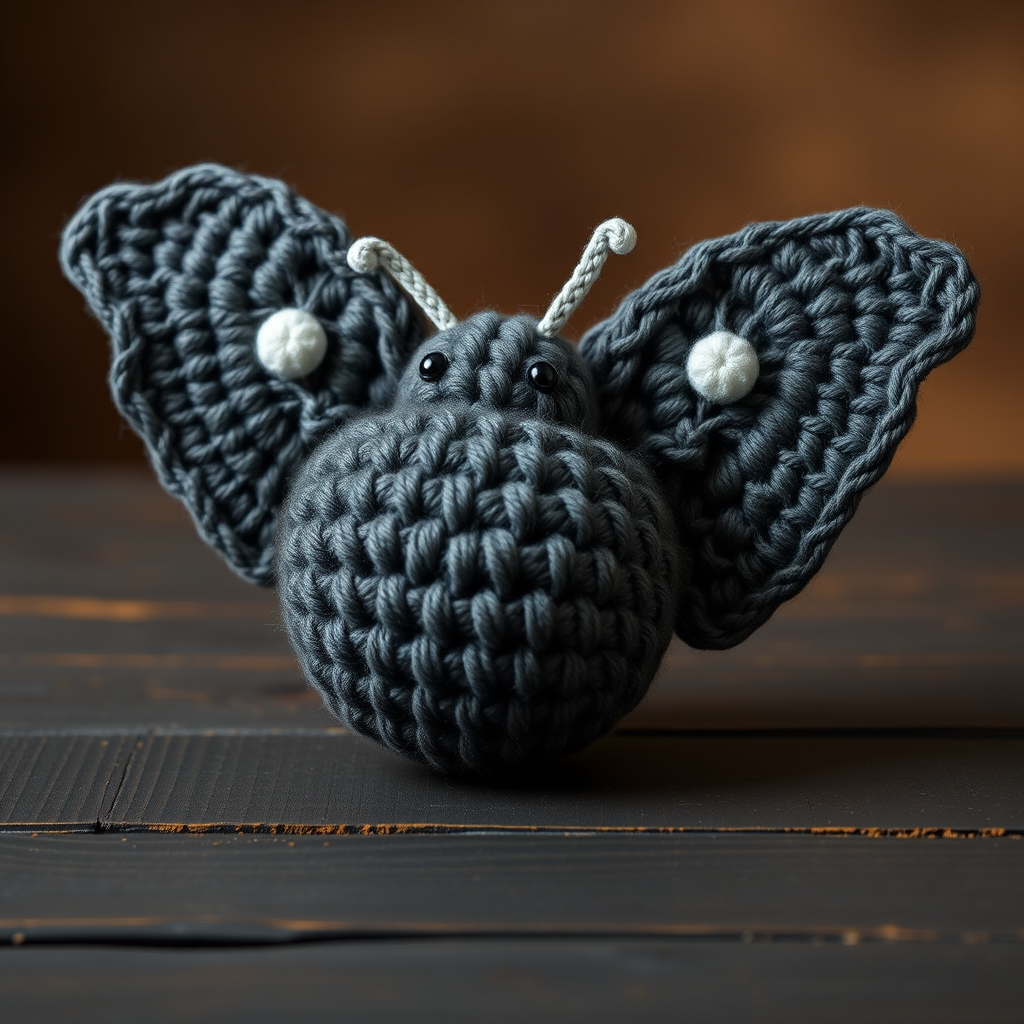
Introducing the Moonlit Moth Cocoon
Step into a world of soft textures and moonlit magic with this free crochet pattern for a stunning, heirloom-quality moth amigurumi. Designed to capture the delicate beauty of a night-flying insect, this project uses simple stitches to create a richly textured body and intricately shaped wings. The deep charcoal body contrasts beautifully with pale silver spots and antennae, resulting in a keepsake that feels both organic and mysterious—like a creature from a moonlit forest. Perfect for intermediate beginners, this pattern will guide you through every step to create a unique, nature-inspired treasure.
Materials Needed
- Yarn: Worsted weight (#4) yarn in two colors:
- Color A: Deep charcoal or midnight blue (for body and wings) – approximately 100 yards
- Color B: Pale silver or dusty rose (for wing spots and antennae) – approximately 20 yards
- Small amount of black yarn for embroidering eyes
- Hook: Size G/6 (4.0 mm) crochet hook
- Other: Yarn needle, stitch marker, polyester fiberfill stuffing, scissors
- Gauge: Not critical for amigurumi, but aim for a tight fabric to prevent stuffing from showing. 4 sc and 4 rows = 1 inch.
Step-by-Step Instructions
Abbreviations
ch = chain, sc = single crochet, inc = increase (2 sc in same stitch), dec = decrease (sc 2 together), sl st = slip stitch, st(s) = stitch(es), rnd = round. Work in continuous rounds unless stated otherwise.
Body (make 1)
With Color A. Work in continuous rounds.
- Rnd 1: Magic ring, 6 sc. (6)
- Rnd 2: Inc in each st around. (12)
- Rnd 3: (Sc in next st, inc) repeat around. (18)
- Rnd 4: (Sc in next 2 sts, inc) repeat around. (24)
- Rnd 5: (Sc in next 3 sts, inc) repeat around. (30)
- Rnd 6-10: Sc in each st around. (30) – 5 rounds even.
- Rnd 11: (Sc in next 3 sts, dec) repeat around. (24)
- Rnd 12: (Sc in next 2 sts, dec) repeat around. (18)
- Rnd 13: (Sc in next st, dec) repeat around. (12)
- Stuff firmly with fiberfill, shaping into a plump oval.
- Rnd 14: Dec around. (6)
- Fasten off, weave in end through front loops of remaining 6 sts and pull tight to close. Weave in end securely.
Upper Wings (make 2)
With Color A. Work in rows, turning at the end of each row.
- Ch 10.
- Row 1: Sc in 2nd ch from hook and across. (9)
- Row 2: Ch 1, turn. Sc in each st across. (9)
- Row 3: Ch 1, turn. Inc in first st, sc in next 7 sts, inc in last st. (11)
- Row 4: Ch 1, turn. Sc in each st across. (11)
- Row 5: Ch 1, turn. Inc in first st, sc in next 9 sts, inc in last st. (13)
- Row 6: Ch 1, turn. Sc in each st across. (13)
- Row 7: Ch 1, turn. Inc in first st, sc in next 11 sts, inc in last st. (15)
- Row 8: Ch 1, turn. Sc in each st across. (15)
- Row 9: Ch 1, turn. Dec over first 2 sts, sc in next 11 sts, dec over last 2 sts. (13)
- Row 10: Ch 1, turn. Dec over first 2 sts, sc in next 9 sts, dec over last 2 sts. (11)
- Row 11: Ch 1, turn. Dec over first 2 sts, sc in next 7 sts, dec over last 2 sts. (9)
- Fasten off, leaving a long tail (about 12 inches) for sewing.
Lower Wings (make 2)
With Color A. Work in rows.
- Ch 8.
- Row 1: Sc in 2nd ch from hook and across. (7)
- Row 2: Ch 1, turn. Sc in each st across. (7)
- Row 3: Ch 1, turn. Inc in first st, sc in next 5 sts, inc in last st. (9)
- Row 4: Ch 1, turn. Sc in each st across. (9)
- Row 5: Ch 1, turn. Inc in first st, sc in next 7 sts, inc in last st. (11)
- Row 6: Ch 1, turn. Sc in each st across. (11)
- Row 7: Ch 1, turn. Dec over first 2 sts, sc in next 7 sts, dec over last 2 sts. (9)
- Row 8: Ch 1, turn. Dec over first 2 sts, sc in next 5 sts, dec over last 2 sts. (7)
- Fasten off, leaving a long tail for sewing.
Wing Spots (make 4 for upper wings, 2 for lower wings)
With Color B.
- Make a magic ring, 6 sc. Pull tight to close the ring.
- Sl st to first sc to join. Fasten off, leaving a tail for sewing.
Antennae (make 2)
With Color B.
- Ch 15.
- Row 1: Sl st in 2nd ch from hook, sl st in next 2 ch, sc in next 3 ch, hdc in next 3 ch, dc in next 3 ch, tr in last 3 ch.
- Fasten off, leaving a long tail for sewing.
Assembly
- Sew wing spots: Using the tails, sew the spots onto the upper and lower wings as desired. For each upper wing, sew two spots near the center of the wing, spaced about 1/2 inch apart. For each lower wing, sew one spot near the center. Weave in ends.
- Attach upper wings: Position the body with the magic ring end as the head (the top). Sew the upper wings to the sides of the body, slightly behind the head (about 1/2 inch down from the top). The wings should curve outward and slightly backward. Use the long tails and a whip stitch, sewing through the body and the edge of the wing. Secure firmly.
- Attach lower wings: Sew the lower wings just below the upper wings, about 1/4 inch below. Position them so they angle slightly downward and outward. Use the long tails to sew securely.
- Attach antennae: Sew the antennae to the top of the head, about 1/4 inch apart. Position them so they curl outward and upward. Use the long tails to sew through the body and the base of the antennae.
- Embroider eyes: With black yarn and a yarn needle, embroider two small eyes on the face. Place them about 3-4 stitches apart, centered on the head, about 1/2 inch down from the top. Use a French knot or a small satin stitch for each eye. Weave in ends.
- Weave in all ends: Use the yarn needle to weave in any remaining ends inside the body or wings, trimming excess.
Your Moonlit Moth Cocoon is complete! Display it on a shelf, use it as a unique gift, or add it to a nature-themed collection. The soft, organic texture and subtle color contrast make it a truly special heirloom piece.



