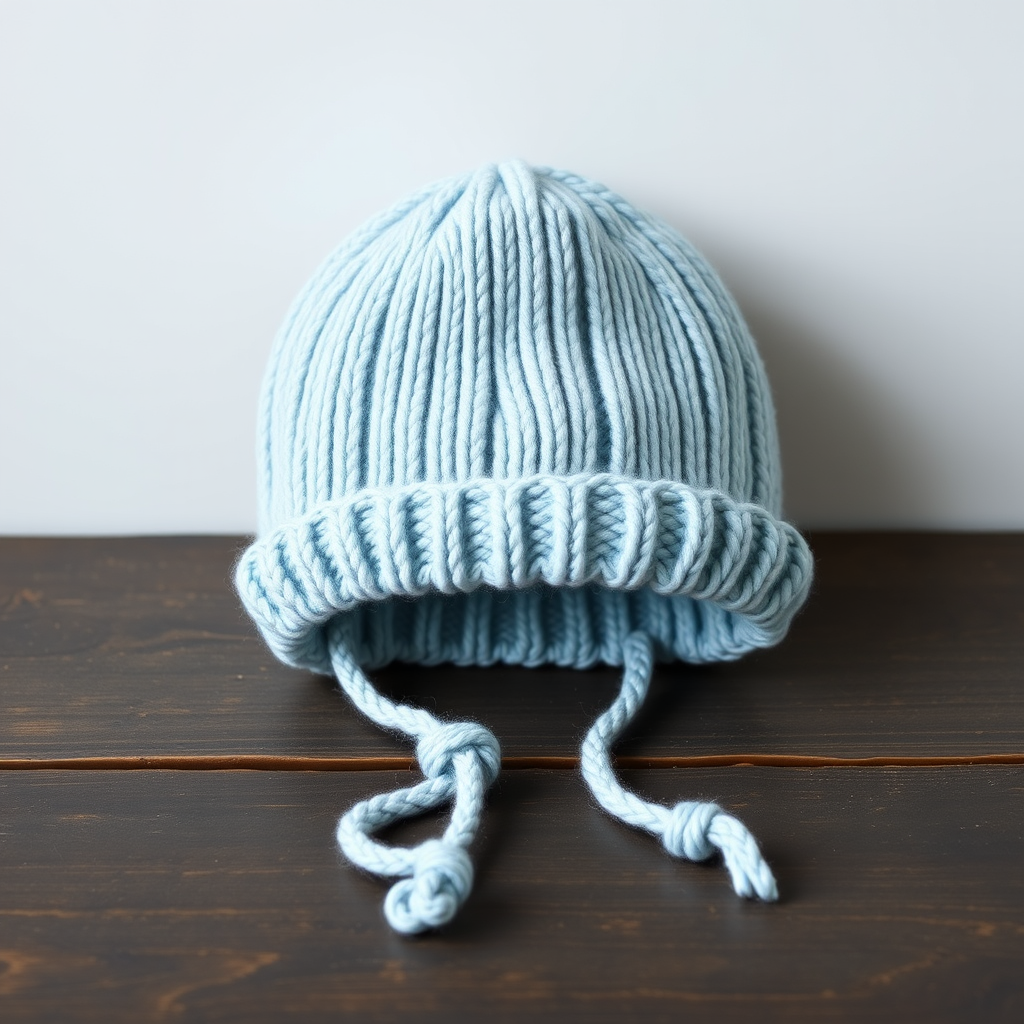
The Petal Puddle Bonnet Free Pattern – Knit a Whimsical Flower-Crown Baby Hat

The Petal Puddle Bonnet Free Pattern – Knit a Whimsical Flower-Crown Baby Hat
There is something truly magical about knitting for a new baby. Every stitch carries love, hope, and the promise of sweet snuggles. Today, I'm thrilled to share a pattern that captures that magic in a truly unique way: the Petal Puddle Bonnet. This enchanting bonnet transforms a classic baby hat into a soft, sculptural flower crown with layered petals and a delicate ribbon tie. Knit in a single piece with gentle increases, it's a quick, memorable gift for a new arrival that will be treasured for years to come.
What makes this bonnet so special is its whimsical design. The smooth, squishy garter stitch base provides a cozy, classic silhouette, while the six individually knitted petals create a stunning, dimensional flower crown that sits beautifully on a little one's head. The contrast between the soft blush pink bonnet and the cream-colored petals is simply breathtaking. Whether you're a seasoned knitter looking for a quick project or a beginner ready for a fun challenge, this pattern is designed to guide you through every step with clarity and confidence.
This bonnet is more than just a hat—it's a statement piece, a photo prop, and a keepsake all in one. The gentle shaping ensures a perfect fit for newborns (0-3 months), and the adjustable sizing means you can easily customize it for older babies. So, grab your yarn, settle into your favorite knitting spot, and let's create something truly beautiful together.
Materials Needed
Before we dive into the pattern, let's gather all the supplies you'll need. Having everything ready beforehand will make the process smooth and enjoyable.
Yarn
- Weight: Worsted weight (Category 4) cotton or cotton-blend yarn
- Amount: Approximately 120-150 yards (you'll need two colors—one for the bonnet body and one for the petals)
- Suggested Yarn: Lion Brand Comfy Cotton Blend in 'Blush' (for the bonnet) and 'Cream' (for the petals)
Why cotton? Cotton is breathable, soft, and gentle on a baby's delicate skin. It also holds its shape beautifully, which is perfect for the sculptural petals. The Comfy Cotton Blend has a lovely drape and a subtle sheen that makes the finished bonnet look extra special.
Needles
- US 7 (4.5 mm) 16-inch circular needle for the main body of the bonnet
- US 7 (4.5 mm) double-pointed needles (DPNs) for knitting the petals
Note: If you prefer, you can use a long circular needle and the magic loop method for the petals, but DPNs are often easier for small, flat pieces.
Other Supplies
- Stitch markers (at least 6)
- Tapestry needle for weaving in ends and sewing the petals
- Scissors
- Measuring tape
- Blocking mats and pins (optional, but recommended for a professional finish)
Gauge
20 stitches and 28 rows = 4 inches in stockinette stitch (knit flat, blocked). While this pattern uses garter stitch for the main body, checking your gauge is still important to ensure the correct finished size. If your gauge is off, adjust your needle size accordingly.
Step-by-Step Instructions
Now, let's get to the fun part! This pattern is worked flat from the back to the front, then the petals are knitted separately and attached. Follow along carefully, and you'll have a beautiful bonnet in no time.
Abbreviations
- K = knit
- P = purl
- K2tog = knit two together (decrease)
- Kfb = knit front and back (increase)
- PM = place marker
- SM = slip marker
- CO = cast on
- BO = bind off
- St st = stockinette stitch (knit on RS, purl on WS)
Finished Size
Newborn (0-3 months) – fits head circumference 13-14 inches. To adjust size, add or subtract stitches in multiples of 6 in the crown section.
Bonnet Body (Worked Flat from Back to Front)
Step 1: Cast On
Using your main color (Blush), CO 60 stitches onto your circular needle. Do not join in the round—we're working flat back and forth.
Step 2: Garter Stitch Base
Row 1 (RS): K all.
Row 2 (WS): K all.
Repeat these 2 rows for garter stitch until the piece measures 4 inches from the cast-on edge, ending with a WS row. This will be the back of the bonnet that covers the baby's head.
Tip: Garter stitch is created by knitting every row. This creates a squishy, textured fabric that's perfect for a baby's sensitive head.
Step 3: Shape the Crown (Decrease Section)
Now we'll shape the top of the bonnet to create a rounded crown.
Row 1 (RS): K8, K2tog, PM, *K8, K2tog, PM; repeat from * to end. You will have 6 markers, each placed after a decrease. (54 sts)
Row 2 (WS): K all.
Row 3 (RS): *K to 2 sts before marker, K2tog, SM; repeat from * to end – 6 decreases. (48 sts)
Row 4 (WS): K all.
Repeat Rows 3-4 until 12 stitches remain. You will have worked 7 decrease rounds total. The decreases will create a gentle curve that forms the crown of the bonnet.
Step 4: Finish the Crown
Next RS row: K2tog across (6 sts). Cut the yarn, leaving a long tail (about 12 inches). Thread the tail through a tapestry needle, slide it through the remaining 6 stitches, pull tight to gather, and secure with a knot. This closes the top of the bonnet.
Sew the Back Seam
Step 5: Seam the Back
Fold the bonnet in half with right sides together, matching the cast-on edge. The cast-on edge will be the front opening, and the gathered crown will be the top. Sew the back seam from the cast-on edge up to the crown, using a mattress stitch or whip stitch. Leave the front opening free. Turn the bonnet right side out.
Tip: Use the tail from the crown to sew the top portion of the seam, and use a new piece of yarn for the lower portion if needed. Weave in all ends securely.
Pick Up Stitches for the Brim
Step 6: Pick Up and Knit the Brim
With RS facing, pick up and knit 60 stitches along the front opening (the cast-on edge). This will be the brim of the bonnet.
Work in garter stitch (knit every row) for 1 inch, ending with a WS row.
Step 7: Increase for the Flared Brim
Next RS row: K1, *Kfb, K4; repeat from * to last st, K1 – increase to 72 stitches. This increase will give the brim a gentle flare, creating a lovely frame for the face.
Work in garter stitch for another 1 inch.
BO loosely. The loose bind-off ensures the brim has a nice drape and doesn't pull in.
Make the Flower Petals (Make 6)
Now for the star of the show—the petals! Each petal is knitted flat in garter stitch, creating a textured, rounded leaf shape. Using your cream yarn and DPNs, follow these steps for each petal.
Step 8: Cast On and Shape the Petal
CO 6 stitches.
Row 1 (RS): Kfb, K4, Kfb (8 sts)
Row 2 (WS): K all.
Row 3: Kfb, K6, Kfb (10 sts)
Row 4: K all.
Row 5: Kfb, K8, Kfb (12 sts)
Row 6: K all.
Step 9: Shape the Petal Tip
Row 7: K2tog, K8, K2tog (10 sts)
Row 8: K all.
Row 9: K2tog, K6, K2tog (8 sts)
Row 10: K all.
Row 11: K2tog, K4, K2tog (6 sts)
Row 12: K all.
BO all stitches. Weave in the ends, leaving a long tail (about 8 inches) for sewing the petals together. Repeat this process to make a total of 6 petals.
Tip: The increases at the beginning create the wide base of the petal, while the decreases at the end form a rounded tip. This gives each petal a beautiful, organic shape.
Assembly
Step 10: Form the Flower
Arrange the 6 petals in a circle, overlapping slightly at the base. The rounded tips should point outward. Using the long tails, sew the petals together at the center, stitching through all layers to secure them firmly. Weave in the ends.
Step 11: Attach the Flower to the Bonnet
Position the flower on the front of the bonnet, just above the brim, slightly off-center for a whimsical look. Using a tapestry needle and matching yarn, sew the flower securely to the bonnet. Make sure to catch the back of the petals and the bonnet fabric so it's well-attached.
Ties
Step 12: Create the Ties
Cut two 12-inch lengths of cream yarn. Attach one to each side of the bonnet at the brim edge (at the corners). You can braid or twist each tie for a more polished look, or simply leave them as single strands. For an extra touch of charm, add a small pom-pom to the end of each tie.
Tip: To make twisted ties, fold the yarn in half, twist it tightly, and then fold it in half again—it will twist on itself. Secure the ends with a knot.
Finishing
Step 13: Weave in All Ends
Take your time to weave in every loose end with a tapestry needle. This is crucial for a professional finish and ensures the bonnet is durable and safe for a baby.
Step 14: Block Gently
Blocking will help the bonnet keep its shape and the petals lie flat. Soak the bonnet in lukewarm water with a gentle wool wash, then gently squeeze out excess water (do not wring). Lay it flat on a towel, shaping the bonnet and arranging the petals. Allow it to dry completely.
Tip: You can pin the petals in place while blocking to ensure they dry in the perfect position.
Final Thoughts
And there you have it—a stunning, whimsical Petal Puddle Bonnet that's sure to be the star of any baby shower or newborn photoshoot. The combination of the soft blush garter stitch and the sculptural cream petals creates a truly one-of-a-kind piece that looks like it came straight from a boutique.
This pattern is perfect for knitters of all levels. The garter stitch body is simple and meditative, while the petals offer a fun opportunity to practice increases and decreases. The result is a beautiful, functional work of art that any parent would be thrilled to receive.
I'd love to see your finished bonnets! Share your creations on social media and tag me so I can admire your beautiful work. Happy knitting, and may your stitches always be even and your coffee always be warm!