The Stegosaurus Spike Hat: A Free Knitting Pattern for a Playful, Textured Dino Hat
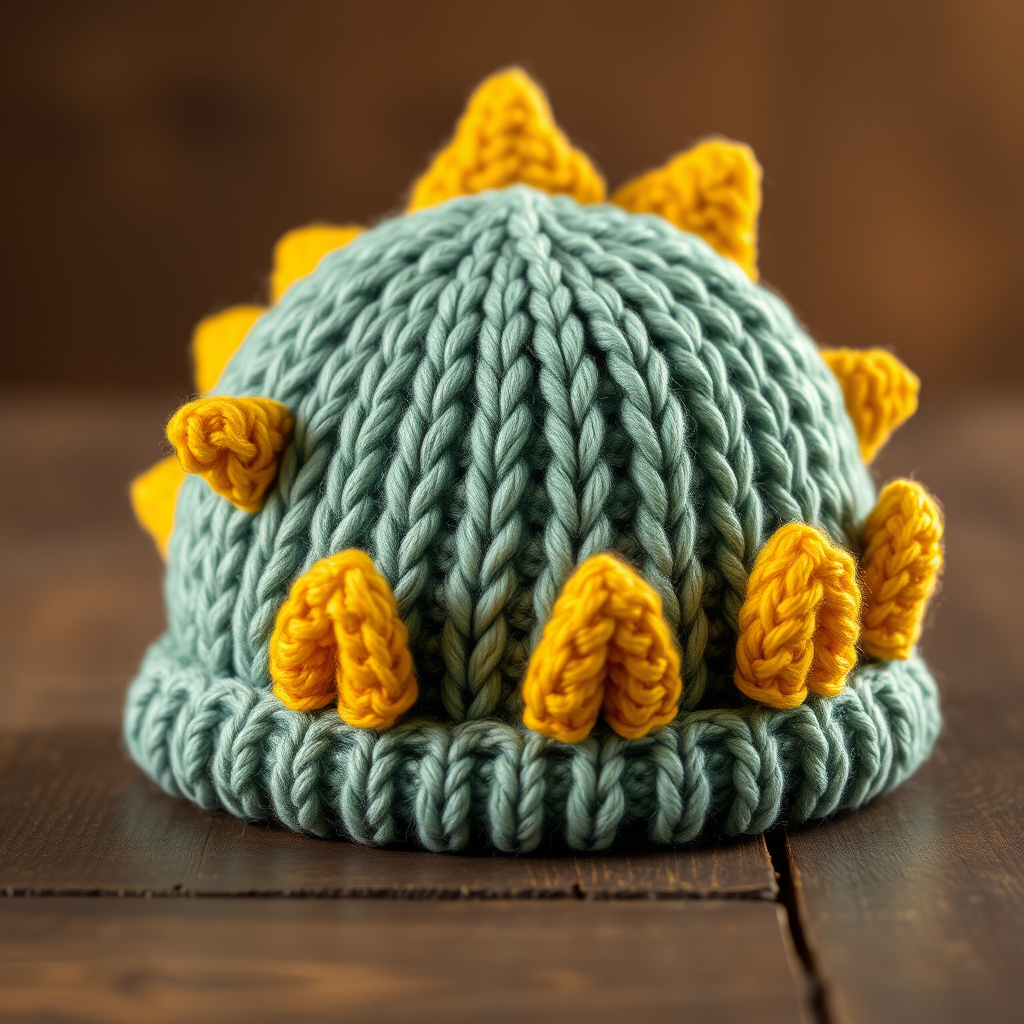
Transform Your Little One Into a Prehistoric Pal with the Stegosaurus Spike Hat
Imagine the delight on your child's face when they pull on a hat that transforms them into their favorite dinosaur. The Stegosaurus Spike Hat is more than just a cozy accessory—it's a ticket to a world of imaginative play. This free knitting pattern combines the warmth of a classic beanie with the playful charm of a stegosaurus, featuring a row of soft, textured spikes that run from crown to brim. The ribbed brim ensures a snug fit, while the smooth stockinette body provides a perfect canvas for the vibrant spikes. Whether for a chilly day at the park or a costume party, this hat is sure to spark joy and creativity. Let's dive into creating this whimsical piece that's as fun to knit as it is to wear.
Materials Needed
Before you begin, gather the following materials to ensure a smooth knitting experience. All items are readily available at craft stores or online.
- Yarn: Worsted weight yarn in two colors:
- Main Color (MC): Approximately 150 yards (e.g., soft sage green)
- Contrast Color (CC): Approximately 50 yards (e.g., warm mustard yellow)
- Needles: US size 7 (4.5 mm) knitting needles. Use double-pointed needles (DPNs) or a circular needle for small circumference knitting. A tapestry needle for finishing is also required.
- Gauge: 20 stitches and 28 rows = 4 inches in stockinette stitch (knit flat, then seamed). Achieving the correct gauge ensures the hat fits as intended.
- Additional: Scissors, stitch markers (optional), and a small amount of yarn scraps for lightly stuffing the spikes.
Step-by-Step Instructions
This pattern is designed for a toddler/child head circumference of 18-20 inches. To adjust the size, add or subtract stitches in multiples of 4. Follow these detailed steps carefully, and you'll have a charming dinosaur hat in no time.
Abbreviations
- CO: Cast on
- K: Knit
- P: Purl
- K2tog: Knit two together (decrease)
- SSK: Slip slip knit (decrease)
- St(s): Stitch(es)
- MC: Main color
- CC: Contrast color
- M1: Make one increase (knit front and back of the same stitch)
Hat Body (Worked Flat, Then Seamed)
The hat body is knitted flat in rows, then seamed at the back. This method makes it easy to manage the decreases and spikes later.
- Cast On: With MC, CO 80 stitches.
- Ribbing: Work in K2, P2 ribbing for 2 inches. This creates a stretchy, snug brim. Repeat: *K2, P2* across all rows. End with a K2 on the right side.
- Body: Continue in stockinette stitch (K on right side rows, P on wrong side rows) until the piece measures 5 inches from the cast-on edge. This forms the main part of the hat.
- Crown Decreases: Begin shaping the top of the hat. Work the following rows, purling all wrong side rows (Rows 2, 4, 6, etc.):
- Row 1 (RS): *K8, K2tog* repeat across. (72 sts remain)
- Row 2 and all WS rows: Purl all stitches.
- Row 3: *K7, K2tog* (64 sts)
- Row 5: *K6, K2tog* (56 sts)
- Row 7: *K5, K2tog* (48 sts)
- Row 9: *K4, K2tog* (40 sts)
- Row 11: *K3, K2tog* (32 sts)
- Row 13: *K2, K2tog* (24 sts)
- Row 15: *K1, K2tog* (16 sts)
- Row 17: *K2tog* (8 sts)
- Finish Crown: Cut the yarn, leaving a 12-inch tail. Thread the tail through a tapestry needle, then pass it through the remaining 8 stitches. Pull tight to gather the crown, and secure with a knot.
- Sew Back Seam: Using the same yarn tail, sew the back seam from the brim to the crown using a mattress stitch or whip stitch. Weave in the end.
Spikes (Make 5)
Each spike is knitted flat and lightly stuffed to give them a 3D appearance. Use CC for all spikes.
- Cast On: With CC, CO 2 stitches.
- Row 1 (RS): K1, M1 (knit front and back of the next stitch), K1. (3 sts)
- Row 2 (WS): Purl all stitches.
- Row 3: K1, M1, K1, M1, K1. (5 sts)
- Row 4: Purl.
- Row 5: K1, M1, K3, M1, K1. (7 sts)
- Row 6: Purl.
- Row 7: K1, M1, K5, M1, K1. (9 sts)
- Row 8: Purl.
- Row 9: K1, SSK, K3, K2tog, K1. (7 sts) Note: SSK = slip next 2 stitches knitwise one at a time, then knit them together through the back loops.
- Row 10: Purl.
- Row 11: K1, SSK, K1, K2tog, K1. (5 sts)
- Row 12: Purl.
- Row 13: K1, K2tog, K1. (3 sts)
- Row 14: Purl.
- Row 15: K2tog, K1. (2 sts)
- Finish: Cut yarn, leaving a 6-inch tail. Thread through the remaining 2 stitches, pull tight, and secure. Sew the side seam of the spike using the tail, creating a triangular shape. Lightly stuff the spike with yarn scraps before closing the seam completely. Weave in ends.
Assembly
Now it's time to bring your dinosaur to life by attaching the spikes.
- Position Spikes: Place the hat with the back seam facing down. Arrange the 5 spikes evenly along the center top of the hat, starting from the crown (where the decreases ended) and going down toward the brim. The first spike should sit at the very top, and the last spike should be about 1-2 inches above the ribbing. Space them about 1 inch apart.
- Sew Spikes: Using CC yarn and a tapestry needle, sew each spike securely to the hat body. Stitch along the base of the spike, catching the hat fabric. Ensure the spikes stand upright and are firmly attached.
- Weave in Ends: Carefully weave in all remaining yarn ends on the inside of the hat to keep the finish neat.
Your Stegosaurus Spike Hat is now complete! This playful accessory is perfect for keeping little heads warm while inspiring hours of dinosaur adventures. The textured spikes and cozy ribbed brim make it a standout piece that's sure to become a favorite. Happy knitting!



