The Toadstool Tidy: A Free Crochet Pattern for a Textured, Forest-Floor Inspired Towel Topper
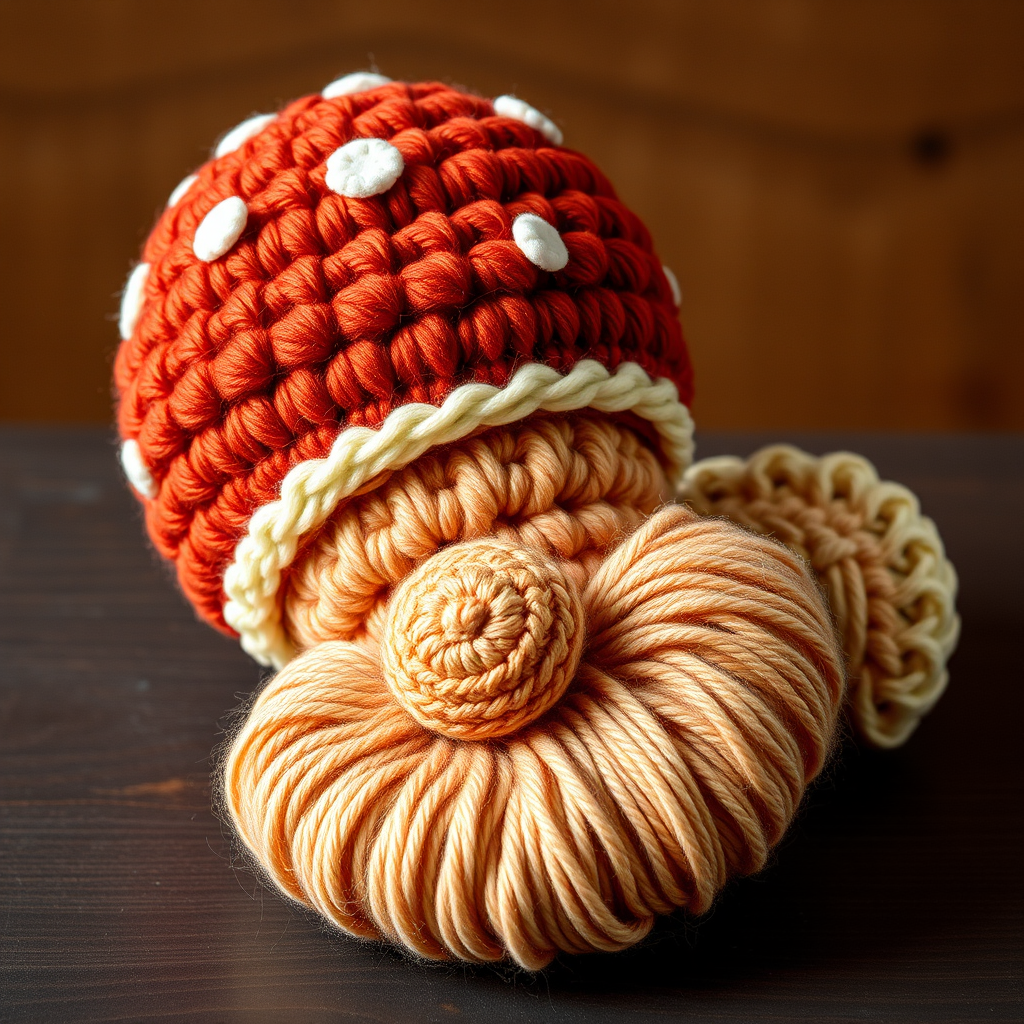
Bring a Touch of Whimsy to Your Kitchen: The Toadstool Tidy Towel Topper
Transform your kitchen into an enchanted woodland with the Toadstool Tidy—a delightfully textured towel topper that combines a plush mushroom cap with a charming gnome face. This quick, satisfying project adds a touch of cozy fantasy to your daily routine, making every dish-drying moment feel like a storybook adventure. Perfect for beginners and experienced crocheters alike, this free pattern uses simple stitches and easy-to-find materials to create a functional, whimsical home decor piece.
Materials Needed
To create your own Toadstool Tidy, gather the following supplies:
- Yarn: Worsted weight (#4) cotton or cotton-blend yarn in three colors:
- Color A (Mushroom Cap): Rust/Red-Orange (approx. 50g)
- Color B (Stem/Beard): Cream/Off-White (approx. 30g)
- Color C (Gnome Face): Peach/Skin Tone (approx. 20g)
- Hook: Size G (4.0 mm) crochet hook
- Other: Stitch marker, tapestry needle, fiberfill stuffing (small amount for nose), scissors
Gauge: 4 sc and 4 rows = 1 inch (2.5 cm) in single crochet. Gauge is not critical for this project, but consistency is important for a neat finish.
Step-by-Step Instructions
Abbreviations (US Terms)
ch = chain, sc = single crochet, hdc = half double crochet, dc = double crochet, sl st = slip stitch, inc = increase (2 sc in same stitch), dec = decrease (sc2tog), BLO = back loop only, FLO = front loop only, MR = magic ring.
Part 1: Towel Topper Loop (Stem)
With Color B (Cream), ch 6.
- Row 1: Sc in 2nd ch from hook and across (5 sc). Ch 1, turn.
- Rows 2-30: Sc in BLO of each stitch across (5 sc). Ch 1, turn.
At the end, fold the strip in half lengthwise and sl st the short ends together to form a loop. Fasten off, leaving a long tail for sewing.
Part 2: Mushroom Cap (Top Section)
With Color A (Rust), make a MR.
- Round 1: 6 sc in MR (6). Do not join, work in continuous rounds. Place marker.
- Round 2: Inc in each st around (12).
- Round 3: (Sc in next st, inc) repeat around (18).
- Round 4: (Sc in next 2 sts, inc) repeat around (24).
- Round 5: (Sc in next 3 sts, inc) repeat around (30).
- Round 6: (Sc in next 4 sts, inc) repeat around (36).
- Round 7: (Sc in next 5 sts, inc) repeat around (42).
- Round 8: (Sc in next 6 sts, inc) repeat around (48).
- Round 9: (Sc in next 7 sts, inc) repeat around (54).
- Round 10: Sc in each st around (54).
- Round 11: (Sc in next 8 sts, inc) repeat around (60).
- Round 12: Sc in each st around (60).
- Round 13: (Sc in next 9 sts, inc) repeat around (66).
- Round 14: Sc in each st around (66).
- Round 15: (Sc in next 10 sts, inc) repeat around (72).
- Round 16: Sc in each st around (72).
- Round 17: (Sc in next 11 sts, inc) repeat around (78).
- Round 18: Sc in each st around (78).
- Round 19: (Sc in next 12 sts, inc) repeat around (84).
- Round 20: Sc in each st around (84). Fasten off, leaving a long tail for sewing.
Part 3: Gnome Face (Bottom Section)
With Color C (Peach), make a MR.
- Round 1: 6 sc in MR (6).
- Round 2: Inc in each st around (12).
- Round 3: (Sc in next st, inc) repeat around (18).
- Round 4: (Sc in next 2 sts, inc) repeat around (24).
- Round 5: (Sc in next 3 sts, inc) repeat around (30).
- Round 6: (Sc in next 4 sts, inc) repeat around (36).
- Round 7: (Sc in next 5 sts, inc) repeat around (42).
- Round 8: (Sc in next 6 sts, inc) repeat around (48).
- Round 9: (Sc in next 7 sts, inc) repeat around (54).
- Round 10: (Sc in next 8 sts, inc) repeat around (60). Fasten off, leaving a long tail for sewing.
Part 4: Nose
With Color C (Peach), make a MR.
- Round 1: 6 sc in MR (6).
- Round 2: (Sc in next st, inc) repeat around (9).
- Round 3: Sc in each st around (9).
- Round 4: (Sc in next st, dec) repeat around (6). Fasten off, leaving a long tail. Stuff lightly with fiberfill.
Part 5: Beard
With Color B (Cream), ch 11.
- Row 1: Sc in 2nd ch from hook and across (10 sc). Ch 1, turn.
- Row 2: Sc in each st across (10). Ch 1, turn.
- Row 3: Dec, sc in next 6 sts, dec (8). Ch 1, turn.
- Row 4: Dec, sc in next 4 sts, dec (6). Ch 1, turn.
- Row 5: Dec, sc in next 2 sts, dec (4). Ch 1, turn.
- Row 6: Dec twice (2). Fasten off, leaving a long tail.
Assembly
- Attach Cap to Face: Sew the mushroom cap (top) to the gnome face (bottom) using the long tails, matching the edges. The cap should slightly overhang the face.
- Add Nose: Sew the nose to the center of the face, just above the seam.
- Attach Beard: Sew the beard to the bottom of the face, centered under the nose.
- Embroider Eyes: Using black yarn, embroider two small eyes (French knots or satin stitches) above the nose.
- Add Cap Dots: Using white yarn, embroider small dots on the mushroom cap for a classic toadstool look.
- Attach Loop: Attach the towel topper loop (stem) to the back of the mushroom cap, centered. Sew securely.
- Finish: Weave in all ends.
Your Toadstool Tidy is now ready to hang! Simply loop the stem over a cabinet handle or towel bar, and enjoy the whimsical, forest-floor charm it brings to your kitchen. Happy crocheting!


