The Whispering Willow Wall Hanging: A Free Crochet Pattern for a Textured, Organic Fiber Art Piece
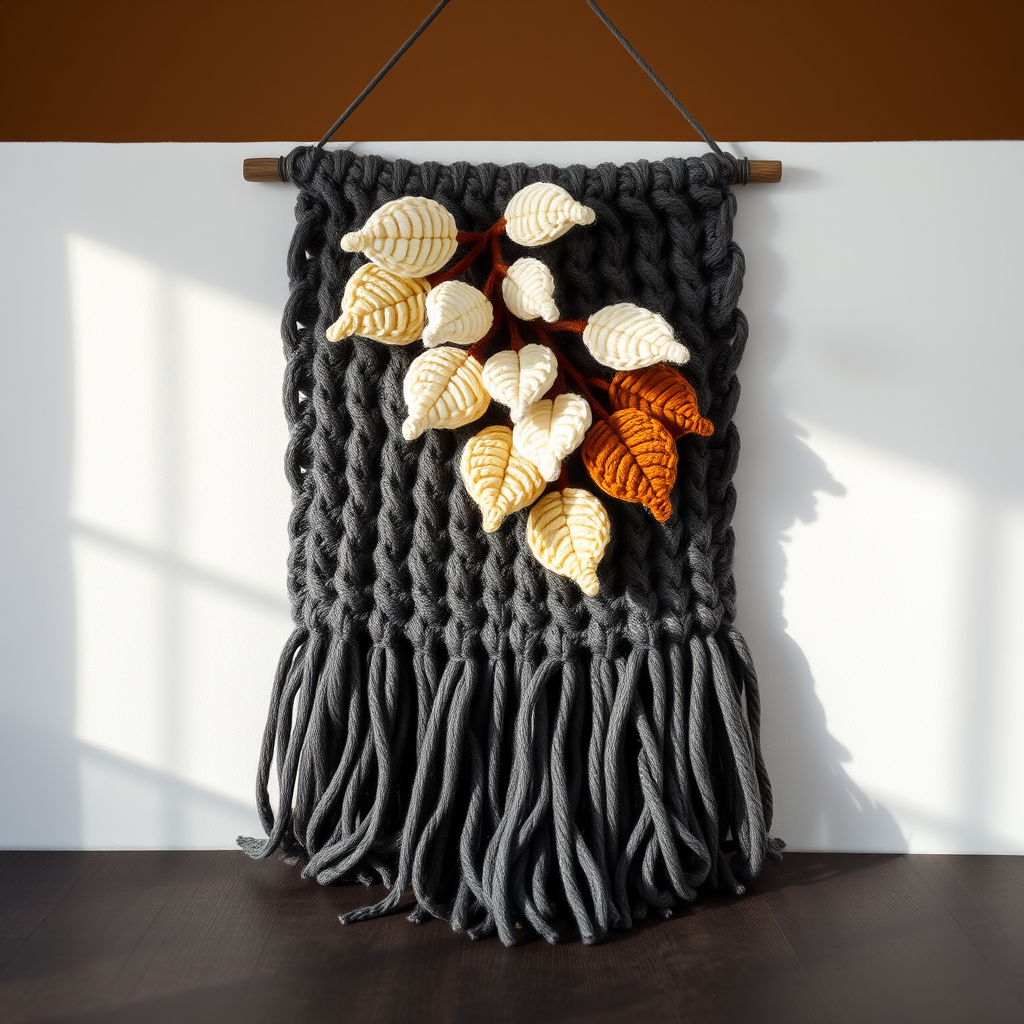
Bring the Outdoors In: Introducing the Whispering Willow Wall Hanging
Transform your living space with a touch of serene, organic beauty. The Whispering Willow Wall Hanging is a modern fiber art piece that combines the warmth of crochet with the natural elegance of cascading willow leaves. This free pattern is designed to be beginner-friendly, guiding you through creating a textured, boho-inspired tapestry that serves as a stunning alternative to traditional macrame. With its soft, earthy color palette and chunky yarn, this wall hanging adds depth and a calming, nature-inspired vibe to any room. Let's get started on crafting your own piece of art!
Materials Needed
Before you begin, gather the following supplies. The chunky yarn and large hook make this project work up quickly, perfect for a weekend craft session.
- Yarn: Lion Brand Wool-Ease Thick & Quick (super bulky weight, 80% acrylic, 20% wool) in the following colors (approx. 1 skein each):
- Color A: 'Charcoal' (for the main body and hanging loop)
- Color B: 'Fisherman' (for large leaves)
- Color C: 'Buttercup' (for medium leaves)
- Color D: 'Mushroom' (for small leaves)
- Hook: Size N/P (10 mm) crochet hook
- Other: Tapestry needle for weaving ends and sewing leaves, scissors
Step-by-Step Instructions
Finished Size: Approximately 18 inches wide x 30 inches long (including fringe).
Gauge: 4 sc x 4 rows = 4 inches in single crochet. Gauge is not critical for this project, but consistency helps achieve the stated size.
Abbreviations
- ch = chain
- sc = single crochet
- hdc = half double crochet
- dc = double crochet
- tr = treble crochet
- sl st = slip stitch
- st(s) = stitch(es)
- rep = repeat
- RS = right side
Pattern Notes
The wall hanging is worked from the top down. The main body is a simple, open mesh that creates a beautiful, airy texture. The willow leaves are crocheted separately as motifs and then sewn onto the mesh. Fringe is added to the bottom for a finished, boho look.
Main Body (Worked in Rows)
Row 1 (RS): With Color A, ch 46. Sc in the 2nd ch from the hook and in each ch across. Turn. (45 sc)
Row 2: Ch 1, sc in the first st, *ch 3, skip 2 sts, sc in the next st; rep from * across. Turn. (You will have 15 ch-3 spaces)
Row 3: Ch 1, sc in the first sc, *ch 3, sc in the next sc (the sc from the previous row); rep from * across. Turn.
Rows 4-20: Repeat Row 3. At the end of Row 20, fasten off Color A and weave in the end.
Willow Leaves (Make 7-9 Leaves in Varying Sizes)
Large Leaf (make 3): With Color B, ch 11.
- Sc in the 2nd ch from the hook, hdc in the next ch, dc in the next 2 ch, tr in the next 2 ch, dc in the next 2 ch, hdc in the next ch, sc in the last ch. Ch 1, turn.
- Now working along the opposite side of the foundation chain: sc in the first ch, hdc in the next ch, dc in the next 2 ch, tr in the next 2 ch, dc in the next 2 ch, hdc in the next ch, sc in the last ch.
- Fasten off, leaving a long tail (approx. 12 inches) for sewing.
Medium Leaf (make 3): With Color C, ch 9.
- Sc in the 2nd ch from the hook, hdc in the next ch, dc in the next 2 ch, tr in the next ch, dc in the next 2 ch, hdc in the next ch, sc in the last ch. Ch 1, turn.
- Working along the opposite side: sc in the first ch, hdc in the next ch, dc in the next 2 ch, tr in the next ch, dc in the next 2 ch, hdc in the next ch, sc in the last ch.
- Fasten off, leaving a long tail.
Small Leaf (make 3): With Color D, ch 7.
- Sc in the 2nd ch from the hook, hdc in the next ch, dc in the next ch, tr in the next ch, dc in the next ch, hdc in the next ch, sc in the last ch. Ch 1, turn.
- Working along the opposite side: sc in the first ch, hdc in the next ch, dc in the next ch, tr in the next ch, dc in the next ch, hdc in the next ch, sc in the last ch.
- Fasten off, leaving a long tail.
Assembly
1. Attach the Leaves: Lay the main body flat on a table. Using the long tails and a tapestry needle, sew the leaves onto the mesh in a cascading pattern. Start near the top of the wall hanging and work downward, overlapping the leaves slightly for a natural, organic look. Weave the ends securely into the back of the work.
2. Create the Fringe: Cut strands of all four colors (A, B, C, D) to approximately 12 inches long. For each ch-3 space along the bottom edge of the main body, take 3 strands (you can mix colors or use one color per fringe cluster). Fold the strands in half, insert your crochet hook through the ch-3 space, grab the folded loop, and pull it through the space. Then, pull the loose ends through the loop and tighten gently. Repeat this process for all 15 ch-3 spaces across the bottom.
3. Make the Hanging Loop: Cut a 24-inch strand of Color A. Fold it in half. Tie the two ends securely to the top corners of the wall hanging—specifically, through the first and last stitches of Row 1. Knot tightly to ensure it can support the weight of the piece.
4. Trim the Fringe: Once all fringe is attached, trim the ends evenly to your desired length (approximately 6 inches from the bottom edge of the main body).
Your Whispering Willow Wall Hanging is now complete! Hang it on a dowel, branch, or directly on the wall to enjoy its textured, organic beauty. Happy crocheting!


