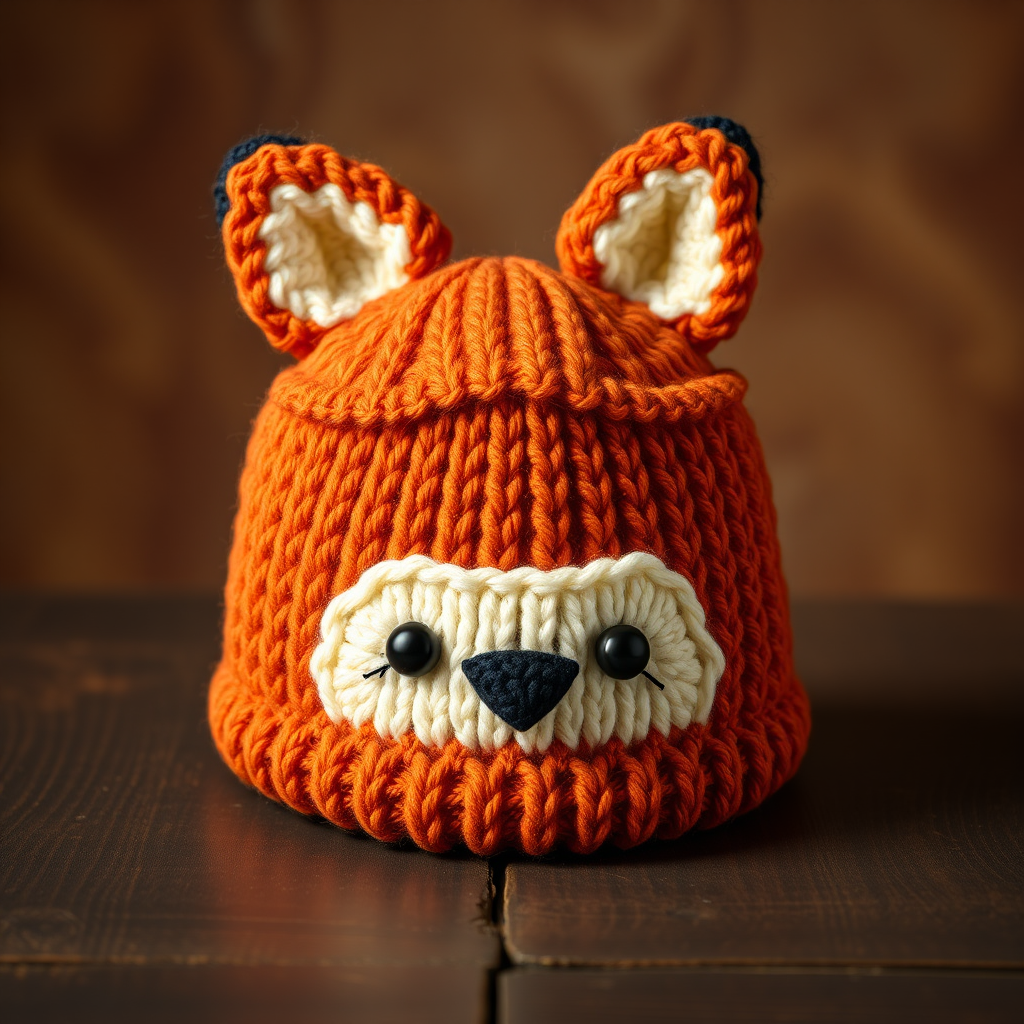
Whimsical Whiskers Cat Beanie Hat Free Pattern – Cozy Knit with Ear Flaps

Whimsical Whiskers Cat Beanie Hat Free Pattern – Cozy Knit with Ear Flaps
Are you a cat lover looking for a playful yet practical winter accessory? This charming cat beanie hat features adorable pointed ears, a sweet embroidered face, and cozy ear flaps to keep you warm on the chilliest days. Knit in a soft, chunky worsted-weight yarn, this pattern is perfect for beginners and experienced knitters alike who want to create a handmade gift that's full of personality. With clear step-by-step instructions, you'll have a whimsical, cozy hat that's sure to become your new cold-weather favorite.
Materials Needed
Before you begin, gather the following supplies to ensure a smooth knitting experience:
- Yarn: Worsted weight yarn in main color (MC) and contrasting color (CC) for face details (approx. 200g MC, 50g CC). The sample uses a warm cream MC with soft pink CC for the inner ears and face.
- Needles: US 7 (4.5mm) 16-inch circular knitting needle and double-pointed needles (DPNs) for small circumference work.
- Notions: Stitch markers, tapestry needle for weaving in ends and embroidery, scissors.
- Gauge: 20 stitches and 26 rows = 4 inches in stockinette stitch. Always check your gauge to ensure the correct fit.
Step-by-Step Instructions
Sizes and Abbreviations
Sizes: Adult (Child) – instructions are given for Adult with Child in parentheses.
Abbreviations:
- CO: cast on
- K: knit
- P: purl
- K2tog: knit two together (right-leaning decrease)
- SSK: slip, slip, knit (left-leaning decrease)
- PM: place marker
- SM: slip marker
- St(s): stitch(es)
- MC: main color
- CC: contrasting color
Hat Body
1. With MC, CO 88 (80) sts. Join in the round, being careful not to twist. PM at beginning of round.
2. Work K1, P1 ribbing for 2 inches. This creates a snug, stretchy brim that will keep the hat securely on your head.
3. Switch to stockinette (knit every round) and work until hat measures 6 (5.5) inches from cast-on edge. This gives you the main body of the hat before shaping the crown.
Shape Crown
Now we'll decrease to close the top of the hat. Work the following decrease rounds, knitting all stitches on even-numbered rounds:
Round 1: *K6, K2tog* repeat to end – 77 (70) sts.
Round 2 and all even rounds: Knit all sts.
Round 3: *K5, K2tog* repeat to end – 66 (60) sts.
Round 5: *K4, K2tog* repeat to end – 55 (50) sts.
Round 7: *K3, K2tog* repeat to end – 44 (40) sts.
Round 9: *K2, K2tog* repeat to end – 33 (30) sts.
Round 11: *K1, K2tog* repeat to end – 22 (20) sts.
Round 13: *K2tog* repeat to end – 11 (10) sts.
Cut yarn, leaving a long tail. Thread through remaining sts, pull tight, and secure. Weave in the end on the inside of the hat.
Ear Flaps (make 2)
These cozy flaps will keep your ears warm and add to the cat charm.
1. With MC, CO 10 (8) sts.
2. Work back and forth in stockinette (K on RS, P on WS) for 2 inches.
3. Decrease row (RS): K1, SSK, knit to last 3 sts, K2tog, K1 – 8 (6) sts.
4. Work 1 row purl.
5. Repeat last two rows until 2 sts remain.
6. K2tog, cut yarn and pull through. Weave in ends.
7. Sew ear flaps to the inside of the hat, centered over the ears (about 2 inches from the bottom edge). Position them so they hang down naturally over your ears.
Cat Ears (make 2)
These triangular ears are the signature feature of this whimsical hat.
1. With MC, CO 12 sts.
2. Row 1 (RS): Knit.
3. Row 2: Purl.
4. Row 3: K1, SSK, knit to last 3 sts, K2tog, K1 – 10 sts.
5. Row 4: Purl.
6. Repeat rows 3-4 until 2 sts remain.
7. K2tog, cut yarn and pull through.
8. Fold each ear in half and sew the side edges together to form a triangle. Sew ears to the top of the hat, about 1 inch apart, angled slightly outward for that playful cat look.
Face Embroidery
Bring your cat to life with these simple embroidery details:
1. Using CC, embroider two small triangles for eyes (or use French knots) positioned about 1 inch apart, centered on the front of the hat, roughly 2 inches above the brim.
2. Create a small 'Y' shape for the nose and mouth, centered below the eyes. Use a satin stitch for the nose and a backstitch for the mouth lines.
3. Add whiskers with straight stitches extending from the sides of the nose. Use thin black yarn or embroidery floss for contrast.
4. Weave in all ends securely on the inside of the hat.
Finishing Touches
For an extra whimsical detail, you can add small pompoms to the ends of the ear flaps using MC yarn. Simply create a small pompom (about 1.5 inches in diameter) and attach it securely to the tip of each ear flap.
Your Whimsical Whiskers Cat Beanie Hat is now complete! This cozy, handmade accessory is perfect for cat lovers of all ages. Whether you're making it for yourself or as a thoughtful gift, the adorable ears, sweet embroidered face, and warm ear flaps make it a truly special piece. Enjoy your new favorite winter hat!