Aurora Boreal Chunky Scarf Free Pattern – Gradient Knit Scarf with Woven Texture
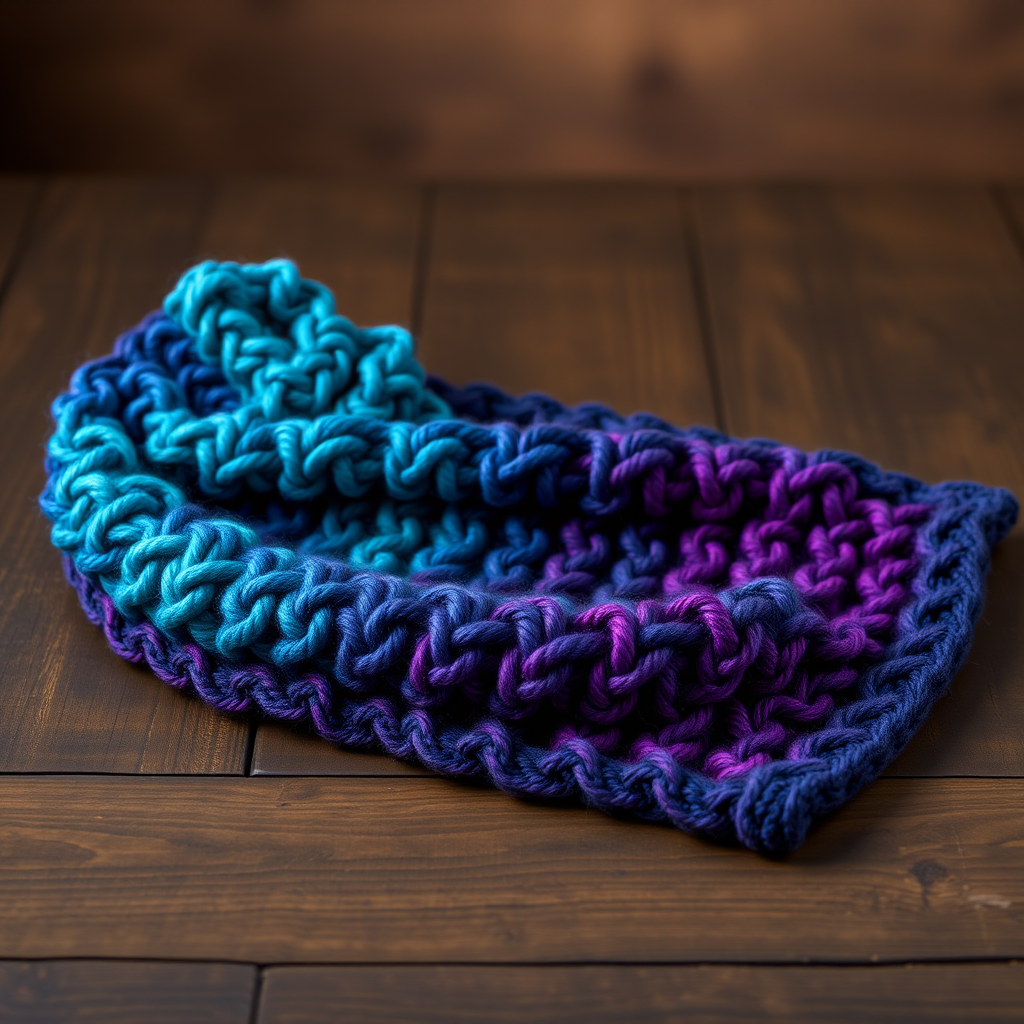
Aurora Boreal Chunky Scarf: A Free Knitting Pattern for a Stunning Gradient Scarf
Imagine wrapping yourself in the ethereal beauty of the northern lights. With this free chunky scarf knitting pattern, you can bring that magic to life! The Aurora Boreal Chunky Scarf features a mesmerizing gradient of teal, purple, and midnight blue, all knit in a unique woven stitch that creates a dense, plush fabric. This quick-knit project is perfect for intermediate beginners looking to create a cozy statement piece that's both stylish and incredibly warm. Whether you're making it for yourself or as a handmade gift, this gradient knit scarf is sure to turn heads.
Materials Needed
Before you begin, gather the following materials to ensure a smooth knitting experience. This project uses super bulky yarn, making it a fast and satisfying knit.
- Yarn: Super bulky weight yarn (size 6) in 3 colors:
- Color A (Midnight Blue) – approximately 80 yards
- Color B (Aurora Teal) – approximately 70 yards
- Color C (Nebula Purple) – approximately 70 yards
- Needles: US Size 13 (9 mm) knitting needles
- Notions: Tapestry needle for weaving in ends, scissors
- Gauge: 8 stitches and 10 rows = 4 inches in woven stitch pattern (blocked). Gauge is important for achieving the correct width, but this pattern is forgiving.
Step-by-Step Instructions
This scarf is knit flat in one piece using a simple two-row repeat that creates a beautiful woven texture. The gradient effect is achieved by changing colors every 10 rows, or you can use a self-striping yarn for a seamless transition. Follow these detailed instructions carefully, and you'll have a gorgeous scarf in no time.
Abbreviations
- CO: Cast on
- K: Knit
- P: Purl
- Sl: Slip stitch purlwise
- WYIF: With yarn in front
- WYIB: With yarn in back
- BO: Bind off
Step 1: Cast On
With Color A (Midnight Blue), CO 24 stitches loosely. Use a long-tail cast-on method for a stretchy edge. This will create a scarf that is approximately 8 inches wide. Ensure your cast-on is not too tight, as this will make the edge stiff.
Step 2: Knit the Base Rows
Rows 1-4: Knit all stitches (garter stitch border). This will prevent curling and create a neat, flat edge. Knitting these four rows establishes a solid foundation for the woven pattern.
Step 3: Begin Woven Stitch Pattern
Now you'll start the signature woven texture. This pattern is created by slipping stitches with the yarn in front or back, which creates horizontal bars across the fabric.
- Row 5 (Right Side): K2 (edge stitches), *Sl 1 WYIF, K1*, repeat from * to * until last 2 stitches, K2. Remember to keep the yarn in front when slipping the stitch, then move it to the back to knit the next stitch.
- Row 6 (Wrong Side): K2, *P1, Sl 1 WYIB*, repeat from * to * until last 2 stitches, K2. On this side, you'll purl one stitch, then slip the next with the yarn in back.
Step 4: Continue Woven Stitch Pattern
Repeat Rows 5 and 6 for 8 more rows (total of 10 rows of woven stitch) with Color A. This creates the first color block. Count your rows carefully to ensure even color transitions.
Step 5: Change to Color B (Aurora Teal)
Cut Color A, leaving a 6-inch tail. Join Color B by simply starting to knit with the new yarn. Knit 2 rows of garter stitch (Knit all stitches) to create a smooth transition between colors. This garter stitch break also adds a subtle design element.
Step 6: Repeat Woven Stitch Pattern
Repeat Rows 5 and 6 for 10 rows with Color B. Continue the same woven stitch pattern, maintaining the 2 knit stitches at each edge for a clean border.
Step 7: Change to Color C (Nebula Purple)
Cut Color B, leaving a 6-inch tail. Join Color C. Knit 2 rows of garter stitch. This transition will be visible as a neat ridge, adding to the scarf's texture.
Step 8: Continue Woven Stitch Pattern
Repeat Rows 5 and 6 for 10 rows with Color C. You're now at the midpoint of the scarf, and the gradient should be at its most vibrant purple.
Step 9: Create the Gradient Reverse
Now, to create a symmetrical gradient, repeat the color changes in reverse. This will mirror the first half of the scarf.
- Knit 2 rows of garter stitch with Color C, then 10 rows of woven stitch with Color C.
- Cut Color C, join Color B. Knit 2 rows of garter stitch, then 10 rows of woven stitch with Color B.
- Cut Color B, join Color A. Knit 2 rows of garter stitch, then 10 rows of woven stitch with Color A.
Step 10: Finish with Garter Border
Knit 4 rows of garter stitch with Color A. This mirrors the beginning of the scarf and provides a balanced, finished look.
Step 11: Bind Off
BO all stitches loosely in knit. Use a larger needle or a loose bind-off method to ensure the edge remains stretchy. Weave in all ends with a tapestry needle, being careful to secure them well so they don't unravel with wear.
Step 12: Blocking (Optional)
Lightly steam block the scarf to even out the stitches and enhance the woven texture. Lay flat to dry. Blocking will help the scarf lay flat and look more polished, but it's not strictly necessary with super bulky yarn.
Sizing and Customization
The finished scarf measures approximately 8 inches wide and 70 inches long (excluding fringe). To adjust length, simply add or subtract repeats of the woven stitch pattern. Here are some additional ideas to make this pattern your own:
- For a longer scarf: Add more color repeats in the middle section.
- Add a fringe: Use leftover yarn to create a simple fringe on the ends for a boho look.
- Solid color: Use a single solid color for a more minimalist aesthetic.
- Different gradient: Experiment with your own color combinations to match your wardrobe.
This chunky scarf knitting pattern is a joy to make and even more delightful to wear. The combination of the woven stitch and the gradient colors creates a truly unique accessory. Happy knitting!


