Aurora Borealis Driftwood Throw Free Pattern
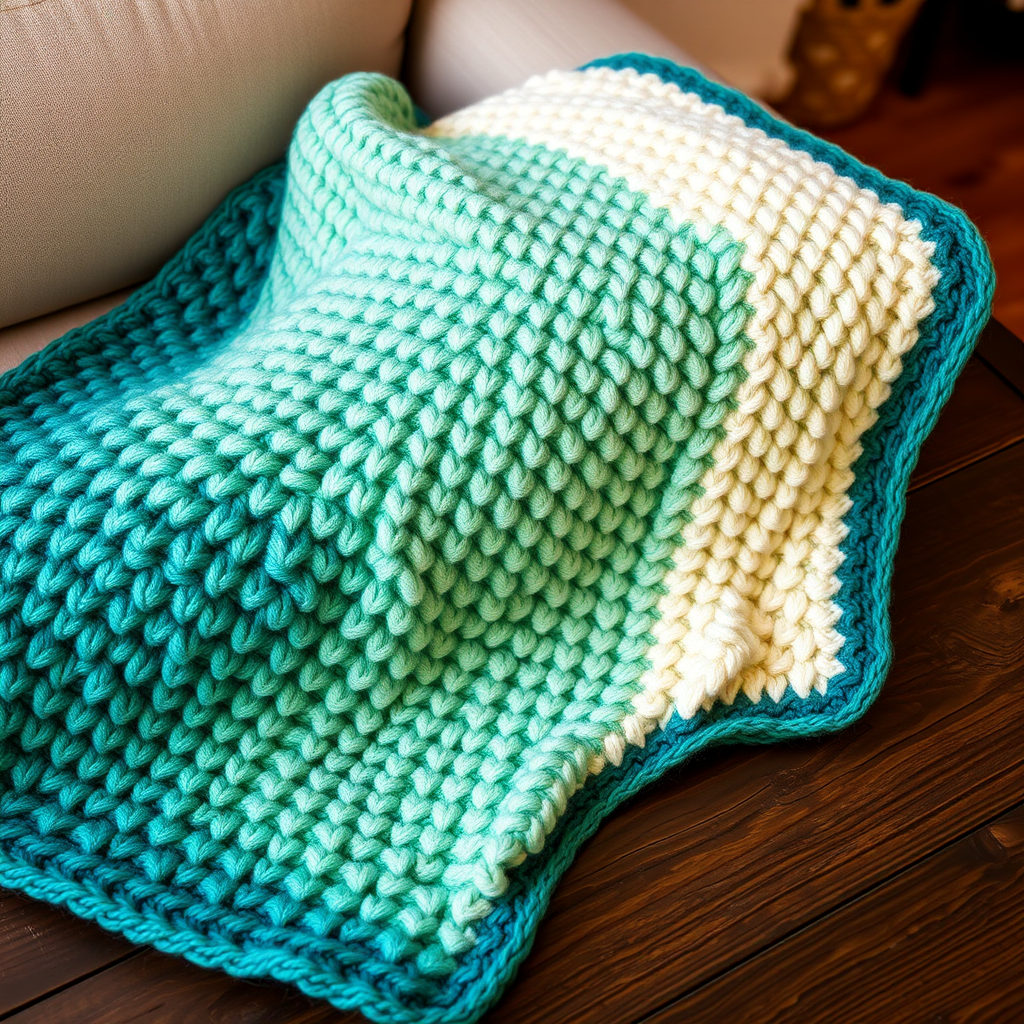
Introducing the Aurora Borealis Driftwood Throw
Imagine wrapping yourself in the ethereal, shifting colors of the northern lights. The Aurora Borealis Driftwood Throw captures that magic in a cozy, textured blanket that feels as luxurious as it looks. This free knitting pattern uses a clever combination of gradient color blocking and a simple slipped-stitch texture to create a fabric that appears woven and dimensional, with small, raised diagonal ridges that catch the light beautifully.
Despite its stunning, complex appearance, this throw is surprisingly beginner-friendly. It is worked in one piece from the bottom up, using only knit, purl, and slip stitches. The pattern is a rhythmic repeat that is easy to memorize, making it the perfect project for cozy evenings in front of the TV. The result is a dense, warm, and visually striking throw that will become the centerpiece of your living room.
Whether you are looking for a challenging-yet-achievable project or a heartfelt handmade gift, this throw delivers. Let’s dive into the materials and steps to create your own piece of the aurora.
Materials Needed
Before you begin, gather the following supplies. The quality of your yarn will significantly impact the drape and feel of the final blanket, so choose a soft, plush worsted weight yarn.
- Yarn: Worsted weight yarn in 5 colors (approx. 600g total):
- Color A: Deep Teal (approx. 150g)
- Color B: Emerald (approx. 120g)
- Color C: Mint (approx. 120g)
- Color D: Pale Aqua (approx. 120g)
- Color E: Cream (approx. 90g)
- Needles: US 9 (5.5 mm) knitting needles, or the size needed to obtain the correct gauge.
- Extras: Tapestry needle for weaving in ends, scissors, and a measuring tape.
Gauge & Finished Size
- Gauge: 16 stitches and 24 rows = 4 inches in stockinette stitch. Always knit a swatch to ensure your tension matches, or your blanket will not be the correct size.
- Finished Size: Approximately 45" x 60". You can easily adjust the length by working more or fewer repeats of the main pattern.
Step-by-Step Instructions
This pattern is worked flat, in one piece. We will build the throw from the bottom (deep teal) to the top (cream). Follow these steps carefully, and you will see the magic unfold.
Special Stitches & Abbreviations
- k: Knit
- p: Purl
- sl: Slip stitch purlwise with yarn in back (wyib). This creates the textured ridge.
- RS: Right Side
- WS: Wrong Side
Pattern Notes
- The throw is worked from the bottom up.
- When changing colors, do not cut the yarn. Carry the unused yarn loosely up the side of the work. This creates a neat selvedge edge and reduces ends to weave in.
- The slipped stitches create a dense, warm fabric that is perfect for a winter throw.
Getting Started: The Foundation
Foundation Row: With Color A (Deep Teal), cast on 180 stitches loosely. Ensure your cast-on is not tight, as this is the bottom edge of the blanket.
Rows 1-4 (Garter Border): Work in garter stitch (knit every row) with Color A. This creates a flat, sturdy base border.
The Textured Slipped-Stitch Section
This section creates the beautiful diagonal ridges. You will repeat these 8 rows to build the textured body of the throw.
Row 5 (RS): Change to Color B (Emerald). Knit 2, sl 1, knit 3; repeat from * to the last 2 stitches, knit 2.
Row 6: With Color B, purl all stitches.
Row 7: Change to Color C (Mint). Knit 2, knit 1, sl 1, knit 2; repeat from * to the last 2 stitches, knit 2.
Row 8: With Color C, purl all stitches.
Row 9: Change to Color D (Pale Aqua). Knit 2, knit 2, sl 1, knit 1; repeat from * to the last 2 stitches, knit 2.
Row 10: With Color D, purl all stitches.
Row 11: Change to Color E (Cream). Knit 2, knit 3, sl 1; repeat from * to the last 2 stitches, knit 2.
Row 12: With Color E, purl all stitches.
Notice how the slipped stitch moves one stitch to the left each time, creating the diagonal drift effect.
The Stockinette Gradient Blocks
Now we will create smooth, solid blocks of color that transition back down the gradient. These blocks give the eye a place to rest between the textured sections.
Rows 13-16: With Color E (Cream), work in stockinette stitch (knit on RS, purl on WS) for 4 rows.
Rows 17-20: With Color D (Pale Aqua), work in stockinette stitch for 4 rows.
Rows 21-24: With Color C (Mint), work in stockinette stitch for 4 rows.
Rows 25-28: With Color B (Emerald), work in stockinette stitch for 4 rows.
Rows 29-32: With Color A (Deep Teal), work in stockinette stitch for 4 rows.
Repeating the Pattern
You have now completed one full pattern repeat (Rows 5-32). To continue the throw:
Repeat Rows 5-32 until the piece measures approximately 58 inches from the cast-on edge. Always end with a Row 32 repeat (a complete color block of Deep Teal) to ensure the pattern is symmetrical.
Finishing the Top Border
Final Border: With Color A (Deep Teal), work 4 rows in garter stitch (knit every row). This matches the bottom border.
Bind Off: Bind off all stitches loosely, knitwise. A loose bind-off is crucial to prevent the top edge from curling or being too tight.
Finishing Touches
Weave in Ends: Using your tapestry needle, carefully weave in all loose ends on the wrong side of the blanket. Since you carried the yarn up the sides, you will only have ends at the very beginning and end.
Blocking: Block the throw gently to size. Lay it flat on a clean surface, mist it with water, and pin it to the correct dimensions (45" x 60"). Allow it to dry completely. This will even out the stitches and enhance the drape of the fabric.
Once dry, your Aurora Borealis Driftwood Throw is ready to be draped over a sofa or folded at the foot of your bed. The interplay of the gradient colors and the textured slipped stitches creates a truly unique, heirloom-quality piece that you will cherish for years to come. Happy knitting!


