Aurora Borealis Fingerless Mitts Free Crochet Pattern
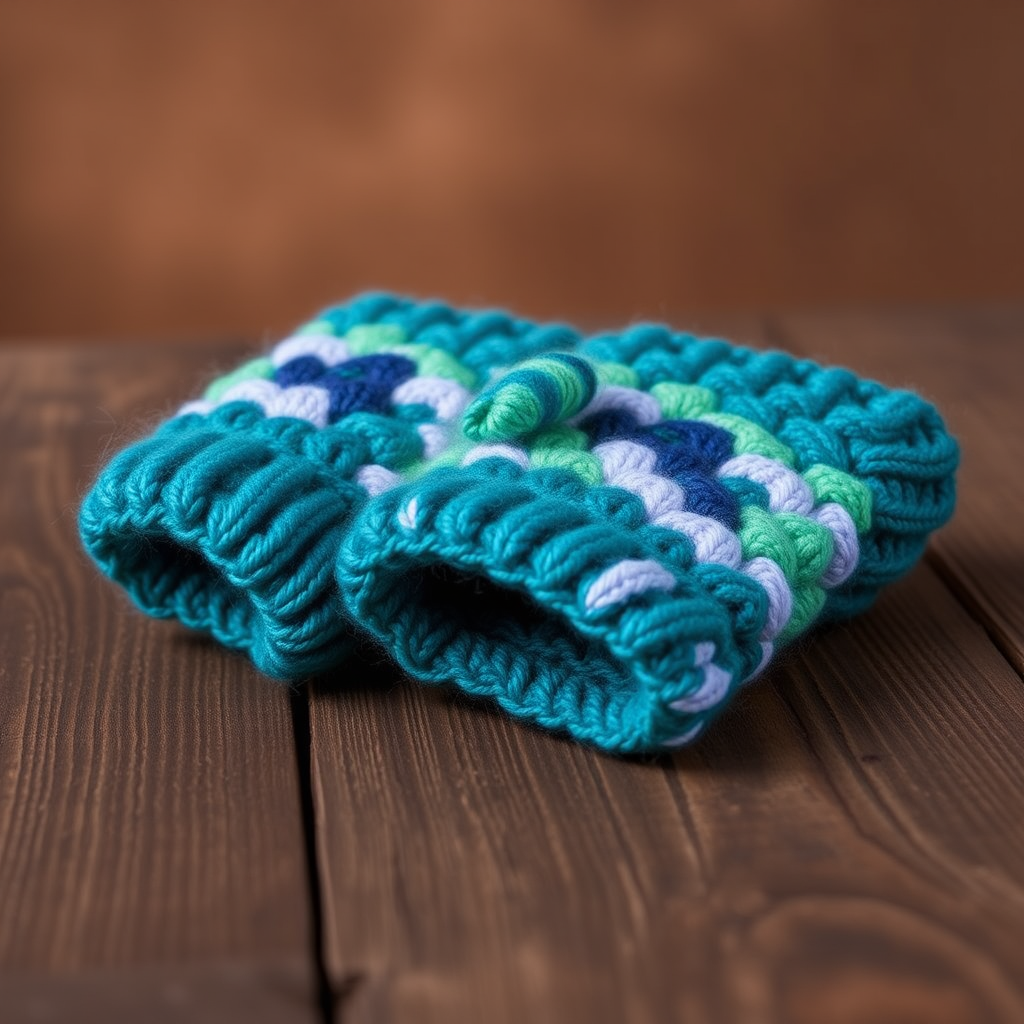
Aurora Borealis Fingerless Mitts: A Free Mosaic Crochet Pattern
Wrap your hands in the swirling colors of the northern lights with these stunning fingerless mitts. This free crochet pattern uses a unique mosaic technique to create a cozy, gradient effect that looks far more complex than it actually is. Perfect for beginners who want to try something new, or for experienced crocheters looking for a quick, satisfying project, these mitts add a pop of color to any winter outfit. The geometric, overlapping design mimics the ethereal beauty of the aurora borealis, making them a truly special handmade accessory.
Why You'll Love This Pattern
Mosaic crochet is a brilliant technique that creates intricate, woven-looking patterns using only single and double crochet stitches. You work with one color per row, which means no frustrating color changes mid-row or tangled bobbins. The result is a dense, warm, and beautifully textured fabric that looks like it took hours of complex colorwork—but it's surprisingly simple to master. These fingerless mitts are the perfect project to learn this addictive technique.
Materials Needed
Before you begin, gather these supplies. The gauge is not critical for this project, but it will affect the final fit, so it's worth checking.
- Yarn: Worsted weight yarn in 3 colors:
- Color A (Deep Teal) – approx. 50g
- Color B (Emerald Green) – approx. 50g
- Color C (Soft Lavender) – approx. 50g
- Hook: US Size G/6 (4.0 mm) crochet hook
- Other: Yarn needle for weaving in ends, scissors
Gauge: 16 stitches and 12 rows of mosaic pattern = 4 inches (10 cm) in pattern. Gauge is not critical, but affects fit.
Special Stitches & Pattern Notes
This pattern uses a few basic stitches and one special mosaic stitch. Don't worry—it's easier than it looks!
Stitch Abbreviations
- ch: chain
- sc: single crochet
- dc: double crochet
- sl st: slip stitch
- BLO: back loop only
- mdc: mosaic double crochet (see below)
Special Stitch: Mosaic Double Crochet (mdc)
Work a double crochet into the front loop only of the stitch two rows below, skipping the stitch directly above it. This creates the signature mosaic overlay. Here’s how:
- Yarn over.
- Insert your hook into the front loop of the stitch two rows down (the one that matches the color you're currently working with).
- Yarn over and pull up a loop (you'll have 3 loops on your hook).
- Yarn over and pull through two loops.
- Yarn over and pull through the remaining two loops. Your mdc is complete.
Pattern Notes:
- The pattern is worked in rows. Each row uses only one color. The unused colors are carried loosely up the side or cut and woven in.
- The mosaic pattern is created by alternating rows of single crochet (worked in the back loop only) and rows of mosaic double crochet (worked in the front loop of the stitch two rows below).
- The thumb opening is created by working a series of chain stitches and skipping a section of the row.
Step-by-Step Instructions
Let's get started! Make two mitts following these instructions.
Mosaic Pattern (Worked over a multiple of 4 + 2 stitches)
This is the core pattern repeat you'll use for the body of the mitt. Practice this first to get comfortable with the mdc stitch.
- Row 1 (Color A): Ch 1, sc in 2nd ch from hook and in each ch across. Turn. (This is the foundation row, not part of the pattern repeat.)
- Row 2 (Color A): Ch 1, sc in the back loop only (BLO) of each sc across. Turn.
- Row 3 (Color B): Ch 1, sc in BLO of first sc, *mdc in next st (two rows below), sc in BLO of next st, mdc in next st, sc in BLO of next st* repeat from * to * across, ending with sc in BLO of last st. Turn.
- Row 4 (Color B): Ch 1, sc in BLO of each sc across. Turn.
- Row 5 (Color C): Ch 1, sc in BLO of first sc, *mdc in next st, sc in BLO of next st, mdc in next st, sc in BLO of next st* repeat from * to * across, ending with sc in BLO of last st. Turn.
- Row 6 (Color C): Ch 1, sc in BLO of each sc across. Turn.
- Row 7 (Color A): Ch 1, sc in BLO of first sc, *mdc in next st, sc in BLO of next st, mdc in next st, sc in BLO of next st* repeat from * to * across, ending with sc in BLO of last st. Turn.
- Row 8 (Color A): Ch 1, sc in BLO of each sc across. Turn.
Repeat Rows 3-8 for the pattern, always working the mdc in the stitch two rows below that is in the same color as the current row. This creates the overlapping, geometric design.
Mitten (Make 2)
Cuff
- With Color A, ch 30 (or desired width for your hand, multiple of 4 + 2).
- Row 1: Sc in 2nd ch from hook and in each ch across. Turn. (29 sc)
- Rows 2-10: Ch 1, sc in BLO of each sc across. Turn. (This creates a ribbed cuff.)
Main Body
- Row 11 (Color A): Ch 1, sc in BLO of each sc across. Turn. (29 sc)
- Row 12 (Color A): Ch 1, sc in BLO of each sc across. Turn.
- Row 13 (Color B): Ch 1, sc in BLO of first sc, *mdc in next st, sc in BLO of next st, mdc in next st, sc in BLO of next st* repeat from * to * across, ending with sc in BLO of last st. Turn.
- Row 14 (Color B): Ch 1, sc in BLO of each sc across. Turn.
- Row 15 (Color C): Ch 1, sc in BLO of first sc, *mdc in next st, sc in BLO of next st, mdc in next st, sc in BLO of next st* repeat from * to * across, ending with sc in BLO of last st. Turn.
- Row 16 (Color C): Ch 1, sc in BLO of each sc across. Turn.
- Row 17 (Color A): Ch 1, sc in BLO of first sc, *mdc in next st, sc in BLO of next st, mdc in next st, sc in BLO of next st* repeat from * to * across, ending with sc in BLO of last st. Turn.
- Row 18 (Color A): Ch 1, sc in BLO of each sc across. Turn.
- Row 19 (Color B): Ch 1, sc in BLO of first sc, *mdc in next st, sc in BLO of next st, mdc in next st, sc in BLO of next st* repeat from * to * across, ending with sc in BLO of last st. Turn.
- Row 20 (Color B): Ch 1, sc in BLO of each sc across. Turn.
- Row 21 (Color C): Ch 1, sc in BLO of first sc, *mdc in next st, sc in BLO of next st, mdc in next st, sc in BLO of next st* repeat from * to * across, ending with sc in BLO of last st. Turn.
- Row 22 (Color C): Ch 1, sc in BLO of each sc across. Turn.
Thumb Opening
- Row 23 (Color A): Ch 1, sc in BLO of first 10 sts, ch 5, skip next 5 sts, sc in BLO of remaining 14 sts. Turn. (You will have 10 sc, 5 ch, 14 sc = 29 sts)
- Row 24 (Color A): Ch 1, sc in BLO of each st across (working sc in each ch of the thumb opening). Turn. (29 sc)
Continue Pattern
- Row 25 (Color B): Ch 1, sc in BLO of first sc, *mdc in next st, sc in BLO of next st, mdc in next st, sc in BLO of next st* repeat from * to * across, ending with sc in BLO of last st. Turn.
- Row 26 (Color B): Ch 1, sc in BLO of each sc across. Turn.
- Row 27 (Color C): Ch 1, sc in BLO of first sc, *mdc in next st, sc in BLO of next st, mdc in next st, sc in BLO of next st* repeat from * to * across, ending with sc in BLO of last st. Turn.
- Row 28 (Color C): Ch 1, sc in BLO of each sc across. Turn.
- Row 29 (Color A): Ch 1, sc in BLO of first sc, *mdc in next st, sc in BLO of next st, mdc in next st, sc in BLO of next st* repeat from * to * across, ending with sc in BLO of last st. Turn.
- Row 30 (Color A): Ch 1, sc in BLO of each sc across. Turn.
- Row 31 (Color B): Ch 1, sc in BLO of first sc, *mdc in next st, sc in BLO of next st, mdc in next st, sc in BLO of next st* repeat from * to * across, ending with sc in BLO of last st. Turn.
- Row 32 (Color B): Ch 1, sc in BLO of each sc across. Turn.
- Row 33 (Color C): Ch 1, sc in BLO of first sc, *mdc in next st, sc in BLO of next st, mdc in next st, sc in BLO of next st* repeat from * to * across, ending with sc in BLO of last st. Turn.
- Row 34 (Color C): Ch 1, sc in BLO of each sc across. Turn.
Top Edge
- Row 35 (Color A): Ch 1, sc in BLO of each sc across. Turn.
- Row 36 (Color A): Ch 1, sc in BLO of each sc across. Fasten off, leaving a long tail for seaming.
Finishing
- Fold the mitten in half lengthwise, with the right sides together. Using the long tail, whip stitch the side seam from the cuff up to the thumb opening. Then, stitch the other side of the thumb opening to the top of the mitten. Weave in all ends.
- Repeat for the second mitten.
Optional Thumb
To make a full mitten, you can crochet a thumb by working in rounds around the thumb opening. Attach yarn at the thumb opening, ch 1, sc evenly around the opening (about 12 sc). Work sc in the round for 5-6 rounds, then decrease by working sc2tog around until closed. Fasten off and weave in ends.
Tips for Success
- Count your stitches: The mdc stitch can make it easy to lose your place. Count your stitches at the end of each row to ensure you still have 29.
- Carry your yarn: When changing colors, you can carry the unused yarn loosely up the side of the work. Just be sure not to pull it too tight, or the edge will pucker.
- Block your mitts: Once finished, gently block your mitts to even out the stitches and enhance the mosaic pattern.
These Aurora Borealis Fingerless Mitts are a joy to make and even more joyful to wear. The mosaic technique is addictive, and the color combination is simply stunning. Whether you keep them for yourself or gift them to a loved one, they're sure to be a cherished handmade treasure. Happy crocheting!


