Aurora Borealis Gradient Crochet Scarf with Fringe Free Pattern
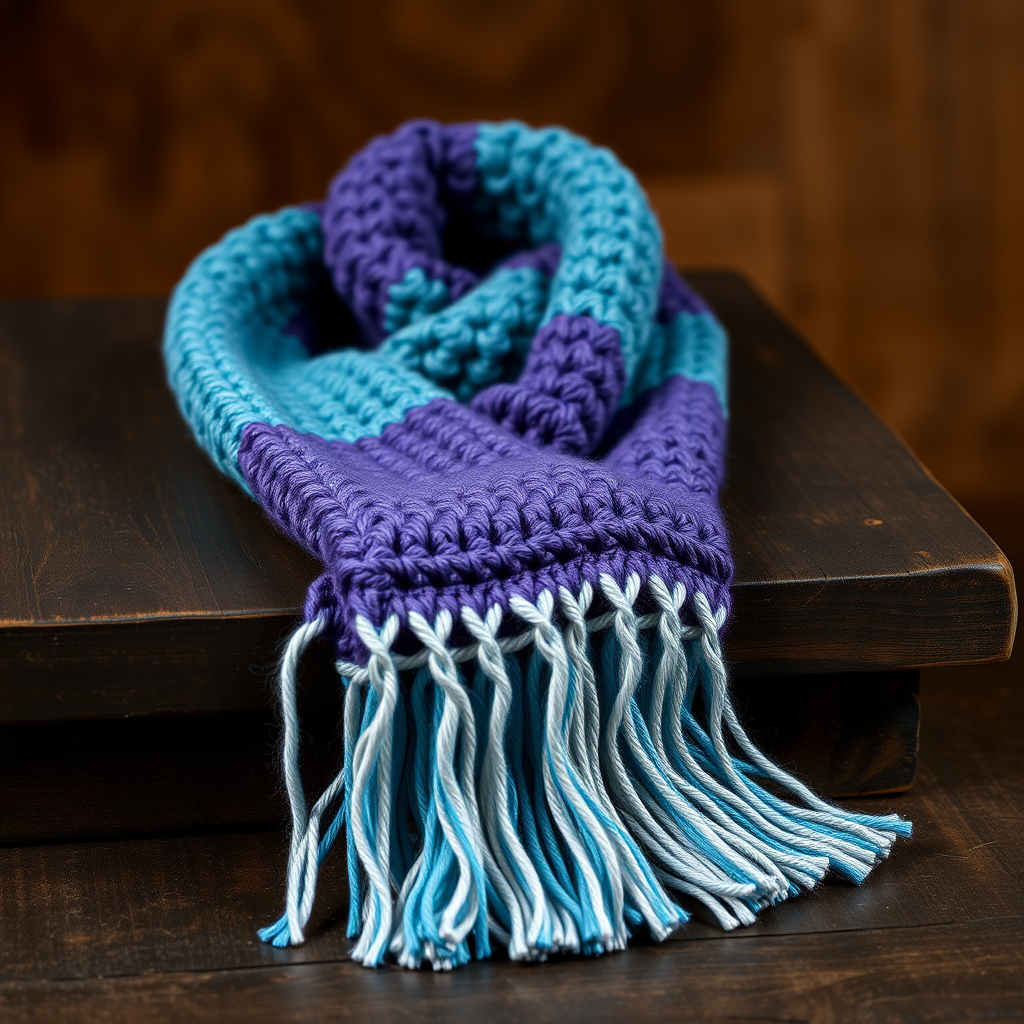
Wrap Yourself in the Northern Lights: The Aurora Borealis Gradient Crochet Scarf
Imagine draping the ethereal beauty of the aurora borealis around your shoulders. With this free crochet pattern, you can transform that vision into a stunning, wearable piece of art. The Aurora Borealis Gradient Crochet Scarf is a mesmerizing project that blends a simple, repetitive stitch with a breathtaking color transition. It's the perfect project for a beginner looking to expand their skills or an experienced maker seeking a mindful, relaxing make. The result is a soft, flowing scarf with a delicate fringe that adds a touch of elegance to any outfit, making it a truly unforgettable handmade gift.
This pattern is designed to be your trusted guide. We'll walk you through every step, from gathering your materials to tying the final fringe knot, ensuring you can confidently create this gorgeous accessory at home. Let's get started on this colorful journey!
Materials Needed: Gathering Your Palette
Before you begin, it's time to assemble your artist's toolkit. The beauty of this scarf lies in its gradient, so choosing the right yarns is key. Here’s exactly what you'll need:
- Yarn: Worsted weight yarn in 4 colors: deep purple, teal, light blue, and silver (approx. 200g total). This is roughly 50g (or one small skein) of each color. The silver yarn with a subtle shimmer will beautifully mimic the stars in the night sky.
- Crochet Hook: A 5.5mm (I-9) crochet hook. This size is perfect for worsted weight yarn, creating a fabric that is dense yet has a lovely drape.
- Other Tools: A pair of sharp scissors and a yarn needle for weaving in the ends.
Gauge: 14 double crochet (dc) stitches x 8 rows = 4 inches. While gauge isn't critical for a scarf, keeping a consistent tension will ensure your scarf is the desired width and length.
Step-by-Step Instructions: Crafting Your Masterpiece
This pattern is wonderfully repetitive, making it a great project for relaxing evenings. The magic happens as you change colors to create the stunning gradient. Follow these steps carefully, and you'll be amazed at what you create.
Getting Started: The Foundation Chain
We'll begin by creating the foundation for our scarf. This will determine the width of your finished piece.
- Make a slip knot with your deep purple yarn and place it on your 5.5mm hook.
- Chain (ch) 30. This creates a loose foundation. Be careful not to chain too tightly, as this can make the first row difficult to work into.
Row 1: The First Double Crochet Row
This row establishes the stitch pattern we'll use for the entire scarf.
- Double crochet (dc) in the 4th chain from your hook. The first three chains you skip count as your first double crochet. This means you will have a total of 28 double crochet stitches in this row.
- Dc in each chain across. Continue working one double crochet into each of the remaining chains until you reach the end of the row. You should now have 28 dc stitches total (including the initial chain-3).
Row 2 and Beyond: Building the Body
Now we'll start the simple repetition that forms the body of the scarf. Pay close attention to the color changes to achieve the perfect gradient.
- Chain 3, then turn your work. This chain-3 counts as the first double crochet of the new row.
- Dc in each dc across. Work one double crochet into the top of each double crochet from the previous row. Remember to work into the 'V' shape at the top of each stitch. At the end of the row, you will have 28 dc stitches.
- Repeat Row 2 for a total of 10 rows in deep purple.
Changing Colors for the Gradient: After completing 10 rows of deep purple, it's time to introduce your next color. At the end of your 10th row, do not finish off. Instead, simply drop the deep purple yarn and pick up your teal yarn. Make a slip knot with the teal yarn and pull it through the loop on your hook. Leave a 6-inch tail to weave in later. Now, continue with Row 2 (ch 3, turn, dc across) using the teal yarn.
Continue this beautiful rhythm, changing colors every 10 rows in this exact order:
- Deep Purple: Rows 1-10
- Teal: Rows 11-20
- Light Blue: Rows 21-30
- Silver: Rows 31-40
After the silver, simply repeat the sequence (deep purple, teal, light blue, silver) until your scarf measures 60 inches long from the foundation chain. This will create a beautiful, repeating gradient effect. When you reach your desired length, finish off by cutting the yarn, leaving a 6-inch tail, and pulling it through the last loop on your hook.
Finishing Touches: Weaving in the Ends
To give your scarf a clean, professional look, you'll need to hide all the yarn tails.
- Thread a yarn needle with one of the tails.
- Weave the needle in and out of the wrong side of the scarf, following the path of the stitches. Weave it in one direction for about 2 inches, then double back and weave it in the opposite direction for extra security.
- Trim the excess yarn close to the fabric. Repeat this for all the tails from your color changes and the final finish.
Adding the Fringe: The Final Flourish
The fringe is what gives this scarf its flowing, elegant movement. It's a simple technique that adds a huge visual impact.
- Cut your fringe strands. Cut 12-inch strands of yarn in each of your four colors. You will need a total of 42 fringe bundles (21 on each end).
- Create a fringe bundle. Take 3 strands of yarn. For a balanced look, you can use one strand of a single color, or mix and match. For this pattern, we recommend using 3 strands of the same color to match the section of the scarf where you're attaching it.
- Attach the fringe. Fold the 3 strands in half to create a loop. Insert your crochet hook from the wrong side to the right side of the scarf, through the edge stitch where you want to place the fringe. Catch the folded loop with your hook and pull it through the fabric.
- Secure the fringe. You will now have a loop on the front of your scarf and two yarn tails behind it. Take the two tails and pull them through the loop. Pull tight to create a secure knot.
- Place the fringe evenly. Place a fringe bundle in every 2 stitches along both short ends of the scarf. This will give you a beautifully full and even fringe.
- Trim the fringe. Once all the fringe is attached, lay the scarf flat and use your scissors to trim the ends of the fringe so they are all an even length.
And there you have it! Your very own Aurora Borealis Gradient Crochet Scarf. This project is a joy to make and an even greater joy to wear or gift. The simple stitch pattern allows the stunning color gradient to take center stage, creating a truly unique and magical accessory. Happy crocheting!