Aurora Dune Chunky Knit Blanket Free Pattern
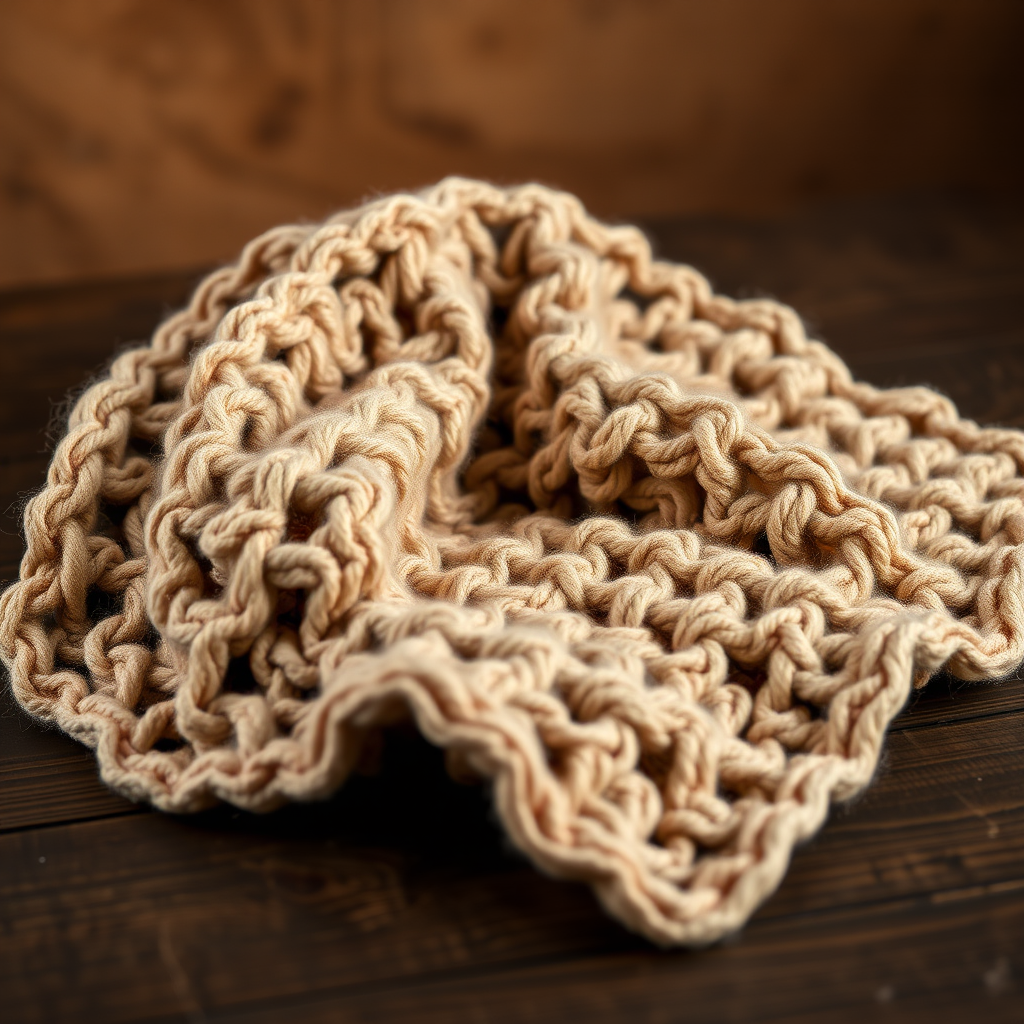
The Aurora Dune Chunky Knit Blanket: A Free Pattern for Cozy, Modern Living
There's something truly magical about wrapping yourself in a hand-knit blanket—especially one crafted from plush, chunky yarn with a texture that feels as beautiful as it looks. The Aurora Dune Chunky Knit Blanket is designed to be your new favorite companion for chilly evenings, lazy Sundays, and everything in between. With its mesmerizing ripple texture, delicate eyelet details, and warm speckled colorway, this throw brings a touch of modern rustic charm to any space. Best of all, it's a quick knit that works up faster than you might expect, making it the perfect weekend project for both beginners and seasoned crafters alike.
In this comprehensive guide, I'll walk you through every step—from gathering your materials to binding off that final stitch—so you can create a stunning, heirloom-quality blanket right in your own home. Let's dive in!
Why You'll Love This Pattern
The Aurora Dune Blanket is more than just a cozy accessory; it's a statement piece. The rhythmic ripple pattern, created by alternating ribbed sections and delicate yarn-over eyelets, catches the light beautifully, while the speckled yarn adds depth and organic texture. Whether you're curling up on the couch, draping it over a reading chair, or gifting it to someone special, this blanket is sure to impress.
Materials Needed
Before you begin, gather the following supplies. Having everything ready will make your knitting experience smooth and enjoyable.
Yarn
- Super bulky weight yarn (size 6) in a speckled colorway: 6 skeins (approximately 1200 yards total).
- Suggested yarn: Lion Brand Wool-Ease Thick & Quick in "Taupe Speckle" or any similar super bulky yarn with a speckled or heathered effect.
Needles & Notions
- US 15 (10 mm) circular knitting needle, 32 inches long (to accommodate the large number of stitches).
- Tapestry needle for weaving in ends.
- Stitch markers (optional, but helpful for keeping track of pattern repeats).
- Measuring tape to check your progress.
Gauge
- 8 stitches and 12 rows = 4 inches in stockinette stitch (blocked).
- Be sure to check your gauge before starting to ensure your blanket turns out the correct size.
Finished Size & Abbreviations
This pattern creates a generously sized throw blanket, perfect for draping over your lap or sharing with a loved one.
Finished Dimensions
- Approximately 45 inches wide x 60 inches long (adjustable by adding or removing pattern repeats).
Abbreviations
- CO: Cast on
- K: Knit
- P: Purl
- K2tog: Knit two together (decrease)
- YO: Yarn over (increase)
- Sl: Slip stitch
- St(s): Stitch(es)
- Rep: Repeat
Pattern Notes
- The blanket is worked flat, back and forth on a circular needle to accommodate the large number of stitches.
- The pattern repeat is a multiple of 6 + 2 stitches.
- The ripple texture is created by combining knits, purls, and yarn overs, which form delicate eyelets while maintaining the stitch count.
Step-by-Step Instructions
Now, let's get to the fun part! Follow these detailed instructions carefully, and you'll have a beautiful blanket in no time.
Step 1: Cast On
CO 92 stitches using your preferred method (a long-tail cast-on works beautifully with chunky yarn). Take your time to ensure your cast-on is not too tight, as this will make the first row easier to work.
Step 2: Establish the Ribbing Pattern
This first section creates a neat, stretchy ribbed border that frames the blanket beautifully.
- Row 1 (RS): K2, *P2, K2; rep from * to end.
- Row 2 (WS): P2, *K2, P2; rep from * to end.
Repeat Rows 1 and 2 once more (so you have 4 rows of ribbing total) to establish a solid foundation.
Step 3: Begin the Ripple Pattern
This is where the magic happens! The yarn overs and decreases create the beautiful eyelet details that give the Aurora Dune its signature texture.
- Row 3: K2, *P2, YO, K2tog, K2; rep from * to end. (The YO and K2tog work together to create a decorative eyelet while maintaining your stitch count.)
- Row 4: P2, *K2, P2; rep from * to end.
- Row 5: K2, *P2, K2, YO, K2tog; rep from * to end.
- Row 6: P2, *K2, P2; rep from * to end.
Step 4: Work the Ribbed Sections
These plain ribbing rows give the eyelets breathing room and create the rhythmic, wave-like texture.
- Rows 7-10: Repeat Rows 1 and 2 twice more (so you have 4 rows of plain ribbing).
Step 5: Create the Second Eyelet Section
Notice how the decreases and yarn overs are positioned differently here—this creates the alternating ripple effect.
- Row 11: K2, *P2, K2tog, YO, K2; rep from * to end.
- Row 12: P2, *K2, P2; rep from * to end.
- Row 13: K2, *P2, K2, K2tog, YO; rep from * to end.
- Row 14: P2, *K2, P2; rep from * to end.
Step 6: Complete the Pattern Repeat
- Rows 15-18: Repeat Rows 1 and 2 twice more (4 rows of plain ribbing).
Step 7: Continue the Pattern
Repeat Rows 3-18 until the blanket measures approximately 58 inches from the cast-on edge, ending with a Row 18 (a wrong-side row). This ensures your pattern is symmetrical before you begin the final border.
Step 8: Work the Final Ribbing
Just like the beginning, we'll finish with a neat ribbed border to frame the blanket.
- Rows 1-6: Repeat Rows 1 and 2 three times (6 rows of plain ribbing).
Step 9: Bind Off
Bind off loosely in pattern—knit the knit stitches and purl the purl stitches as you bind off. This keeps the edge stretchy and prevents it from pulling or curling. Take your time here; a loose bind-off is key to a professional finish.
Finishing Touches
Your blanket is almost complete! These final steps will ensure it looks polished and lasts for years to come.
Weave in Ends
Using your tapestry needle, carefully weave in all loose ends along the edges of the blanket. Be sure to weave them in securely, but avoid pulling too tightly, which can distort the stitches.
Blocking
Blocking is essential for this pattern—it evens out the stitches, opens up the eyelet details, and gives the blanket its beautiful, drapey finish.
- Lay the blanket flat on a clean surface or blocking mats.
- Gently pin the blanket to its final dimensions (approximately 45" x 60").
- Lightly steam the blanket using a garment steamer or a steam iron held a few inches above the surface. Do not press heavily—the goal is to relax the fibers, not flatten them.
- Allow the blanket to dry completely before unpinning.
Care Instructions
To keep your Aurora Dune Blanket looking its best, hand wash it in cool water with a gentle wool wash, then lay it flat to dry. Avoid wringing or twisting, and reshape it while damp. With proper care, this blanket will be a cherished piece for years to come.
Final Thoughts
Congratulations! You've just created a stunning, cozy, and modern masterpiece. The Aurora Dune Chunky Knit Blanket is more than just a project—it's a labor of love that will bring warmth and beauty to your home. Whether you keep it for yourself or gift it to someone special, this blanket is sure to be treasured.
I'd love to see your finished creation! Share your photos on social media with the hashtag #AuroraDuneBlanket and tag me so I can admire your work. Happy knitting!


