Aurora Waves Throw Blanket Free Pattern

Introducing the Aurora Waves Throw Blanket
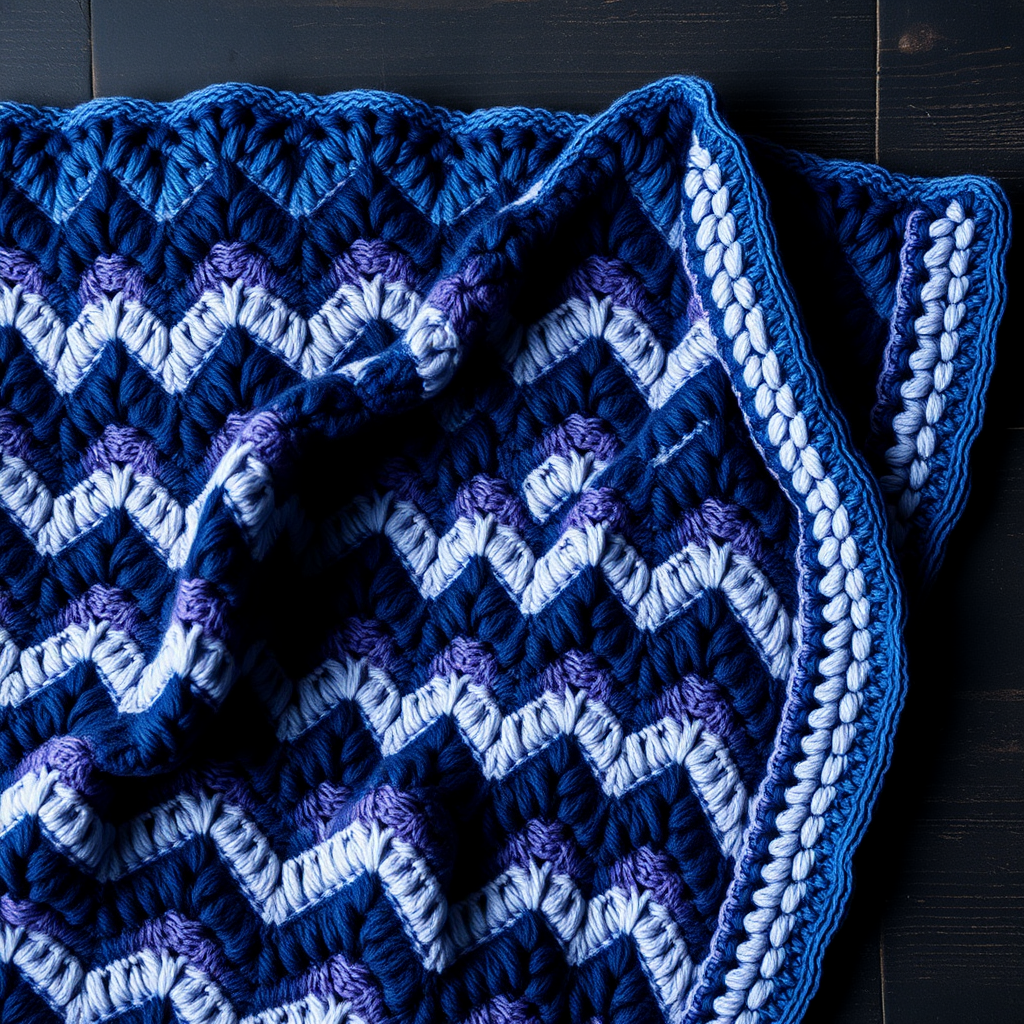
Imagine wrapping yourself in the ethereal, shifting colors of the northern lights. That's the magic of the Aurora Waves Throw Blanket—a mesmerizing crochet project that brings the aurora borealis into your living space. This pattern uses a classic ripple stitch to create a fluid, gradient effect that feels both modern and timeless. Whether you're looking for a cozy companion for chilly evenings or a stunning handmade gift, this throw is sure to become a cherished piece. The rhythmic repetition of the ripple stitch is not only relaxing to work on but also produces a beautifully textured, dense fabric that drapes perfectly over a sofa or armchair.
This pattern is designed with clarity in mind, making it an excellent project for confident beginners looking to expand their skills. With detailed instructions and a straightforward repeat, you'll be amazed at how quickly the waves of color come together. Let's dive into creating your own piece of atmospheric art.
Materials Needed
Before you begin, gather the following supplies to ensure a smooth crocheting experience. The quality of your materials will directly impact the final look and feel of your blanket.
- Yarn: Worsted weight yarn in 5 colors (e.g., deep teal, soft lavender, dusty rose, warm gold, cream) - approximately 1800 yards total. This gives you roughly 360 yards of each color, but it's always wise to buy an extra skein of each to account for gauge differences and the border.
- Crochet Hook: US Size I/9 (5.5 mm) crochet hook. Using the correct hook size is crucial for achieving the proper gauge and drape.
- Other Tools: A yarn needle for weaving in ends, a pair of scissors, and stitch markers (optional, but helpful for keeping track of your row counts).
Gauge Information
To ensure your blanket turns out the correct size, it's essential to check your gauge. The pattern calls for 14 stitches and 10 rows = 4 inches in ripple pattern (after blocking). Blocking helps even out the stitches and can slightly change the dimensions, so always measure after blocking. If your gauge is off, adjust your hook size accordingly—use a larger hook if your swatch is too small, and a smaller hook if it's too large.
Step-by-Step Instructions
Follow these detailed instructions carefully to create your Aurora Waves Throw. The pattern is a simple repeat, but paying attention to the details will ensure a professional finish.
Getting Started: The Foundation Chain
Begin by making a slip knot and chaining 152 stitches. This number is a multiple of 12 + 2, which is essential for the ripple pattern to work out correctly. Count your chains carefully—it's much easier to fix a mistake now than to rip out rows later.
Row 1: Establishing the Ripple
This first row sets the foundation for the entire pattern. Work into the chain as follows:
- Work 2 double crochet (dc) into the 4th chain from your hook. The skipped chains count as your first double crochet, so you now have 3 dc in that spot, which forms the first "peak" of your ripple.
- Dc in the next 4 chains. Work one dc into each of the next four chains.
- Skip 2 chains. This creates the "valley" of the ripple.
- Dc in the next 4 chains. Work one dc into each of the next four chains.
- Work 3 dc in the next chain. This forms the next "peak".
- Repeat steps 2-5 across the row. Continue this sequence (dc in next 4, skip 2, dc in next 4, 3 dc in next ch) until you reach the end of the chain.
- End with 2 dc in the last chain. This creates the final peak. Turn your work. You should have a total of 150 double crochet stitches.
Row 2 and Beyond: The Repeat
Once Row 1 is complete, the rest of the blanket is a simple repetition of Row 2. This is where the rhythm of the pattern really shines.
- Chain 3 (counts as your first double crochet). Turn your work.
- Work 2 dc in the first stitch. Since the ch-3 counts as a dc, this gives you 3 dc in the first stitch, forming the peak.
- Dc in the next 4 stitches. Work one dc into each of the next four stitches.
- Skip 2 stitches. This aligns with the valley from the previous row.
- Dc in the next 4 stitches. Work one dc into each of the next four stitches.
- Work 3 dc in the next stitch. This forms the next peak.
- Repeat steps 3-6 across the row. Continue this sequence until you reach the end of the row.
- End with 2 dc in the top of the turning chain. This completes the final peak. Turn your work.
Pro Tip: To keep your edges neat, always work the final 2 dc into the top of the ch-3 from the previous row. This ensures a straight, clean edge.
Color Changes and Length
The gradient effect is achieved by changing colors every 6 rows. Follow this color order for a smooth transition:
- Deep Teal: Rows 1-6
- Soft Lavender: Rows 7-12
- Dusty Rose: Rows 13-18
- Warm Gold: Rows 19-24
- Cream: Rows 25-30
After completing the cream section, repeat the entire color sequence (teal, lavender, rose, gold, cream) until your blanket measures approximately 60 inches long. It's best to end with a full color sequence to maintain the visual balance. When you reach your desired length, fasten off and weave in all loose ends with your yarn needle.
Adding the Finishing Border
The border gives your blanket a polished, professional look and helps to stabilize the edges. You'll use your cream yarn for this.
- Round 1 (Single Crochet): Attach your cream yarn to any corner of the blanket. Work a round of single crochet (sc) around the entire perimeter. In each corner, work 3 sc in the same corner stitch to ensure the corner lies flat and turns nicely.
- Round 2 (Reverse Single Crochet / Crab Stitch): This stitch creates a beautiful, twisted-cord edging. Without turning your work, work single crochet in the opposite direction (from left to right if you're right-handed). Insert your hook into the next stitch to the right, yarn over, pull up a loop, yarn over, and pull through both loops on the hook. Repeat this around the entire blanket, working 3 reverse sc in each corner to maintain the shape.
- Finish: Fasten off and weave in all ends securely.
Blocking for Perfection
Blocking is the final, crucial step to achieve the beautiful drape and even stitches shown in the photos. It helps relax the yarn and set the ripple shape.
- Fill a basin with cool water and add a small amount of wool wash or mild detergent.
- Submerge your blanket and let it soak for 15-20 minutes. Gently squeeze (do not wring) to remove excess water.
- Lay the blanket flat on a clean towel and roll it up to remove more water.
- Place the blanket on a blocking mat or dry towel. Gently stretch it to the desired dimensions (approximately 50 inches wide by 60 inches long), pinning the peaks and valleys if needed to define the ripple shape.
- Allow it to dry completely before unpinning and enjoying your masterpiece.
Your Aurora Waves Throw Blanket is now complete! This stunning piece is a testament to the beauty of simple, repetitive stitches and thoughtful color choices. It's perfect for cozying up on the couch, gifting to a loved one, or simply admiring as a piece of functional art. Happy crocheting!