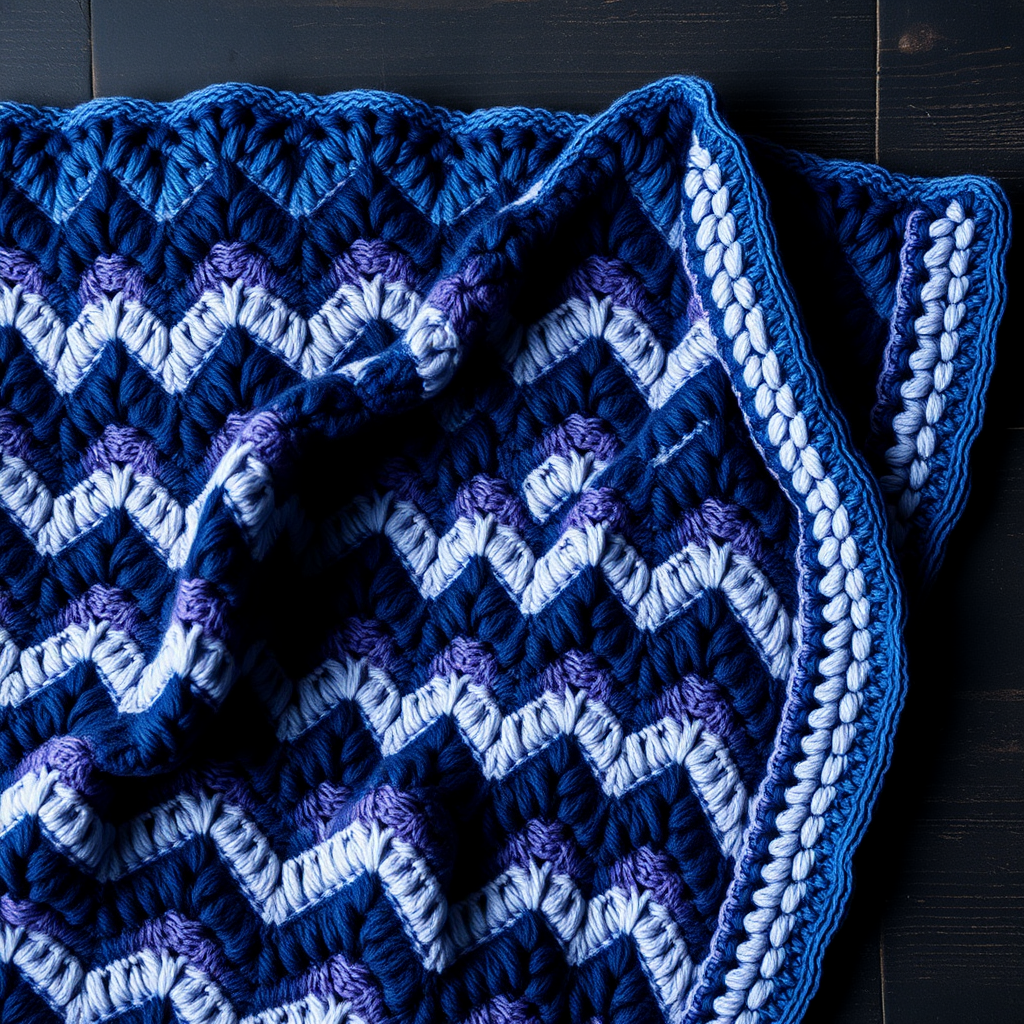
Sunrise Serape Wrap Free Pattern

Wrap Yourself in Sunshine: The Free Sunrise Serape Crochet Pattern
There are few things more comforting than wrapping yourself in a handmade blanket that feels like a warm sunrise. Today, I am thrilled to share a pattern that captures that exact feeling—the **Sunrise Serape Wrap**. This isn't just another crochet blanket; it is a cozy, textured throw designed to drape beautifully over your shoulders or across your lap. Using a repetitive shell stitch and bulky yarn, this project works up faster than you might think, making it the perfect weekend project for beginners and seasoned crocheters alike.
With its gradient of warm yellows, soft peaches, and creamy off-whites, this wrap brings a bohemian, modern aesthetic to any living space. The best part? The repeating pattern is incredibly meditative once you get the rhythm, and the color changes keep things interesting without requiring you to weave in a million ends. Let’s dive into how you can create this stunning, snuggly piece for your home.
Materials Needed
Before we begin, let's gather your supplies. Because we are using bulky yarn, this project is quick to stitch up. Here is exactly what you need to get started:
- Yarn: Bulky weight yarn (Category 5) in 3 colors:
- Color A (Sunrise Yellow) – 400g
- Color B (Peach) – 350g
- Color C (Cream) – 300g
- Crochet Hook: J/10 (6.0 mm) crochet hook
- Other Tools: Scissors and a yarn needle for weaving in ends.
Gauge: 4 shell repeats (12 sts) x 8 rows = 4 inches in pattern stitch. (While gauge is important for exact sizing, this wrap is forgiving—just ensure your stitches are consistent for a neat look.)
Step-by-Step Instructions
Ready to start hooking? Follow these detailed instructions carefully, and you will have your very own Sunrise Serape in no time.
Finished Size & Abbreviations
Finished Size: Approx. 36" wide x 60" long (adjustable by adding or removing foundation chains).
Stitches & Abbreviations (US terms):
- ch = chain
- sc = single crochet
- dc = double crochet
- sk = skip
- st(s) = stitch(es)
- sl st = slip stitch
- shell = 5 dc in same st
Special Stitch:
- Shell: Work 5 double crochets in the indicated stitch.
Pattern Notes:
- This pattern is worked in rows from the bottom edge up.
- The Ch 3 at the beginning of a row counts as your first double crochet.
- Color Changes: We change colors at the end of specific rows. Do not cut the yarn; simply carry it up the side of the work. This keeps your edges clean and reduces weaving.
Getting Started: The Foundation
Foundation Row: With Color A, chain 86 (this is a multiple of 6 + 2).
Row 1: Dc in the 4th ch from the hook (the skipped chains count as your first dc). Now, *skip 2 chains, work a shell (5 dc) in the next chain, skip 2 chains, dc in the next chain*. Repeat from * to * across the row. Turn. (You should have 14 shells completed.)
Creating the Shell Pattern
Row 2: Chain 3 (counts as your first dc). *Skip 2 dc, work a shell in the center dc of the next shell (the 3rd dc of the 5-dc group), skip 2 dc, dc in the next dc (this is the single dc that sits between the shells)*. Repeat from * to * across the row, ending with a dc in the top of the turning chain from the previous row. Turn.
Row 3: Repeat Row 2, but at the very end of this row, you will change to Color B. To do this: work the last dc of the row until you have 2 loops left on your hook, yarn over with Color B and pull through to complete the stitch. Drop Color A (do not cut it). Turn.
Color Blocking Sequence
Now that you have the rhythm, we will simply repeat Row 2 while switching colors every two rows. Follow this sequence carefully:
- Row 4: With Color B, repeat Row 2.
- Row 5: Repeat Row 2, changing to Color C at the end of the row.
- Row 6: With Color C, repeat Row 2.
- Row 7: Repeat Row 2, changing to Color A at the end of the row.
Rows 8-60: Continue repeating Row 2, changing colors every 2 rows in the sequence: A, B, C, A, B, C... Keep going until your piece measures approximately 60 inches from the foundation edge. Tip: Make sure you end with a Color C row to maintain the symmetry of the color blocks. Fasten off and weave in this final tail.
Finishing Touches
Once you have reached your desired length, it is time to finish your wrap:
- Weave in Ends: Use your yarn needle to carefully weave in all loose ends along the edges. Since we carried the yarn up the sides, you should only have the starting tail and the final tail to hide.
- Optional Fringe: For a more bohemian look, you can add a simple fringe to the short edges using all three colors. If you prefer a clean, modern aesthetic like the original design, simply leave the edges as they are—the shell stitch creates a beautiful scalloped edge naturally.
- Blocking: Gently block your wrap to shape. Lay it flat on a towel, mist it lightly with water, and smooth it out to even the stitches. Allow it to dry completely before moving.
And there you have it—a gorgeous, textured Sunrise Serape Wrap that is as cozy as it is stylish. The combination of the chunky yarn and the rhythmic shell stitch makes this a joy to create. Whether you keep it for yourself or gift it to a loved one, this wrap is sure to be a cherished favorite for years to come. Happy crocheting!