Misty Fjord Waves Crochet Blanket Free Pattern

Misty Fjord Waves Crochet Blanket Free Pattern
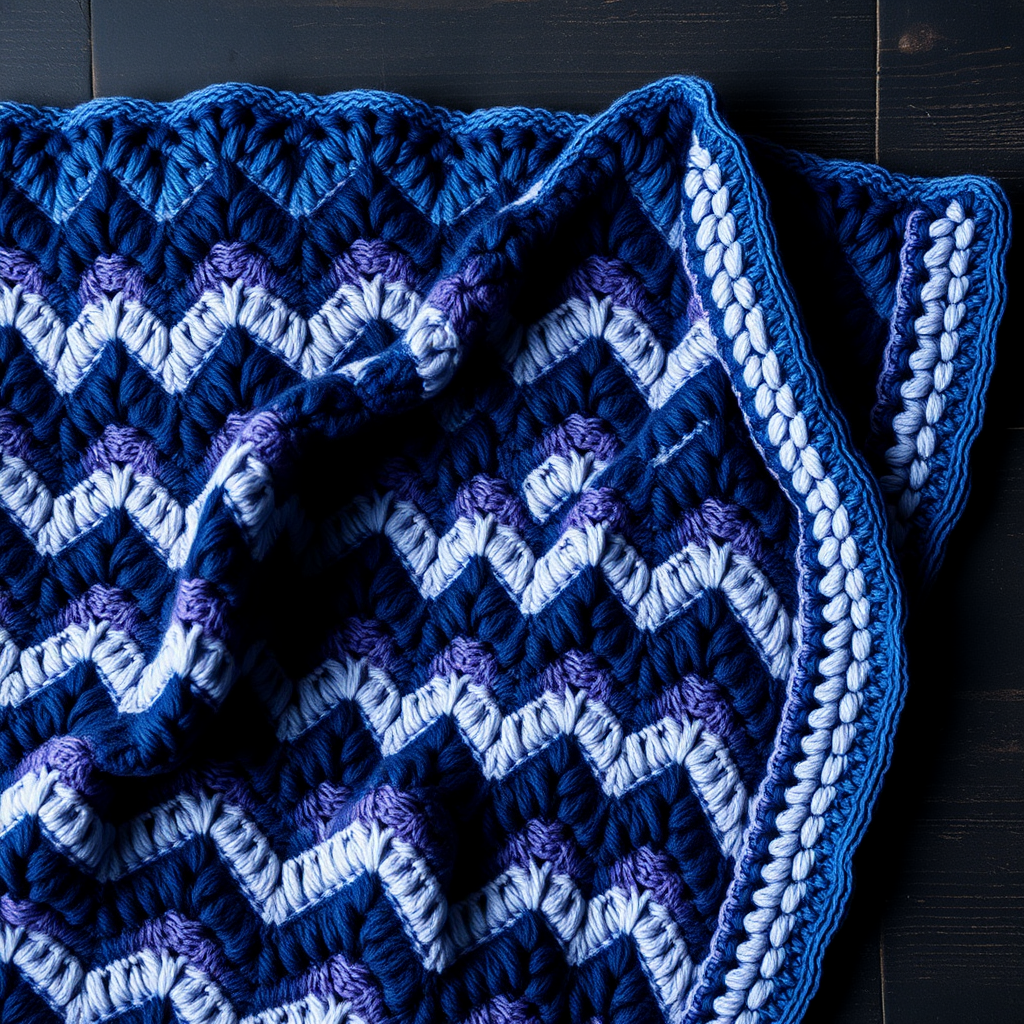
Wrap yourself in the soothing rhythm of ocean waves with this textured, color-blocked crochet blanket. The gentle ripple stitch pattern creates a cozy, modern heirloom piece perfect for cool evenings. Inspired by the serene beauty of coastal fjords, this blanket flows through misty blues, sea glass greens, warm sand dunes, and deep teals—creating a gradient-like sequence that evokes calm waters and peaceful landscapes.
Whether you're an experienced crocheter looking for a meditative project or a confident beginner ready to tackle a stunning ripple pattern, this Misty Fjord Waves blanket delivers both beauty and functionality. The fine yarn creates a soft, drapey fabric that lies flat beautifully, making it perfect for snuggling on the couch or draping over a bed. Let's dive into this relaxing and rewarding crochet journey!
Materials Needed
Before you begin, gather the following supplies to ensure a smooth crochet experience:
Yarn
Fingering weight yarn (Category 2 Fine) in 4 colors. The pattern uses approximately:
- Color A (Mist Blue): 600g (12 skeins of 50g/136m)
- Color B (Sea Glass): 500g (10 skeins of 50g/136m)
- Color C (Sand Dune): 400g (8 skeins of 50g/136m)
- Color D (Deep Teal): 300g (6 skeins of 50g/136m)
Suggested yarn: Cascade Yarns Ultra Pima Fine (100% pima cotton, 50g/136m per skein) or any similar fingering weight yarn that meets gauge.
Hook and Notions
- 4.0 mm (G/6) crochet hook
- Yarn needle for weaving in ends
- Scissors
- Stitch markers (optional, for keeping track of rows)
Gauge
For a swatch of 85 chains and 24 rows, the length is 30cm/12" and the width is 30cm/12". Gauge is not crucial for this project, but changes may affect yardage and finished size.
Finished Size
Approximately 100cm x 130cm (39.5" x 51"). Each pattern repeat adds approximately 7cm/2.75" to the width.
Step-by-Step Instructions
This blanket is worked in rows from the bottom edge upward. The pattern uses a multiple of 14 + 2 chains for the foundation. Adjust the starting chain to change the width—each additional repeat adds about 7cm/2.75".
Special Stitches
dc2tog (double crochet 2 together):
- Yarn over, insert hook in next stitch, yarn over, pull up loop, yarn over, pull through 2 loops (2 loops remain on hook).
- Yarn over, insert hook in next stitch, yarn over, pull up loop, yarn over, pull through 2 loops (3 loops now on hook).
- Yarn over, pull through all 3 loops. One dc2tog completed.
dc3tog (double crochet 3 together):
- Work as dc2tog but over 3 stitches: yarn over, insert hook in next stitch, pull up loop, yarn over, pull through 2 loops (2 loops on hook).
- Repeat this process in the next two stitches (4 loops on hook).
- Yarn over, pull through all 4 loops. One dc3tog completed.
Foundation and First Section (Rows 1-24)
Foundation Row: With Color A, chain 142 (or multiple of 14 + 2 for desired width).
Row 1 (Right Side): Dc in 4th ch from hook (counts as first dc), dc in each of next 5 ch, dc3tog over next 3 ch, dc in each of next 6 ch, *ch 2, skip 1 ch, dc in each of next 6 ch, dc3tog over next 3 ch, dc in each of next 6 ch; repeat from * to last 2 ch, ch 1, skip 1 ch, dc in last ch. Turn. (You will have 10 ripple peaks/valleys across the width.)
Row 2: Ch 3 (counts as dc), dc in first st, dc in each of next 5 sts, dc3tog over next 3 sts, dc in each of next 6 sts, *ch 2, skip ch-2 space, dc in each of next 6 sts, dc3tog over next 3 sts, dc in each of next 6 sts; repeat from * to last st, 2 dc in last st (the top of the turning chain). Turn.
Rows 3-24: Repeat Row 2, working in the following color sequence:
- Rows 3-6: Color A
- Rows 7-10: Color B
- Rows 11-14: Color C
- Rows 15-18: Color D
- Rows 19-22: Color B
- Rows 23-24: Color A
At the end of Row 24, fasten off Color A and join Color B.
Second Section (Rows 25-48)
Rows 25-48: Repeat Row 2, using the same color sequence but starting with Color B:
- Rows 25-28: Color B
- Rows 29-32: Color C
- Rows 33-36: Color D
- Rows 37-40: Color A
- Rows 41-44: Color C
- Rows 45-48: Color B
Fasten off at end of Row 48.
Third Section (Rows 49-72)
Rows 49-72: Repeat Row 2, starting with Color C:
- Rows 49-52: Color C
- Rows 53-56: Color D
- Rows 57-60: Color A
- Rows 61-64: Color B
- Rows 65-68: Color D
- Rows 69-72: Color C
Fasten off at end of Row 72.
Fourth Section (Rows 73-96)
Rows 73-96: Repeat Row 2, starting with Color D:
- Rows 73-76: Color D
- Rows 77-80: Color A
- Rows 81-84: Color B
- Rows 85-88: Color C
- Rows 89-92: Color A
- Rows 93-96: Color D
Fasten off at end of Row 96.
Fifth Section (Rows 97-120)
Rows 97-120: Repeat Row 2, starting with Color A:
- Rows 97-100: Color A
- Rows 101-104: Color B
- Rows 105-108: Color C
- Rows 109-112: Color D
- Rows 113-116: Color B
- Rows 117-120: Color A
Fasten off at end of Row 120.
Border (Optional but Recommended)
A clean, simple border in matching colors adds a polished finish to your Misty Fjord Waves blanket.
Round 1: With right side facing, join Color A in any corner. Ch 1, work sc evenly around the entire blanket, working 3 sc in each corner. Join with slip stitch to first sc. Fasten off.
Round 2: Join Color B in any corner. Ch 1, work sc in each sc around, working 3 sc in each corner. Join with slip stitch. Fasten off.
Round 3: Join Color C in any corner. Ch 1, work reverse sc (crab stitch) in each sc around, working 3 reverse sc in each corner. Join with slip stitch. Fasten off.
Finishing Touches
Weave in all ends securely using your yarn needle. Block the blanket to finished measurements if desired—this will help even out the stitches and enhance the drape of the fabric.
Tips for Success
- Count your stitches at the end of each row to ensure you maintain the ripple pattern correctly.
- Use stitch markers at the beginning of each color section to help track your progress through the 120 rows.
- Keep your tension consistent throughout the project for an even, professional-looking finish.
- When changing colors, fasten off and weave in ends as you go to avoid a daunting pile of ends at the end.
- Blocking is worth it! This cotton yarn responds beautifully to wet blocking, which will help your waves lay flat and crisp.
Your Misty Fjord Waves blanket will become a treasured piece—a beautiful blend of texture, color, and the calming rhythm of the sea. Enjoy the process, and don't hesitate to make it your own by adjusting colors or size to suit your space. Happy crocheting!