Candy Cane Crochet Santa Ornament Free Pattern – A Jolly Holiday Keepsake
Candy Cane Crochet Santa Ornament Free Pattern – A Jolly Holiday Keepsake
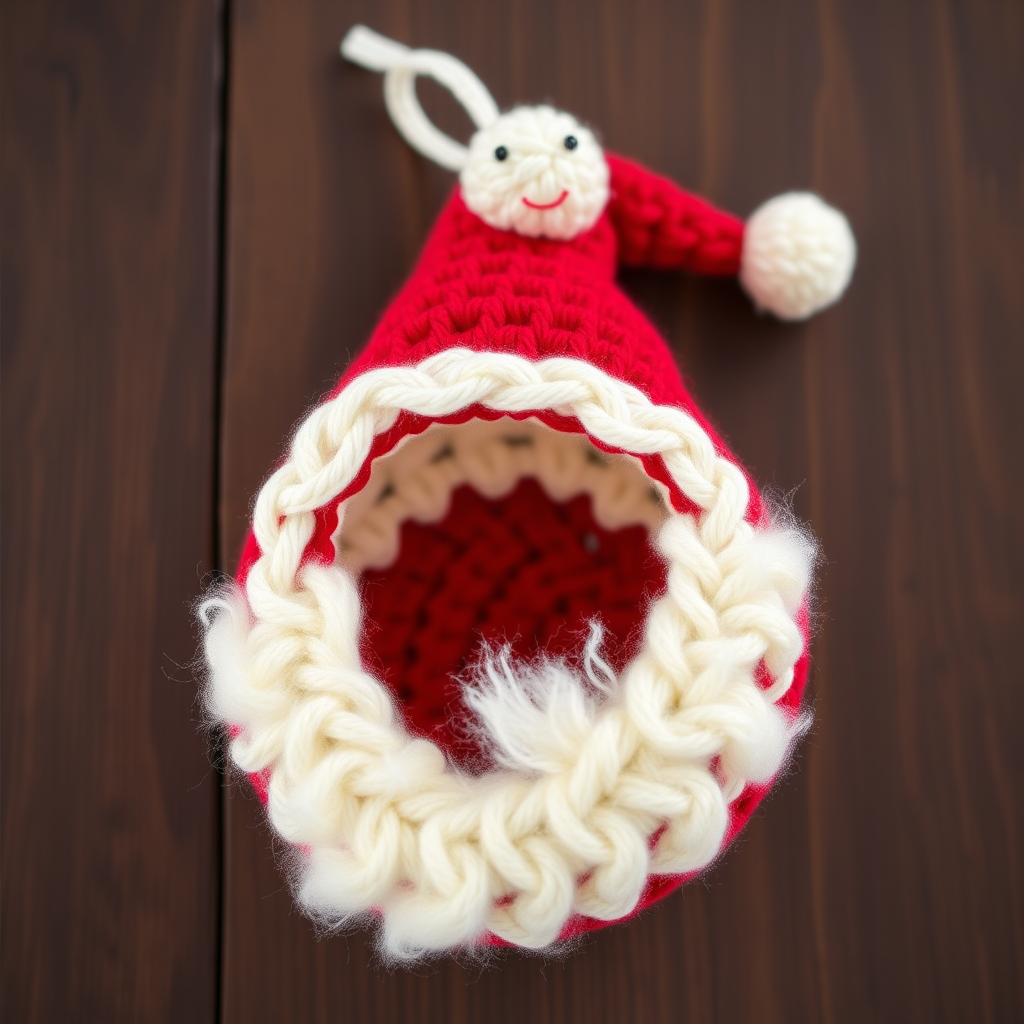
Add a touch of handmade charm to your Christmas tree this year with this adorable Crochet Santa Ornament! This isn't just any festive decoration—it doubles as a clever candy cane holder, making it a delightful gift topper or a whimsical addition to your holiday décor. Crafted with soft, chunky worsted-weight yarn, this little Santa features a classic red-and-white face with a cozy, textured beard that is sure to bring a smile to everyone who sees it.
Whether you are a seasoned crocheter or a beginner looking for a quick weekend project, this pattern is simple, fast, and incredibly rewarding. The finished ornament measures about 3 inches tall, making it the perfect size for a tree, a gift wrap accent, or even a festive garland. Let’s grab your hook and some yarn to create this jolly keepsake!
Materials Needed
Before we dive into the stitches, let’s gather your supplies. This project uses minimal materials and is highly portable—perfect for crafting on the go.
- Yarn: Worsted weight cotton or acrylic yarn in the following colors:
- Red (for the head and hat)
- White (for the beard, pom-pom, and candy cane loop)
- Black (small amount for the eyes)
- Crochet Hook: 3.5mm (E) crochet hook
- Other: Fiberfill stuffing, yarn needle, scissors
- Gauge: 4 sc x 4 rows = 1 inch (Note: Gauge is not critical for this project, just keep your stitches tight enough so the stuffing doesn't show).
Step-by-Step Instructions
Follow these detailed instructions carefully, and you’ll have your very own Santa ornament in no time. We’ll work from the head down to the details.
Head (Red)
We’ll start with the base of Santa’s face. This is worked in continuous rounds (spiral) unless otherwise noted.
- Round 1: Create a magic ring with red yarn. Work 6 single crochet (sc) into the ring. Pull tight to close. (6 stitches)
- Round 2: Increase (inc) in each sc around. (12 stitches)
- Round 3: *Sc in the next sc, inc in the next sc*; repeat from * to * around. (18 stitches)
- Round 4: *Sc in the next 2 sc, inc in the next sc*; repeat from * to * around. (24 stitches)
- Round 5: *Sc in the next 3 sc, inc in the next sc*; repeat from * to * around. (30 stitches)
- Rounds 6-10: Sc in each sc around. (30 stitches) This creates the height of the head.
- Round 11: *Sc in the next 3 sc, decrease (dec) in the next sc*; repeat from * to * around. (24 stitches)
- Round 12: *Sc in the next 2 sc, dec in the next sc*; repeat from * to * around. (18 stitches)
- Stuff the head firmly with fiberfill. Make sure it’s plump but not overstuffed to the point of stretching the yarn.
- Round 13: *Sc in the next sc, dec in the next sc*; repeat from * to * around. (12 stitches)
- Round 14: Dec around. (6 stitches)
- Finishing: Fasten off, leaving a long tail (about 12 inches). Thread the tail onto a yarn needle. Weave the needle through the front loops of the remaining 6 stitches and pull tight to close the hole. Secure the yarn and hide the tail inside the head.
Beard (White)
This fluffy beard is crocheted separately and sewn onto the head. It’s worked in a flat circle to create a nice, full shape.
- Round 1: With white yarn, create a magic ring. Work 6 sc into the ring. (6 stitches)
- Round 2: Inc in each sc around. (12 stitches)
- Round 3: *Sc in the next sc, inc in the next sc*; repeat from * to * around. (18 stitches)
- Round 4: *Sc in the next 2 sc, inc in the next sc*; repeat from * to * around. (24 stitches)
- Rounds 5-7: Sc in each sc around. (24 stitches) This adds depth to the beard.
- Round 8: *Sc in the next 2 sc, dec in the next sc*; repeat from * to * around. (18 stitches)
- Round 9: *Sc in the next sc, dec in the next sc*; repeat from * to * around. (12 stitches)
- Finishing: Fasten off, leaving a long tail for sewing. Stuff the beard lightly with fiberfill to give it a soft, puffy look.
Hat (Red)
Santa’s iconic hat is a simple cone shape that gets sewn on at a jaunty angle.
- Round 1: Create a magic ring with red yarn. Work 6 sc into the ring. (6 stitches)
- Round 2: Inc in each sc around. (12 stitches)
- Round 3: *Sc in the next sc, inc in the next sc*; repeat from * to * around. (18 stitches)
- Rounds 4-6: Sc in each sc around. (18 stitches)
- Round 7: *Sc in the next 2 sc, dec in the next sc*; repeat from * to * around. (12 stitches)
- Rounds 8-9: Sc in each sc around. (12 stitches)
- Round 10: *Sc in the next sc, dec in the next sc*; repeat from * to * around. (8 stitches)
- Rounds 11-12: Sc in each sc around. (8 stitches)
- Finishing: Fasten off, leaving a long tail. Stuff the hat lightly. Sew the hat onto the top of the head, positioning it slightly angled to one side for that classic Santa look.
Pom-pom (White)
You have two options for the pom-pom: a traditional yarn pom-pom or a tiny crocheted ball. Both look great!
- Option 1 (Traditional): Wrap white yarn around your fingers several times, tie tightly in the middle, and cut the loops. Trim into a neat ball. Sew securely to the tip of the hat.
- Option 2 (Crocheted): Magic ring, 6 sc. Inc to 12. Work 2 rounds of 12 sc. Dec to 6. Close and sew to the hat tip.
Eyes (Black)
Using black yarn and a yarn needle, embroider two French knots or small satin stitches onto the head. Position them about 4 rounds above the beard attachment line, spaced 4 stitches apart. Make sure they are level for a friendly expression.
Nose (Red)
This tiny ball gives Santa his character.
- With red yarn, make a small ball: magic ring, 6 sc. Inc to 12. Work 1 round of 12 sc. Dec to 6. Close.
- Sew the nose onto the face between the eyes, slightly overlapping the top edge of the beard.
Candy Cane Holder Loop (White)
This is the special feature that makes this ornament unique!
- With white yarn, chain 12 stitches.
- Slip stitch to the first chain to form a loop.
- Attach the loop to the top of the hat (just under the pom-pom) by sewing the ends securely. This loop is designed to hold a candy cane.
Assembly
Now it’s time to bring Santa together.
- Sew the beard onto the lower half of the head, covering the bottom edge. Ensure the beard is centered and fluffy. Use the long tail you left earlier and weave it through the head for a secure hold.
- Weave in all remaining ends neatly with your yarn needle.
Finishing Touches
Your ornament is almost ready!
- Optional Hanging Loop: If you want to hang this directly on your tree without a candy cane, add a small hanging loop of red yarn at the top of the hat. Simply chain 10, attach to the top, and secure.
- The Final Touch: Slide a classic peppermint candy cane through the white loop for a festive holder. The red and white stripes will perfectly complement your handmade Santa!
And there you have it—a delightful, huggable Crochet Santa Ornament that’s ready to spread holiday cheer. This pattern is perfect for using up scrap yarn and makes a wonderful handmade gift for friends, family, or coworkers. Happy crocheting, and have a very merry holiday season!


