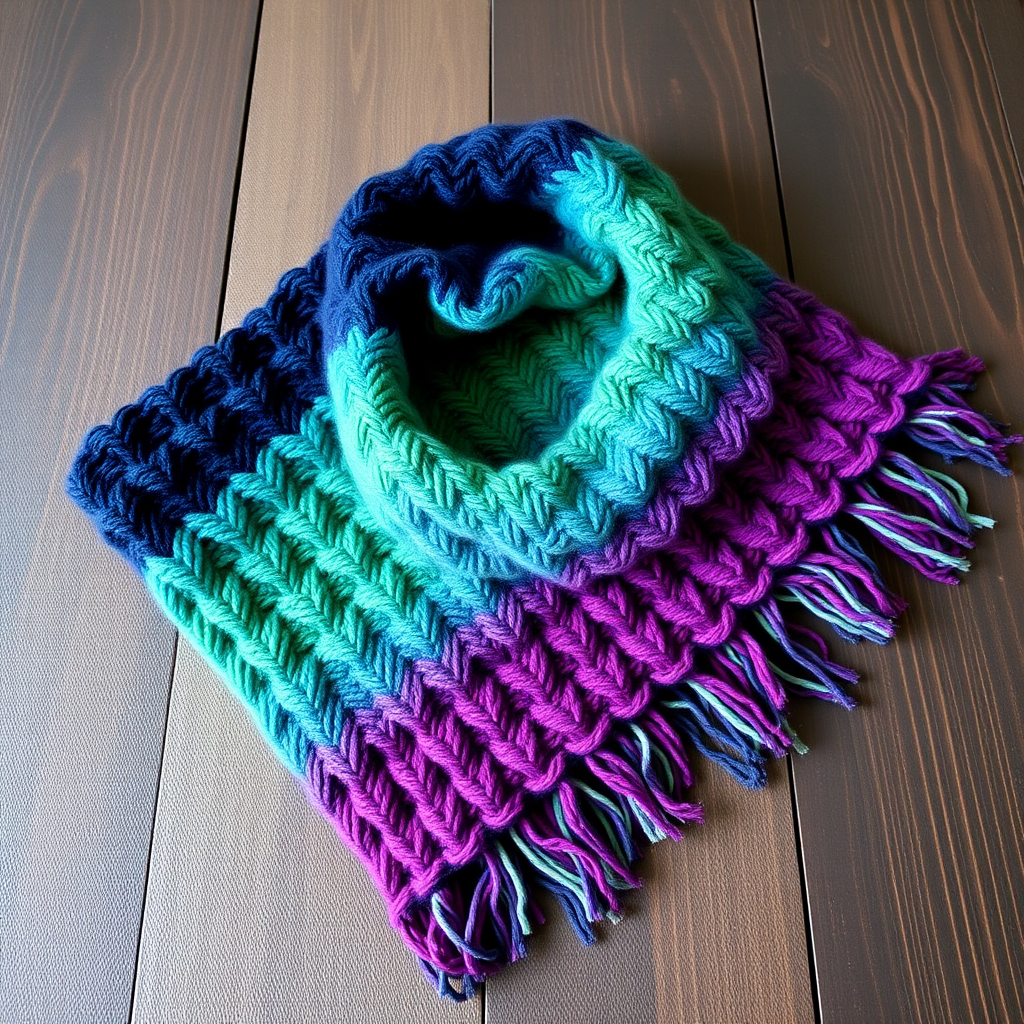
Dune Drift Ombre Pocket Scarf Free Pattern – A Knitted Desert Gradient Wrap

Dune Drift Ombre Pocket Scarf Free Pattern – A Knitted Desert Gradient Wrap
Wrap yourself in the shifting sands of a desert sunset with this stunning gradient pocket scarf. Knitted in a soothing ombre of terracotta, blush, and cream, this scarf is as functional as it is beautiful. The hidden pockets keep your hands cozy on chilly walks, while the textured seed stitch center adds a modern, sculptural feel that elevates any winter outfit.
This pattern is perfect for intermediate knitters looking to expand their skills, but beginners who are comfortable with basic knit and purl stitches will also find it achievable. The ombre effect is created by simply switching yarn colors at intervals, making it an approachable project that yields a professional-looking result. Let's dive into creating this cozy, minimalist accessory that measures approximately 8 inches wide and 60 inches long.
Materials Needed
Before you begin, gather the following supplies:
- Yarn: Worsted weight yarn in 3 shades:
- Color A (terracotta) – approx. 220 yards
- Color B (blush) – approx. 220 yards
- Color C (cream) – approx. 220 yards
- Needles: US 8 (5 mm) knitting needles
- Notions: Tapestry needle for weaving in ends, stitch holders (or scrap yarn) for pocket openings
- Gauge: 18 stitches x 24 rows = 4 inches in stockinette stitch (for reference; exact gauge is not critical for this scarf)
Tip: Choose yarns with similar fiber content and weight to ensure consistent drape and texture across the color transitions.
Abbreviations
- CO: Cast on
- K: Knit
- P: Purl
- St(s): Stitch(es)
- K2tog: Knit two together
- Sl: Slip
- Psso: Pass slipped stitch over
Step-by-Step Instructions
This scarf is worked flat in one piece, with pockets created by knitting separate pocket linings and attaching them. The ombre effect is achieved by gradually transitioning from color A to B to C over the length of the scarf. Follow these detailed instructions carefully, and you'll have a beautiful, functional scarf in no time.
Main Scarf (Worked in One Piece)
Step 1: Cast On and Garter Border
With Color A, CO 40 stitches.
Rows 1-4: K all stitches (this creates a garter stitch border at the bottom edge).
Step 2: Establish the Seed Stitch Pattern
Row 5: K4, P32, K4 (this sets up the garter stitch borders on each side with a purl row in the center).
Rows 6-10: K4, *K1, P1* repeat from * to * until 4 stitches remain, K4. (This creates the seed stitch center panel.)
Row 11: K4, P32, K4.
Row 12: K4, *P1, K1* repeat from * to * until 4 stitches remain, K4. (This alternates the seed stitch pattern.)
Step 3: Repeat the Pattern
Repeat Rows 5-12 for the first 12 inches using Color A. The seed stitch will create a beautiful, bumpy texture that contrasts nicely with the smooth garter stitch borders.
Step 4: Transition to Color B
After completing 12 inches in Color A, switch to Color B. Continue in the same pattern (Rows 5-12 repeated) for the next 12 inches. Don't worry about weaving in ends yet – you'll do that at the end.
Step 5: Transition to Color C
After 24 inches total (12 in A, 12 in B), switch to Color C. Continue in the pattern for 6 inches. You should now have 30 inches of scarf total.
Creating the First Pocket Opening
Step 6: Set Up the Pocket Opening
On the next row (right side), work as follows:
Row 1: K4, work in seed stitch over the next 12 stitches, place the next 12 stitches on a stitch holder (these will form the pocket opening), continue in seed stitch over the next 8 stitches, K4. You will now have 28 stitches on your needle and 12 on the holder.
Step 7: Close the Gap
Row 2: K4, work in seed stitch over the next 8 stitches, CO 12 stitches (over the gap where the holder is), work in seed stitch over the next 12 stitches, K4. You are back to 40 stitches on the needle.
Step 8: Continue in Pattern
Continue in the established seed stitch pattern for another 6 inches in Color C. This section will be the middle of your scarf.
Creating the Second Pocket Opening
Step 9: Mirror the Pocket Placement
Now you'll create the second pocket opening on the opposite side. On the next row (right side), work as follows:
Row 1: K4, work in seed stitch over the next 8 stitches, place the next 12 stitches on a stitch holder, continue in seed stitch over the next 12 stitches, K4. (You have 28 stitches on the needle, 12 on the holder.)
Step 10: Close the Gap Again
Row 2: K4, work in seed stitch over the next 12 stitches, CO 12 stitches, work in seed stitch over the next 8 stitches, K4. (Back to 40 stitches.)
Step 11: Finish the Scarf Body
Continue in the established pattern for the final 6 inches of Color C. Then work 4 rows of garter stitch (K all stitches) and bind off loosely. This creates a clean, finished edge that matches the bottom of the scarf.
Pocket Linings (Make 2)
Step 12: Pick Up Stitches
With Color C, carefully pick up the 12 stitches from the first stitch holder onto your knitting needle.
Step 13: Knit the Lining
Work in stockinette stitch (K on right side, P on wrong side) for 6 inches. Bind off loosely. Repeat this process for the second pocket holder.
Step 14: Attach the Linings
Fold each lining to the inside of the scarf. Using your tapestry needle and matching yarn, sew the sides and bottom edge of the lining to the inside of the scarf, creating a secure, hidden pocket. Make sure the opening aligns perfectly with the gap you created in the scarf body.
Finishing Touches
Step 15: Weave in All Ends
Using your tapestry needle, carefully weave in all loose ends from color changes and bind-offs. Be sure to weave them in securely so they don't unravel with wear.
Step 16: Block Gently
Block the scarf gently to shape. Lay it flat on a towel, mist with water, and gently stretch to the desired dimensions. Allow it to dry completely before wearing. This will even out the stitches and give your scarf a professional, polished look.
Tips for Success
- Keep your tension consistent – especially when switching colors. This ensures the ombre transition looks smooth and seamless.
- Use stitch markers to mark the 4-stitch garter borders if you find it helpful to keep track of the pattern.
- Count your stitches regularly – especially after creating the pocket openings – to ensure you maintain 40 stitches throughout.
- Choose soft, cozy yarn – since this scarf will be around your neck, pick a yarn that feels comfortable against the skin.
Your Dune Drift Ombre Pocket Scarf is now complete! This modern, minimalist accessory makes a wonderful gift or a treat for yourself. The hidden pockets are perfect for keeping hands warm on brisk days, and the gradient colors evoke the serene beauty of a desert sunset. Enjoy your new favorite scarf!