Ember & Ash Reversible Double Knot Scarf Free Pattern – A Knitted Twilight Weave
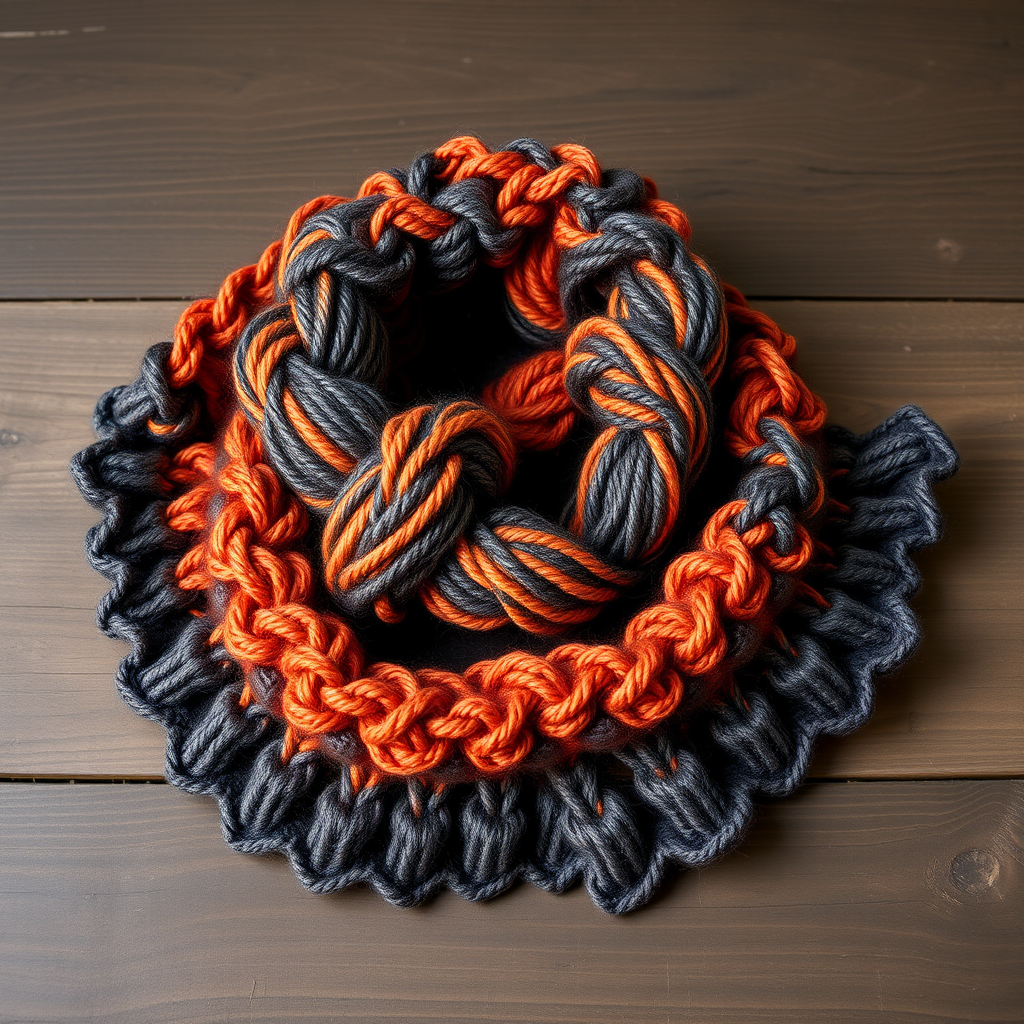
Ember & Ash Reversible Double Knot Scarf Free Pattern – A Knitted Twilight Weave
Wrap yourself in the cozy embrace of the Ember & Ash Reversible Double Knot Scarf, a richly textured knit that captures the quiet drama of a fading sunset. This pattern weaves warm ember orange and deep charcoal into a reversible knot motif, perfect for adding a handcrafted touch to any autumn wardrobe. Whether you're a seasoned knitter looking for a meditative project or a confident beginner ready to tackle textured colorwork, this scarf delivers stunning, professional-looking results. The reversible nature means you get two beautiful looks in one accessory—a true wardrobe workhorse for the cooler months.
This free knitting pattern is designed to be both engaging and achievable. The double-knit technique creates a dense, warm fabric with a fascinating geometric pattern that appears on both sides, with the colors beautifully reversed. The raised knot texture is not only visually appealing but also incredibly satisfying to create. Let's dive into the materials and steps to bring this twilight-inspired scarf to life.
Materials Needed
Before you begin, gather the following supplies. Using the specified yarn weight and needle size is crucial to achieving the correct gauge and the plush, defined texture of the knots.
- Yarn: Worsted weight yarn in two colors:
- Color A (Ember Orange): 220 yards
- Color B (Charcoal Gray): 220 yards
- Needles: US 8 (5.0 mm) knitting needles (straight or circular for ease). A circular needle can be helpful for managing the large number of stitches, but straight needles work perfectly fine.
- Notions: Tapestry needle for weaving in ends, scissors, and a tape measure.
- Gauge: 18 stitches and 24 rows = 4 inches in stockinette stitch (after blocking). Always take time to check your gauge to ensure your scarf matches the finished dimensions.
Step-by-Step Instructions
This pattern is worked flat in one piece. The key to the reversible effect is the careful alternation of knit and purl stitches with your two colors. Don't worry if it feels a bit complex at first—the pattern is a simple repeat once you get into the rhythm.
Finished Dimensions & Abbreviations
Finished Dimensions: Approximately 8 inches wide and 60 inches long (adjustable by repeating pattern rows).
Abbreviations:
- CO: cast on
- K: knit
- P: purl
- K2tog: knit two stitches together
- P2tog: purl two stitches together
- Sl: slip stitch purlwise
- Rep: repeat
- St(s): stitch(es)
Pattern Notes
- The scarf is worked flat in one piece, using two colors to create a reversible double-knit effect. The knot motif appears on both sides, with colors reversed.
- Carrying Yarn: Carry the unused yarn loosely up the side edge, twisting it every few rows to prevent long floats. This keeps your edges neat and your yarn tangle-free.
- The pattern is a multiple of 12 stitches + 2 edge stitches. Our cast-on of 38 stitches follows this rule (12 x 3 = 36 + 2 = 38).
Getting Started: Cast On & Set-Up Rows
CO: With Color A, CO 38 sts (multiple of 12 + 2).
Set-up Rows (worked with both colors):
- Row 1 (RS): With Color A, K all sts.
- Row 2 (WS): With Color B, P all sts.
These two rows establish the base fabric and prepare for the pattern repeat. Remember to always bring the new color up from underneath the previous one to avoid holes.
The Pattern Repeat (Rows 3–16)
This is the heart of the pattern. Repeat these 14 rows until your scarf measures approximately 58 inches from the cast-on edge, ending with Row 16 (WS). Let's break it down step-by-step.
Row 3 (RS): With Color A, K1 (edge), *K2, P2, K2, P2, K2, P2*; rep from * to * across, ending with K1 (edge).
Row 4 (WS): With Color B, P1 (edge), *P2, K2, P2, K2, P2, K2*; rep from * to * across, ending with P1 (edge).
Note: Rows 3 and 4 create the ribbed base that will frame the knots.
Row 5 (RS): With Color A, K1 (edge), *K2tog, K2, P2, K2, P2, K2tog*; rep from * to * across, ending with K1 (edge). (Note: This row begins the knot shaping by decreasing at the edges of the motif.)
Row 6 (WS): With Color B, P1 (edge), *P2tog, P2, K2, P2, K2, P2tog*; rep from * to * across, ending with P1 (edge).
You will notice the stitch count temporarily decreases on these rows. This is intentional and creates the gathered effect of the knot.
Row 7 (RS): With Color A, K1 (edge), *K1, P2, K2, P2, K2, P1*; rep from * to * across, ending with K1 (edge).
Row 8 (WS): With Color B, P1 (edge), *P1, K2, P2, K2, P2, K1*; rep from * to * across, ending with P1 (edge).
Row 9 (RS): With Color A, K1 (edge), *K2, P2, K2, P2, K2, P2*; rep from * to * across, ending with K1 (edge).
Row 10 (WS): With Color B, P1 (edge), *P2, K2, P2, K2, P2, K2*; rep from * to * across, ending with P1 (edge).
Row 11 (RS): With Color A, K1 (edge), *K2, P2, K2tog, K2, P2, K2*; rep from * to * across, ending with K1 (edge). (Knot twist begins.)
Row 12 (WS): With Color B, P1 (edge), *P2, K2, P2tog, P2, K2, P2*; rep from * to * across, ending with P1 (edge).
This second decrease in the center of the motif is what creates the distinct "twist" or knot shape.
Row 13 (RS): With Color A, K1 (edge), *K2, P2, K1, P2, K2, P2*; rep from * to * across, ending with K1 (edge).
Row 14 (WS): With Color B, P1 (edge), *P2, K2, P1, K2, P2, K2*; rep from * to * across, ending with P1 (edge).
Row 15 (RS): With Color A, K1 (edge), *K2, P2, K2, P2, K2, P2*; rep from * to * across, ending with K1 (edge).
Row 16 (WS): With Color B, P1 (edge), *P2, K2, P2, K2, P2, K2*; rep from * to * across, ending with P1 (edge).
Rows 15 and 16 restore the original stitch count and complete the knot motif. The decreases from Rows 5-6 and 11-12 are now hidden within the plush fabric.
Continue repeating Rows 3 through 16 until your scarf reaches your desired length. Remember to end on a Row 16 (WS) to ensure your finishing rows are worked on the correct side.
Finishing Rows & Bind Off
Once your scarf is the desired length, it's time to finish off.
- Row 17 (RS): With Color A, K all sts.
- Row 18 (WS): With Color B, P all sts.
Bind off: With Color A, bind off all sts knitwise on the RS. Weave in all ends using a tapestry needle. Block gently to even out the knot texture and relax the yarn.
Your Ember & Ash Reversible Double Knot Scarf is complete! The blocking process is especially important for this pattern, as it helps the knots to lay flat and the edges to appear more polished. Lay it flat on a towel, pin it to the desired dimensions, and mist with water until damp. Allow it to dry completely before wearing.
This scarf is a beautiful, functional piece of art that you'll be proud to wear or gift. The combination of the ember orange and charcoal gray creates a sophisticated, autumnal palette that pairs beautifully with denim, wool coats, and chunky sweaters. Happy knitting!