Emberfall Twisted Cowl Free Pattern – Crochet a Cozy Autumn Wrap
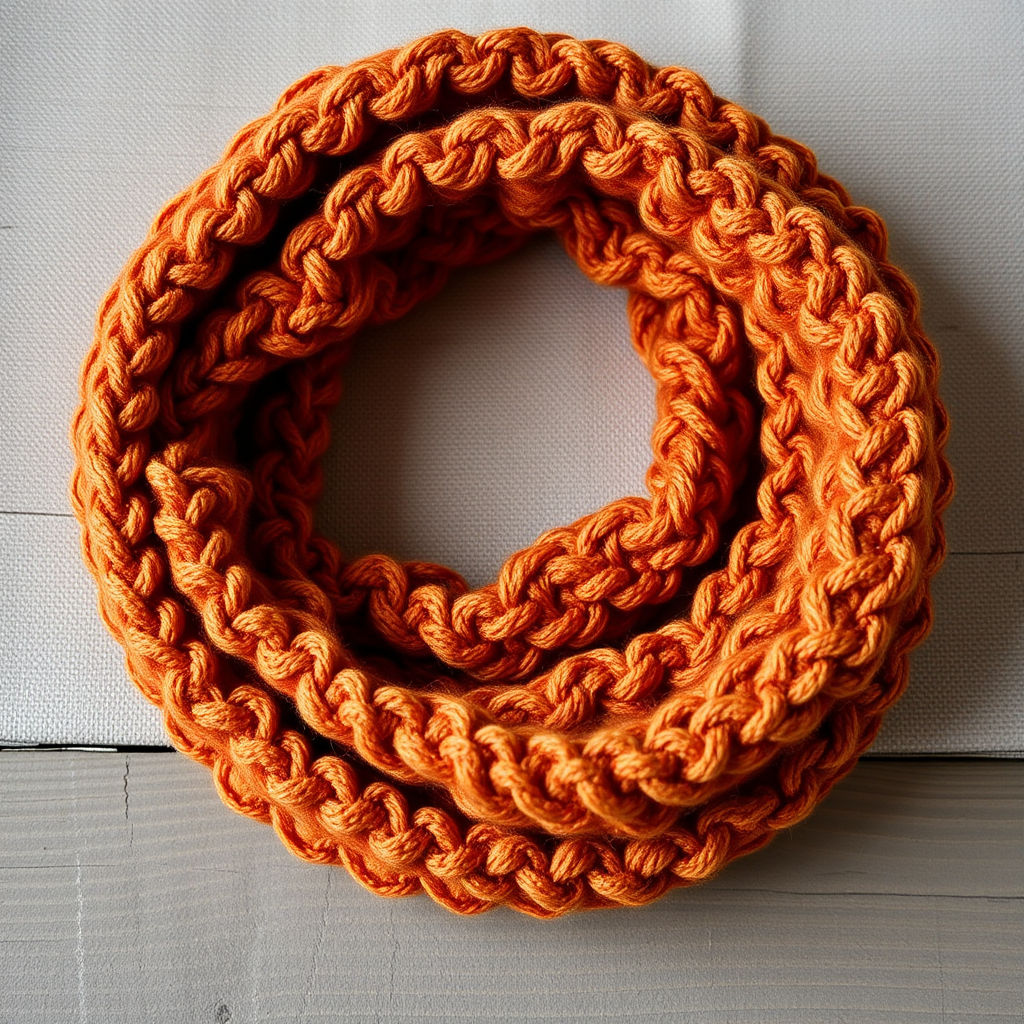
Emberfall Twisted Cowl Free Pattern – Crochet a Cozy Autumn Wrap
Wrap yourself in the warm hues of a crackling fire with this uniquely twisted crochet cowl, featuring a rich gradient of burnt orange, deep rust, and golden amber. The clever spiral construction creates a stunning, sculptural drape that's both modern and timeless. This free pattern is perfect for intermediate beginners looking to add a statement piece to their autumn wardrobe. The chunky yarn works up quickly, making it a satisfying weekend project that yields a luxurious, cozy accessory.
Materials Needed
Before you begin, gather the following supplies. This project is designed to be simple and requires minimal tools, making it an excellent choice for a portable project.
- Yarn: Lion Brand Wool-Ease Thick & Quick (or any super bulky weight yarn, approx. 180-220 yards). The sample uses a variegated autumn colorway, but any super bulky yarn will work beautifully.
- Crochet Hook: US Size N/P (10 mm) crochet hook. Ensure you have a comfortable grip, as you'll be working with a larger hook.
- Stitch Marker: Essential for tracking the start of each round, especially during the twist rounds.
- Yarn Needle: For weaving in ends securely at the finish.
- Scissors: For cutting yarn.
Gauge: 8 double crochet stitches x 5 rows = 4 inches (10 cm) in standard dc. While gauge is important for fit, this cowl is forgiving. If your gauge is slightly off, the cowl will simply be a bit looser or snugger, which is fine for a neck warmer.
Step-by-Step Instructions
This cowl is worked in a continuous spiral, creating a natural twist. Use a stitch marker to track the start of each round. The key to this design is the twist rounds, which give the cowl its signature sculptural look. Follow along carefully, and you'll have a beautiful, twisted cowl in no time.
Foundation and First Rounds
Foundation: Chain 60. Join with a slip stitch to form a ring, being careful not to twist the chain. This is crucial—lay the chain flat and ensure it isn't twisted before joining.
Round 1: Chain 2 (counts as first dc), work 1 dc in each chain around. Join with a slip stitch to the top of the beginning chain-2. (60 dc)
Round 2: Chain 2, work 1 dc in each dc around. Join with a slip stitch. (60 dc)
Round 3: Chain 2, work 1 dc in each dc around. Join with a slip stitch. (60 dc)
Creating the First Twist
Round 4 (Twist Round): This is where the magic happens. Chain 2, work 1 dc in each of the next 29 dc. Now, fold the work in half so the two ends meet, creating a loop. Insert your hook through the next dc (which is the 30th dc of the round) AND simultaneously through the first dc of the round (the one at the base of the chain-2). Work 1 dc through both stitches together. Continue working 1 dc in each of the remaining 29 dc, but when you reach the last dc of the round, work it together with the dc that was skipped at the beginning (the one after the chain-2). Join with a slip stitch. (60 dc, but now the work has a permanent twist)
Pro Tip: This step might feel a bit awkward at first, but trust the process. The twist will become more defined as you continue. Ensure you're working through both loops of both stitches to create a secure join.
Continuing the Body
Rounds 5-12: Chain 2, work 1 dc in each dc around. Join with a slip stitch at the end of each round. (60 dc each round). These rounds are straightforward and will build the main body of the cowl. Keep your tension consistent for an even fabric.
Creating the Second Twist
Round 13 (Second Twist): Repeat the twist process from Round 4, but this time, fold the work in the opposite direction (creating a second twist). Work 1 dc in each of the next 29 dc, then work a dc through the 30th dc and the first dc of the round together. Continue with 1 dc in each remaining dc, joining the last dc with the skipped one. Join with a slip stitch. (60 dc)
Note: Folding in the opposite direction means if you folded the right side over the left in Round 4, now fold the left side over the right. This creates a beautiful, symmetrical twist pattern.
Final Rounds and Finishing
Rounds 14-20: Chain 2, work 1 dc in each dc around. Join with a slip stitch at the end of each round. (60 dc each round). These final rounds complete the cowl, giving it a polished, finished look.
Finishing: Fasten off, leaving a long tail. Weave in all ends securely using your yarn needle. Block lightly to even out the stitches and enhance the drape. To block, simply wet the cowl, gently squeeze out excess water, and lay it flat to dry, shaping it as desired.
Wearing Your Cowl
This cowl is incredibly versatile. Wear it doubled for extra warmth and a snug fit, or let it hang loose for a more relaxed, bohemian look. The twist creates a natural fold that sits beautifully against the neck, and the chunky yarn provides both warmth and style. It makes a wonderful gift for friends and family, especially during the cooler months.
We hope you enjoy crocheting this Emberfall Twisted Cowl as much as we enjoyed designing it. The combination of the rich, autumnal colors and the unique twisted construction makes this a standout piece in any wardrobe. Happy crocheting!


