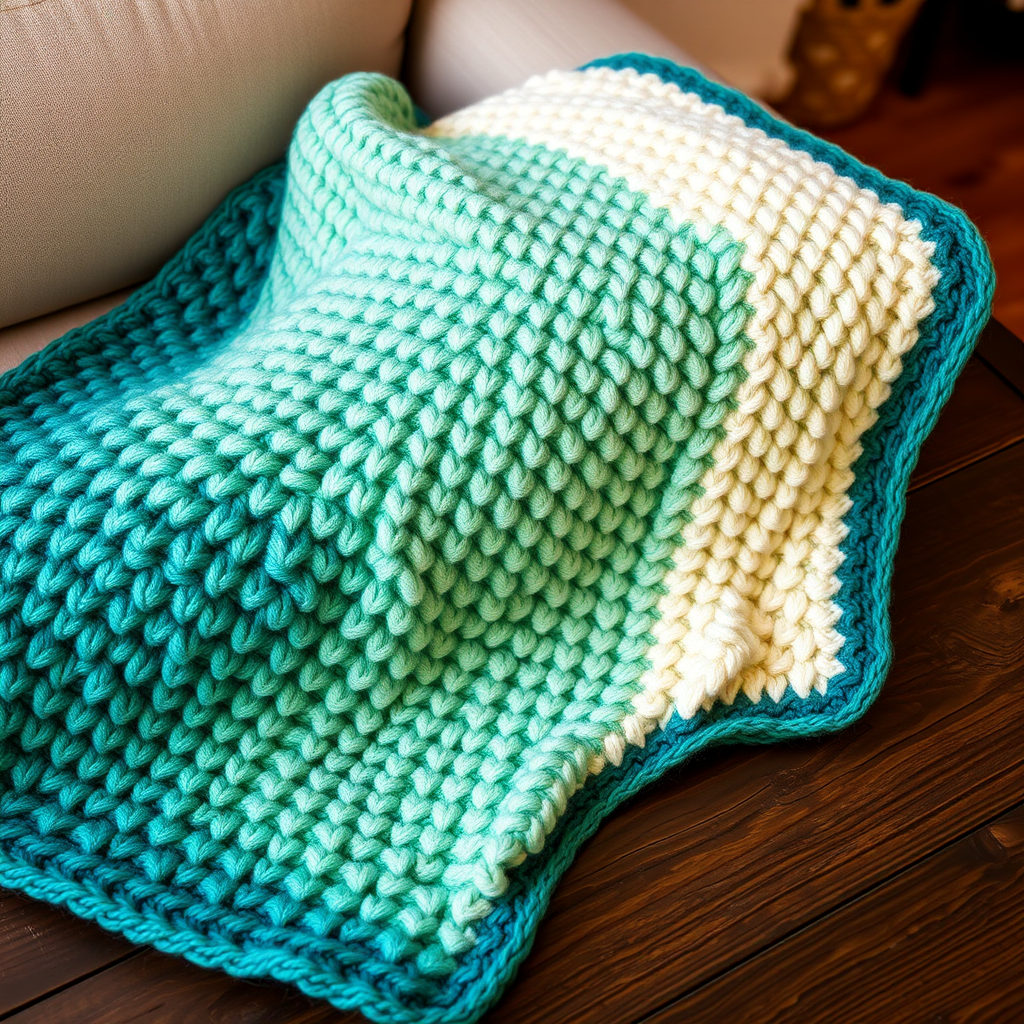
Emberfall Woven Ridge Blanket Free Pattern

Introducing the Emberfall Woven Ridge Blanket
As the leaves begin to turn and the air carries that familiar crispness, there's nothing quite like wrapping yourself in something handmade and warm. I'm absolutely thrilled to share the Emberfall Woven Ridge Blanket—a pattern that captures the very essence of autumn in every stitch. This isn't just another chunky blanket; it's a study in texture, featuring a unique woven ridge stitch that creates a fabric reminiscent of layered forest floors and handwoven baskets. The dense, reversible material is both modern and timeless, making it a stunning statement piece for your living room or a heartfelt gift for someone special.
What I love most about this design is its deceptive simplicity. Using super bulky yarn and a simple two-row repeat, you'll create a deeply tactile, professional-looking piece that feels like a high-end boutique find. The pattern is forgiving, meditative, and perfect for those cozy evenings when you want your knitting to feel like a warm hug. Let's dive into how you can bring this beautiful blanket to life.
Materials Needed
Before we cast on, let's gather our supplies. This project is wonderfully straightforward, requiring minimal tools for maximum impact. Here's what you'll need to get started:
- Yarn: Super bulky weight yarn (size 6), approximately 1200 yards. The sample shown uses a gorgeous gradient of burnt orange, deep rust, and warm cream, but solid colors or variegated yarns will also look stunning.
- Needles: US 13 (9 mm) knitting needles. A circular needle (at least 32 inches long) is recommended to hold the weight of the blanket comfortably, but straight needles work fine too.
- Gauge: 8 stitches and 12 rows = 4 inches in woven ridge stitch (after blocking). Gauge is crucial for achieving the correct dimensions, so take a moment to swatch!
- Extras: Tapestry needle for weaving in ends, scissors, and blocking mats or towels.
Step-by-Step Instructions
Now, let's get to the fun part! This pattern is broken down into manageable sections. The woven ridge stitch is created with a clever combination of slipped stitches, yarn overs, and decreases. Don't be intimidated—once you get into the rhythm, it's incredibly intuitive.
Getting Started: Cast On & Border
Finished Size: Approximately 45 inches wide x 60 inches long (adjustable by changing cast-on and row counts).
Abbreviations:
- K = knit
- P = purl
- Sl = slip stitch purlwise with yarn in front
- Yo = yarn over
- K2tog = knit two stitches together
- Rep = repeat
Pattern Notes:
- The woven ridge stitch creates a dense, reversible fabric with a beautiful woven look.
- Work all slipped stitches with yarn in front to create the ridge effect.
- Blocking is essential to even out the stitches and enhance the drape.
Cast On:
Loosely cast on 90 stitches using the long-tail method. The loose cast-on is vital here—it ensures your edges have the same stretch and give as the dense body of the blanket.
Border (Garter Stitch):
Rows 1-6: Knit all stitches. This creates a flat, sturdy border that will frame your textured fabric beautifully.
The Main Pattern: Woven Ridge Stitch
This is where the magic happens. You'll be working a 4-row repeat that builds the stunning woven texture. Pay close attention to the placement of the slipped stitches and yarn overs—they work together to create the interlocking ridges.
Row 1 (Right Side): K3 (border), *Sl 1 wyif, K1, Yo, K2tog* repeat from * to * until last 3 stitches, K3.
Tip: The "Sl 1 wyif" (slip with yarn in front) is what creates the horizontal bar that forms the ridge. Keep the yarn tension relaxed when slipping.
Row 2 (Wrong Side): K3, *P1, K1, P1* repeat from * to * until last 3 stitches, K3.
This row purls the slipped stitch from the previous row, locking the ridge in place.
Row 3: K3, *K1, Sl 1 wyif, K1, Yo, K2tog* repeat from * to * until last 3 stitches, K3.
Notice how this row is offset by one stitch from Row 1. This staggering is what creates the woven, basket-like appearance.
Row 4: K3, *K1, P1, K1* repeat from * to * until last 3 stitches, K3.
Repeat Rows 1-4 until the blanket measures approximately 58 inches from the cast-on edge, ending with a Row 4. This ensures your pattern is complete before you begin the final border.
Finishing Touches: Border & Bind Off
Once your main body reaches the desired length, it's time to mirror the beginning with a clean, finished edge.
Border (Garter Stitch):
Rows 1-6: Knit all stitches.
Bind Off:
Loosely bind off all stitches in knit. Again, keep this loose to match the flexibility of your cast-on edge. A tight bind-off will cause the blanket to pucker at the ends.
Blocking: The Final Step for Perfection
Don't skip this step! Blocking transforms your knitting from a bunch of squished stitches into a beautifully draped, professional-looking blanket.
Instructions:
Weave in all ends using your tapestry needle. Soak the blanket in lukewarm water with a gentle wool wash for 20 minutes. Gently squeeze out excess water—do not wring or twist, as this can felt the yarn. Lay flat on a clean towel, roll it up to remove more water, then unroll and shape to your desired dimensions. Allow to dry completely. This process relaxes the yarn and truly showcases the woven texture, making the ridges pop and the fabric feel buttery soft.
And there you have it—your very own Emberfall Woven Ridge Blanket! This project is a joy to knit and an even greater joy to snuggle under. I'd love to see your finished creations, so be sure to share your photos and tag me. Happy knitting!