Misty Meadow Capelet Free Crochet Pattern

Misty Meadow Capelet Free Crochet Pattern
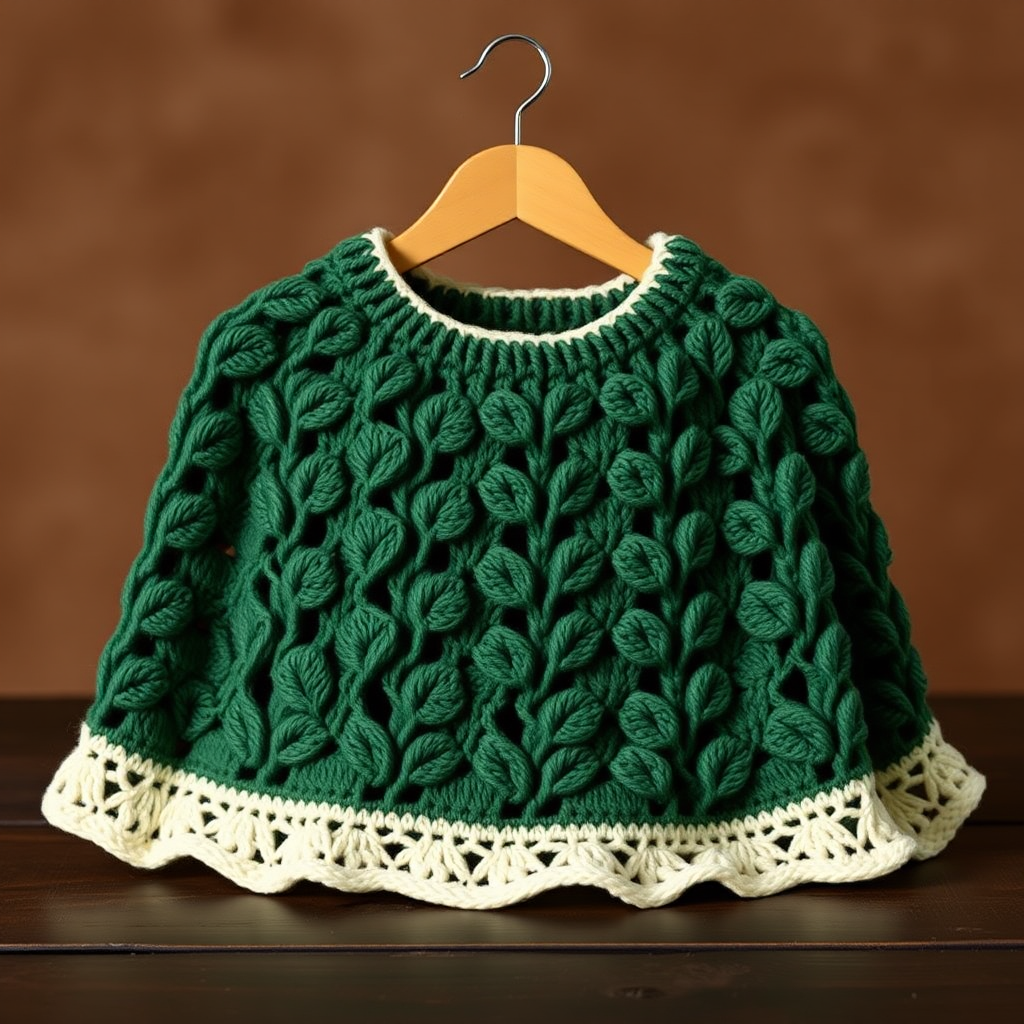
Wrap yourself in the soft, textured embrace of the Misty Meadow Capelet—a modern twist on a classic silhouette that combines cozy comfort with effortless style. This bulky-weight crochet project works up quickly with a simple, rhythmic stitch repeat, creating a dense, drapey layer that's perfect for cool evenings, outdoor gatherings, or simply curling up with a good book. Designed with beginners in mind, this pattern uses basic stitches and a repetitive V-stitch motif to produce a stunning vertical ribbed texture that flares gently from the neckline into an elegant A-line shape. Whether you choose a heathered grey-blue to mimic a misty morning sky or a warm oatmeal for a rustic feel, this capelet is sure to become a beloved addition to your handmade wardrobe.
With no sleeves and an open-front design, the Misty Meadow Capelet sits beautifully on the shoulders, offering just the right amount of warmth without restricting movement. The pattern is worked in the round from the neckline down, making it a seamless, meditative project that you can complete in a weekend. Let's dive into the details and create this stunning accessory together!
Materials Needed
Before you begin, gather the following supplies to ensure a smooth and enjoyable crochet experience:
- Yarn: Bulky/Chunky Weight Yarn (Category 5), approximately 350–500 yards depending on your chosen size. Suggested options include:
- Lion Brand Wool-Ease Thick & Quick in "Misty" (a heathered grey-blue) for a soft, atmospheric look.
- Lion Brand Wool-Ease Thick & Quick in "Linen" (a warm oatmeal) for a neutral, earthy tone.
- Crochet Hook: US Size L/11 (8.0 mm) hook, or the size needed to obtain the correct gauge. Adjust hook size if your tension differs.
- Yarn Needle: A tapestry or yarn needle for weaving in ends and finishing.
- Optional: A decorative button or brooch to secure the neckline, and blocking mats/pins if you wish to shape the capelet lightly.
Gauge
10 double crochet (dc) x 6 rows = 4 inches (10 cm) in the pattern stitch. Always make a gauge swatch before starting to ensure your finished capelet matches the intended dimensions. If your gauge is off, switch to a larger or smaller hook accordingly.
Size Options
This pattern includes four sizes, indicated in parentheses throughout the instructions: Small (Medium, Large, X-Large). The foundation chain and stitch counts are provided for each size, so choose the one that best fits your measurements. The capelet is designed to be slightly oversized and drapey, so when in doubt, size up for a more relaxed fit.
Step-by-Step Instructions
Follow these detailed instructions carefully. The capelet is worked from the neckline down in one continuous piece, so there's minimal seaming. Take your time, count your stitches regularly, and enjoy the rhythmic flow of the pattern.
Pattern Notes & Abbreviations
- ch: chain
- dc: double crochet
- sl st: slip stitch
- sc: single crochet
- st(s): stitch(es)
- sp: space
- V-stitch: (dc, ch 1, dc) all worked into the same stitch or space
Important Notes:
- The capelet is worked in joined rounds. Do not turn your work at the end of each round—continue in the same direction.
- The pattern is a multiple of 2 + 1 stitches. The foundation chain must be an even number to work correctly.
- Ch 3 at the beginning of each round counts as the first double crochet.
- When the pattern says "dc in next 2 dc," you are working into the tops of the stitches from the previous round, not into the chain spaces.
Foundation Row
Chain 56 (64, 72, 80) stitches loosely. This loose foundation is crucial for a comfortable neckline that isn't too tight. Join with a slip stitch to the first chain to form a ring, being extremely careful not to twist the chain. Place a stitch marker in the join to track the beginning of your rounds.
Round 1: Ch 3 (counts as first dc), work 1 dc into each chain around the ring. Join with a sl st to the top of the beginning ch-3. You should now have 56 (64, 72, 80) dc stitches in total. Count carefully to ensure accuracy.
Establishing the V-Stitch Pattern
Round 2: Ch 3 (counts as first dc), 1 dc in the next dc. *Ch 1, skip the next dc, 1 dc in each of the next 2 dc.* Repeat from * to * around the round, ending with ch 1, skip the last dc, and join with a sl st to the top of the beginning ch-3. At the end of this round, you will have 28 (32, 36, 40) V-stitch spaces (each space being the ch-1 gap between pairs of dc).
Round 3: Ch 3 (counts as first dc), 1 dc in the next dc. *Ch 1, skip the ch-1 space from the previous round, 1 dc in each of the next 2 dc.* Repeat from * to * around, ending with ch 1, skip the last ch-1 space, and join with a sl st to the top of the beginning ch-3. This round creates the vertical ribbed texture by working over the chain spaces.
Rounds 4–6: Repeat Round 3 three more times. This will give you a total of 6 rounds of the V-stitch pattern, creating a beautiful, defined ribbed neckline that sits snugly but comfortably.
First Increase Round
Round 7 (Increase Round): Ch 3 (counts as first dc), 1 dc in the next dc. *Ch 1, skip the ch-1 space, 1 dc in the next dc, ch 1, skip the next dc, 1 dc in the next dc.* Repeat from * to * around, ending with ch 1, skip the last ch-1 space, and join with a sl st to the top of the beginning ch-3. This round effectively doubles the number of dc stitches and creates additional ch-1 spaces, beginning the flare of the capelet. After this round, you will have 56 (64, 72, 80) dc stitches and 28 (32, 36, 40) ch-1 spaces.
Round 8: Ch 3 (counts as first dc), 1 dc in the next dc. *Ch 1, skip the ch-1 space, 1 dc in each of the next 2 dc.* Repeat from * to * around, ending with ch 1, skip the last ch-1 space, and join with a sl st to the top of the beginning ch-3. You are now back to the standard V-stitch pattern, but the spaces are wider apart due to the increase.
Working Even
Rounds 9–12: Repeat Round 3 for four rounds. This section works even without increases, allowing the capelet to grow downward in a straight, ribbed column. Maintain consistent tension to keep the fabric even.
Second Increase Round
Round 13 (Increase Round): Repeat Round 7 exactly. After this round, you will have 84 (96, 108, 120) dc stitches and 42 (48, 54, 60) ch-1 spaces. The capelet is now beginning to take on its characteristic A-line flare.
Rounds 14–18: Work Round 8 once, then repeat Round 3 for the remaining four rounds. This gives you five rounds of even work, allowing the increased width to settle into a smooth, drapey fabric.
Third Increase Round
Round 19 (Increase Round): Repeat Round 7 once more. After this round, you will have 112 (128, 144, 160) dc stitches and 56 (64, 72, 80) ch-1 spaces. The capelet is now significantly wider, creating a beautiful, sweeping flare.
Rounds 20–25: Work Round 8 once, then repeat Round 3 for the remaining five rounds. This gives you six rounds of even work to complete the body of the capelet. The fabric should now measure approximately 12–14 inches from the neckline, depending on your size and tension.
Edging
Final Round: Ch 1 (does not count as a stitch), work 1 single crochet (sc) into each dc and each ch-1 space around the entire bottom edge. This creates a neat, finished border that prevents curling and adds a polished look. Join with a sl st to the first sc.
Fasten off by cutting the yarn, leaving a 6-inch tail. Pull the tail through the loop on your hook and tighten gently.
Finishing Touches
Thread the yarn tail onto a yarn needle and weave it carefully through the stitches on the wrong side of the work to secure it. Repeat for any other loose ends from your starting chain or color changes. Trim any excess yarn close to the fabric.
Optional: To add a touch of elegance and functionality, sew a decorative button or attach a brooch at the neckline. This helps secure the capelet on your shoulders and adds a personalized flair. If you prefer a more structured shape, lightly block the capelet by wetting it, gently squeezing out excess water, and laying it flat to dry on blocking mats, pinning the edges to your desired dimensions.
Wear and Enjoy
Your Misty Meadow Capelet is now complete! Slip it over your shoulders and admire the beautiful vertical ribbing and graceful flare. This versatile piece pairs beautifully with jeans and a tee for a casual outing, or over a dress for a more polished look. The bulky yarn provides substantial warmth, making it an ideal layering piece for autumn and early spring.
Because the pattern is easily customizable, feel free to experiment with different yarn colors or add extra length by repeating the increase and even-work sections. You could also add fringe to the bottom edge for a bohemian vibe or work a few extra rounds of single crochet for a thicker border.
We hope you enjoyed crocheting the Misty Meadow Capelet! Share your finished creations online using the hashtag #MistyMeadowCapelet—we'd love to see your color choices and styling. Happy crocheting!