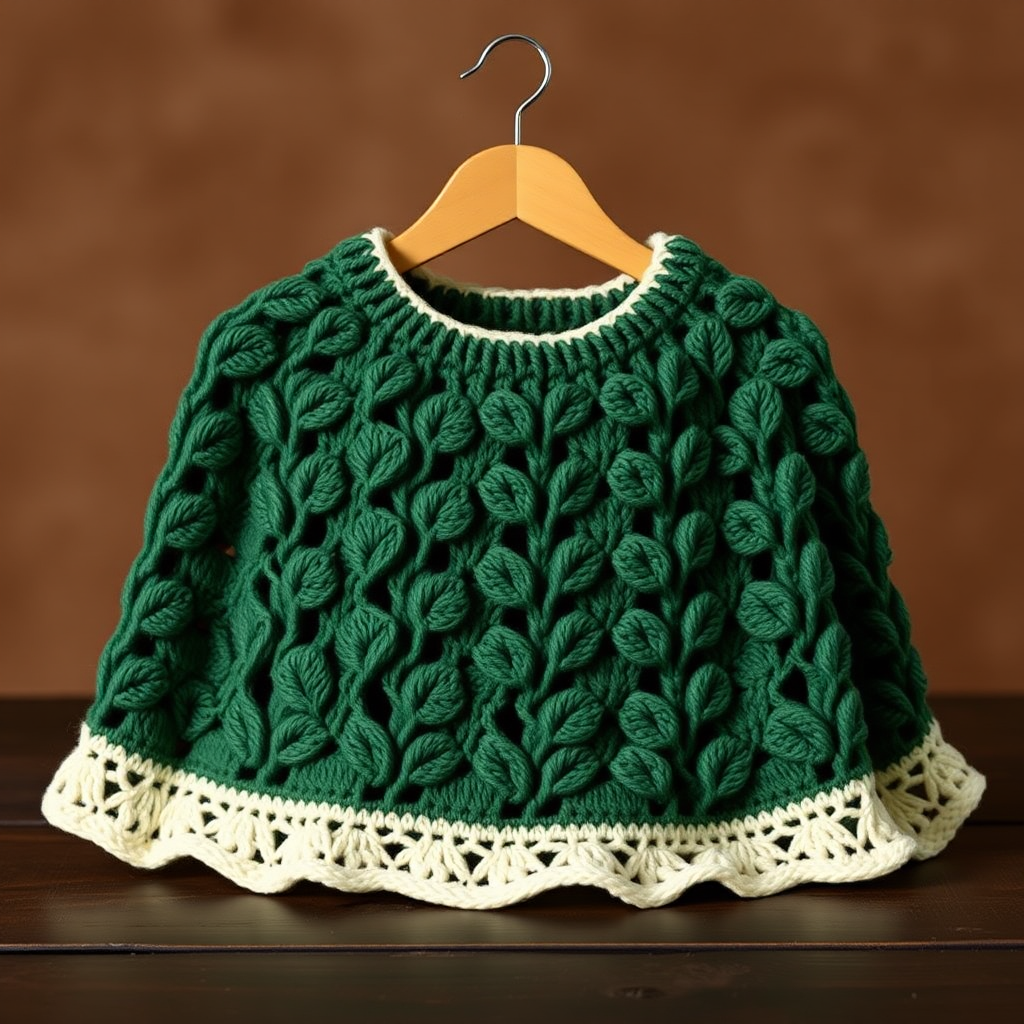
Gossamer Blossom Capelet Free Pattern – A Crocheted Lacy Flower Wrap

Gossamer Blossom Capelet Free Pattern – A Crocheted Lacy Flower Wrap
Wrap yourself in a cascade of delicate floral lace with this enchanting capelet, crafted from soft, breathable yarn. Its openwork petals and graceful drape make it a charming layering piece for spring evenings or special occasions. This pattern is perfect for intermediate crocheters looking to expand their skills, but with our detailed step-by-step instructions, even confident beginners can create this romantic masterpiece.
The Gossamer Blossom Capelet is worked from the top down in a single piece, starting with a foundation chain and then expanding outward with a repeating floral lace pattern. The result is a stunning, bell-shaped wrap that flares dramatically from a snug neckline to a scalloped, petal-like edge. The variegated yarn creates a beautiful gradient effect reminiscent of a sunset garden, making each capelet uniquely yours.
Materials Needed
Before you begin your crochet journey, gather these essential supplies:
- Yarn: Red Heart Unforgettable (or similar worsted weight yarn) in 'Tidal' or 'Poppy' – 2 skeins (approximately 590 yards). The variegated nature of this yarn creates the beautiful color transitions that make this capelet so special.
- Crochet Hook: US Size H/8 (5.0 mm) crochet hook. This hook size is crucial for achieving the correct gauge and drape.
- Yarn Needle: For weaving in ends and finishing touches.
- Optional: A small button or clasp for the neckline, blocking mats and pins for finishing.
Gauge: First 4 rounds of flower motif = 4 inches in diameter. Always check your gauge before starting to ensure your capelet turns out the right size.
Step-by-Step Instructions
This capelet is worked from the top down in a single piece, starting with a foundation chain and then expanding outward with a repeating floral lace pattern. Follow these instructions carefully, and you'll have a beautiful capelet in no time.
Foundation Row
Chain 60, join with slip stitch to form a ring. Ch 3 (counts as first dc), dc in each ch around, join with sl st to top of ch-3. (60 dc)
Pro tip: Make sure your foundation chain isn't twisted before joining. Place your work on a flat surface to verify it's lying straight.
Round 1: Creating the First Loop Layer
Ch 1, sc in same st, *ch 5, skip 2 dc, sc in next dc* repeat from * to * around, ending with ch 5, skip 2 dc, sl st to first sc. (20 ch-5 loops)
This round establishes the base loops that will become your first set of petals. Count carefully to ensure you have 20 loops.
Round 2: First Petal Set
Sl st into first ch-5 loop, ch 3, 4 dc in same loop, *ch 2, 5 dc in next ch-5 loop* repeat from * to * around, ending with ch 2, sl st to top of ch-3. (20 petals)
Each petal is formed by a cluster of 5 double crochets worked into the chain space. The ch-2 between petals creates the separation.
Round 3: Second Loop Layer
Sl st to next dc (2nd dc of petal), ch 1, sc in same dc, *ch 5, sc in 3rd dc of next petal* repeat from * to * around, ending with ch 5, sl st to first sc. (20 ch-5 loops)
Notice how you're working into the middle of each petal now, creating a staggered effect that gives the lace its organic feel.
Round 4: Larger Petals
Sl st into first ch-5 loop, ch 3, 6 dc in same loop, *ch 3, 7 dc in next ch-5 loop* repeat from * to * around, ending with ch 3, sl st to top of ch-3. (20 larger petals)
Your petals are growing! Each round adds more stitches to the clusters, making the capelet expand outward.
Round 5: Third Loop Layer
Sl st to next dc (2nd dc of petal), ch 1, sc in same dc, *ch 7, sc in 4th dc of next petal* repeat from * to * around, ending with ch 7, sl st to first sc. (20 ch-7 loops)
The chain spaces are getting longer, which creates the dramatic flare of the capelet.
Round 6: Large Petals
Sl st into first ch-7 loop, ch 3, 8 dc in same loop, *ch 4, 9 dc in next ch-7 loop* repeat from * to * around, ending with ch 4, sl st to top of ch-3. (20 large petals)
Round 7: Fourth Loop Layer
Sl st to next dc (2nd dc of petal), ch 1, sc in same dc, *ch 9, sc in 5th dc of next petal* repeat from * to * around, ending with ch 9, sl st to first sc. (20 ch-9 loops)
Round 8: Extra-Large Petals
Sl st into first ch-9 loop, ch 3, 10 dc in same loop, *ch 5, 11 dc in next ch-9 loop* repeat from * to * around, ending with ch 5, sl st to top of ch-3. (20 extra-large petals)
Round 9: Fifth Loop Layer
Sl st to next dc (2nd dc of petal), ch 1, sc in same dc, *ch 11, sc in 6th dc of next petal* repeat from * to * around, ending with ch 11, sl st to first sc. (20 ch-11 loops)
Round 10: Giant Petals
Sl st into first ch-11 loop, ch 3, 12 dc in same loop, *ch 6, 13 dc in next ch-11 loop* repeat from * to * around, ending with ch 6, sl st to top of ch-3. (20 giant petals)
Round 11: Sixth Loop Layer
Sl st to next dc (2nd dc of petal), ch 1, sc in same dc, *ch 13, sc in 7th dc of next petal* repeat from * to * around, ending with ch 13, sl st to first sc. (20 ch-13 loops)
Round 12: Final Petals
Sl st into first ch-13 loop, ch 3, 14 dc in same loop, *ch 7, 15 dc in next ch-13 loop* repeat from * to * around, ending with ch 7, sl st to top of ch-3. (20 final petals)
Congratulations! You've completed the main body of your capelet. The dramatic increase in petal size creates that beautiful bell shape.
Edging: The Finishing Touch
Ch 1, sc in same st, *ch 3, skip 2 dc, sc in next dc* repeat from * to * around each petal edge, working 1 sc in each ch-sp between petals, join with sl st to first sc. Fasten off and weave in ends.
This delicate picot-style edging adds a polished, professional finish to your capelet and helps the lace lay flat.
Finishing: Bringing It All Together
Fold the capelet so the foundation chain is at the top. Sew a small button or clasp at the neckline to secure, or simply let it drape open. Block gently to open up the lace pattern.
Blocking Instructions: Soak your finished capelet in lukewarm water with a drop of mild soap for 15-20 minutes. Gently squeeze out excess water (never wring!), roll in a towel to remove moisture, then lay flat on blocking mats. Pin out the petals to their full shape and allow to dry completely. This step is essential for showcasing the beautiful lacework.
Tips for Success
- Count your stitches after each round – it's much easier to fix a mistake early than to rip back several rounds.
- Use stitch markers to mark the beginning of each round if you find yourself losing your place.
- Keep your tension consistent – this is key to achieving the beautiful drape of the capelet.
- Don't rush the blocking process – it truly transforms the finished piece.
Your Gossamer Blossom Capelet is now complete! This stunning piece is perfect for spring weddings, garden parties, or any occasion that calls for a touch of romantic elegance. The openwork design makes it lightweight and breathable, while the dramatic silhouette ensures you'll stand out in any crowd.
We'd love to see your finished capelet! Share your creation on social media with the hashtag #GossamerBlossomCapelet and inspire fellow crocheters. Happy hooking!