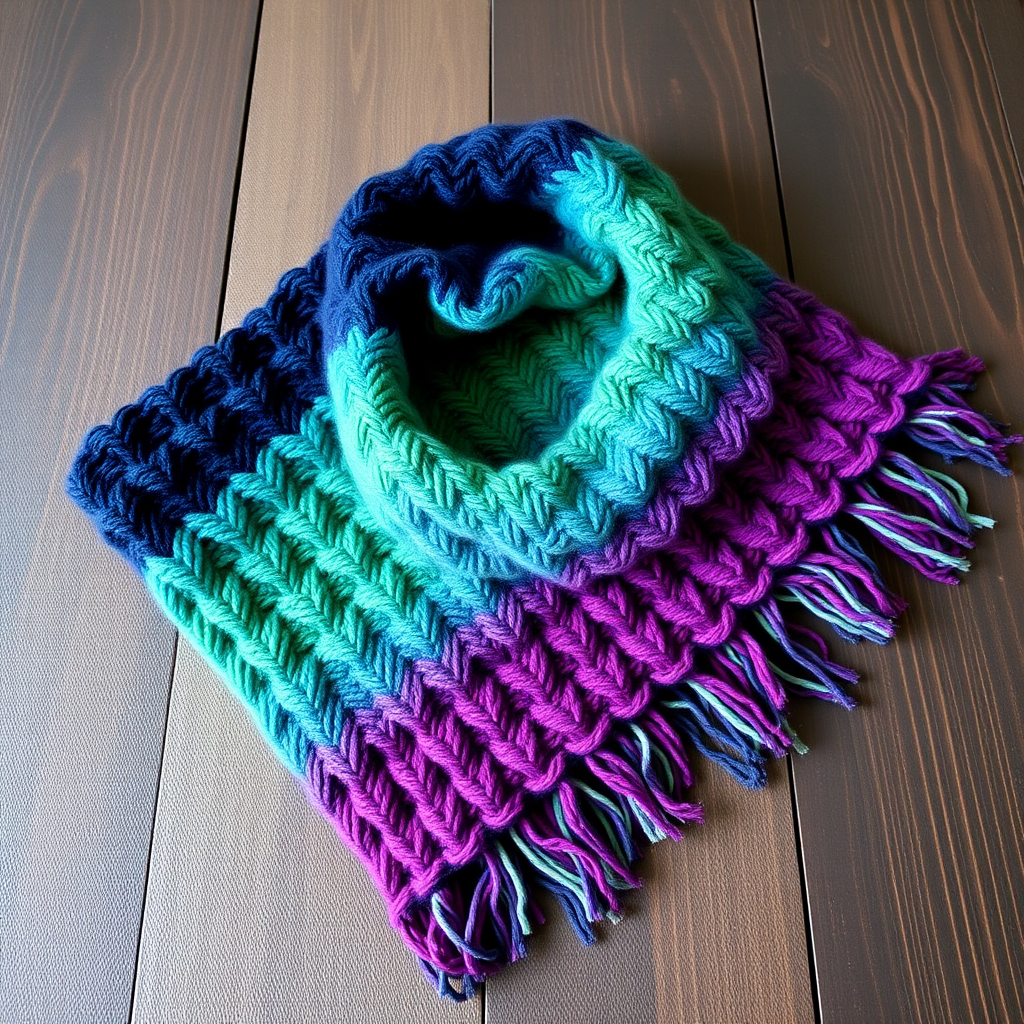
The Aurora Borealis Drift Scarf Free Pattern – Knit a Shifting Gradient Wrap

The Aurora Borealis Drift Scarf: A Free Knitting Pattern for a Shifting Gradient Wrap
Imagine wrapping yourself in the ethereal dance of the northern lights. With the Aurora Borealis Drift Scarf, you can bring that celestial magic to life. This free knitting pattern features a unique slipped-stitch texture that mimics the swirling, woven appearance of auroras in the night sky. Using a gorgeous gradient of deep teal, vibrant purple, and soft mint, this cozy yet lightweight wrap is perfect for chilly evenings and adds a pop of celestial color to any winter outfit. Best of all, this pattern is beginner-friendly, using only knit, purl, and slip stitches to create a reversible, dimensional fabric that looks far more complex than it is.
Whether you are looking for a meditative project or a stunning handmade gift, this scarf delivers. The rhythmic repetition of the stitch pattern is soothing, and the gradual color transitions keep you excited to see the next row. Let’s dive into the materials and get those needles clicking!
Materials Needed
Before you begin, gather the following supplies. This project uses simple, readily available materials, making it an accessible weekend knit.
- Yarn: Worsted weight yarn in 3 colors:
- Color A (Deep Teal): 150g
- Color B (Vibrant Purple): 120g
- Color C (Soft Mint): 80g
- Needles: US 8 (5mm) knitting needles. Straight or circular (used flat) both work well.
- Notions: Tapestry needle for weaving in ends, scissors, and a crochet hook (for optional fringe).
- Gauge: 18 stitches and 24 rows = 4 inches in stockinette stitch (after blocking). Gauge is important for achieving the correct width, but length is flexible.
Step-by-Step Instructions
This pattern is worked flat in rows. The slipped stitches create a woven texture that is completely reversible, so both sides look beautiful. Follow the sections below to create your gradient masterpiece.
Finished Dimensions & Abbreviations
- Finished Size: Approximately 12 inches wide and 70 inches long (excluding fringe).
- Abbreviations:
- CO: Cast on
- K: Knit
- P: Purl
- Sl: Slip stitch purlwise (unless otherwise noted)
- St(s): Stitch(es)
- Rep: Repeat
- RS: Right Side
- WS: Wrong Side
- wyif: With yarn in front
Pattern Notes
- The scarf is worked flat, back and forth in rows.
- The slipped stitches create a woven, textured fabric that is reversible.
- Color changes are made at the end of rows. You can carry the unused yarn loosely up the side, or cut and weave in ends. For a cleaner edge, consider twisting the yarns at the color change.
Section 1: Color A (Deep Teal) — 0 to 20 inches
This section establishes the rhythm of the slipped stitch pattern.
- CO 54 sts with Color A.
- Row 1 (RS): K all sts.
- Row 2 (WS): P all sts.
- Row 3: K2, *Sl 2 wyif, K4; rep from * to last 4 sts, Sl 2 wyif, K2.
- Row 4: P all sts.
- Row 5: K all sts.
- Row 6: P all sts.
- Row 7: K6, *Sl 2 wyif, K4; rep from * to last 2 sts, K2.
- Row 8: P all sts.
- Rep Rows 1-8 until piece measures 20 inches from CO edge, ending with a WS row (Row 2, 4, 6, or 8).
Section 2: Color B (Vibrant Purple) — 20 to 40 inches
- Switch to Color B.
- Continue repeating Rows 1-8 of the Section 1 pattern with Color B until piece measures 40 inches from CO edge, ending with a WS row.
Section 3: Color C (Soft Mint) — 40 to 60 inches
- Switch to Color C.
- Continue repeating Rows 1-8 of the Section 1 pattern with Color C until piece measures 60 inches from CO edge, ending with a WS row.
Final Section: Gradient Blend — 60 to 70 inches
Now we create the stunning aurora effect by blending the colors in short, alternating bands. This gradual shift mimics the natural flow of the northern lights.
- Work 4 rows with Color C.
- Work 4 rows with Color B.
- Work 4 rows with Color A.
- Work 4 rows with Color B.
- Work 4 rows with Color C.
- Work 4 rows with Color B.
- Work 4 rows with Color A.
- Continue this sequence (C, B, A, B, C, B, A) until piece measures 70 inches from CO edge, ending with a WS row.
- Bind off all sts loosely in pattern (knit the knits and purl the purls). This keeps the edge stretchy and matches the fabric's drape.
Finishing Touches
Your scarf is almost complete! A little finishing work will make it look professional and polished.
- Weave in all ends securely using a tapestry needle. Be sure to weave in the color change ends on the wrong side (or the side you prefer) to keep the front clean.
- Block the scarf gently to even out the texture and enhance the drape. Lay it flat, pin to the desired dimensions, and mist with water. Allow it to dry completely before removing pins.
- Add Fringe (Optional but recommended):
- Cut strands of yarn in all three colors, each 12 inches long.
- For each fringe group, take 3 strands (one of each color) and fold them in half.
- Use a crochet hook to pull the folded loop through the edge stitch of the scarf.
- Pull the ends through the loop and tighten gently.
- Add fringe to both short ends of the scarf, spacing them about 1 inch apart.
And there you have it—your very own Aurora Borealis Drift Scarf! The combination of the textured slipped stitches and the gradient color shifts creates a truly unique accessory that captures the magic of the night sky. This pattern is a joy to knit and an even greater joy to wear or gift. Happy knitting!