The Desert Bloom Knotted Cuff Free Pattern – A Boho Bead Bracelet Knit
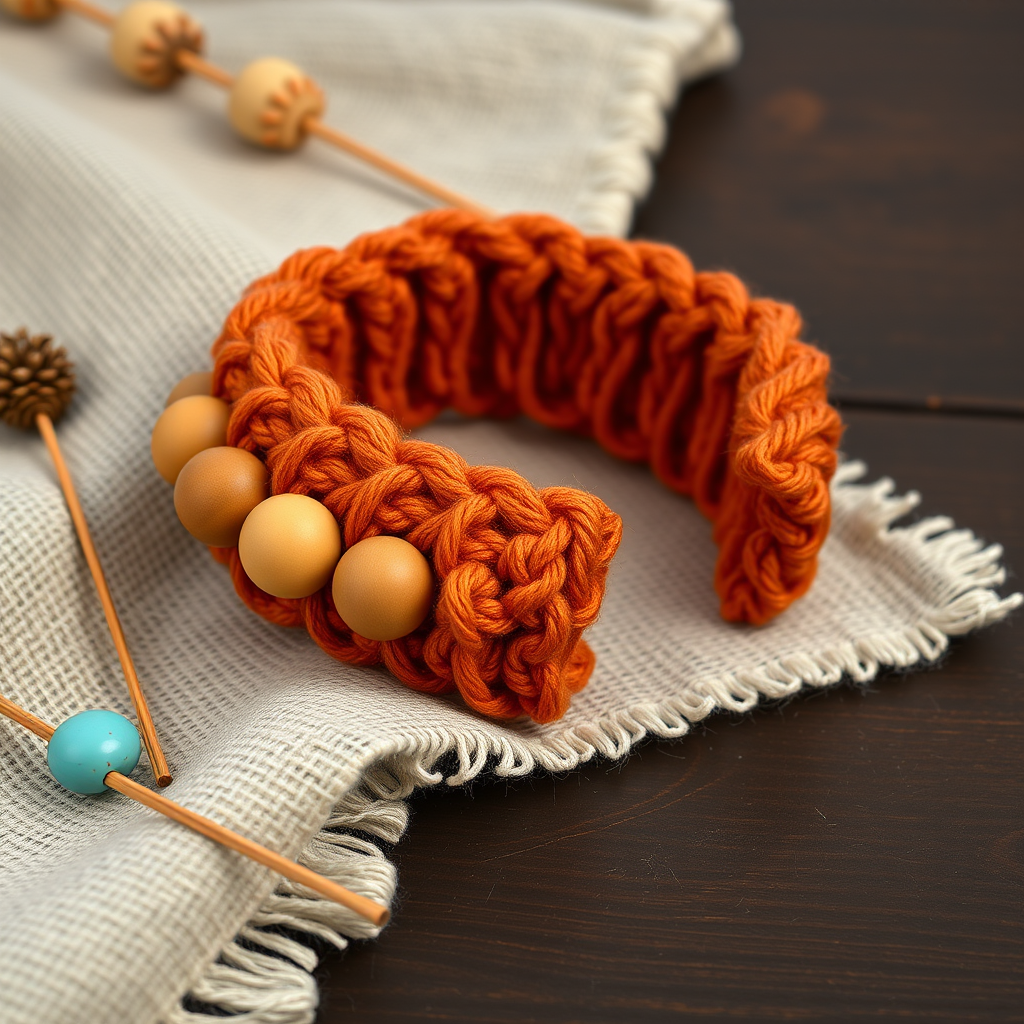
The Desert Bloom Knotted Cuff: A Free Boho Bead Bracelet Knitting Pattern
Wrap your wrist in the earthy elegance of the Desert Bloom, a chunky knit bracelet that blends soft cotton yarn with hand-placed wooden beads for a truly bohemian statement. This quick and satisfying project is perfect for adding a handmade touch to any outfit, whether you're layering it with other bangles or letting it shine solo. With its warm terracotta tones and natural wood accents, this bracelet evokes the serene beauty of a desert sunset—and it's beginner-friendly, making it an ideal weekend project for knitters of all levels.
In this comprehensive guide, I'll walk you through every step, from threading your beads to seaming your finished cuff. By the end, you'll have a stunning, one-of-a-kind accessory that's as comfortable to wear as it is beautiful to behold. Let's dive in!
Why You'll Love This Pattern
This pattern is a perfect introduction to bead knitting without any complicated techniques. The clever bead-incorporation method creates a textured, organic look that's both modern and timeless. Plus, because the gauge isn't critical, you can relax and enjoy the process—no obsessive measuring required. The result is a dense, cozy fabric that feels luxurious against your skin and holds its shape beautifully.
Materials Needed
Before you begin, gather these simple supplies. Most are readily available at your local craft store or online.
Yarn
- Worsted weight cotton yarn in a warm terracotta shade (approx. 30 yards). Look for a soft, mercerized cotton for best stitch definition. If terracotta isn't your color, any warm earth tone—like burnt sienna, ochre, or clay—will work beautifully.
Needles & Tools
- US 7 (4.5 mm) knitting needles—straight or circular, whichever you prefer.
- 5-7 large-hole wooden beads (approx. 8-10 mm diameter). Make sure the holes are wide enough to thread your yarn through easily.
- A small crochet hook (optional, for pulling beads through stitches).
- Tapestry needle for seaming and weaving in ends.
- Scissors
Gauge
20 stitches and 28 rows = 4 inches in stockinette stitch. Note: Gauge is not critical for this project, but aim for a snug, dense fabric so the beads sit securely and the cuff has structure.
Step-by-Step Instructions
This bracelet is knitted flat in a simple garter stitch (knit every row) with a clever bead-incorporation technique that creates a beautiful, textured look. Follow along carefully, and you'll have a gorgeous cuff in no time.
Step 1: Thread the Beads
Cut a length of yarn about 60 inches long. Thread all 5-7 beads onto the yarn, pushing them down toward the ball end. Leave a 6-inch tail at the beginning. Tip: If your beads have tight holes, use a small crochet hook or a needle threader to help pull the yarn through.
Step 2: Cast On
Using the long-tail cast-on method, cast on 8 stitches. Leave a 6-inch tail for finishing. If you're new to the long-tail method, here's a quick refresher: make a slip knot about 6 inches from the end of your yarn, place it on the needle, then hold the needle in your right hand with the yarn draped over your left thumb and index finger. Insert the needle under the thumb strand, over the index finger strand, and pull through to form a stitch. Repeat until you have 8 stitches.
Step 3: Knit the Bracelet Body
Now you'll work in garter stitch, which means you knit every row. This creates a dense, ridged fabric that's perfect for a cuff.
- Row 1 (Right Side): Knit all 8 stitches.
- Row 2 (Wrong Side): Knit all 8 stitches.
Repeat these two rows until the bracelet measures approximately 6.5 inches (or your wrist size minus 1 inch for overlap). End with a wrong-side row. Tip: To check your progress, wrap the knitted piece around your wrist. It should overlap slightly, as you'll seam it into a cuff later.
Step 4: Add the Beads
This is where the magic happens! You'll incorporate the beads along one edge to create a beautiful, organic texture.
On the next right-side row, follow these steps:
- Knit 2 stitches.
- Slide one bead up the yarn so it sits right next to the needle.
- Knit the next 2 stitches, making sure the bead sits snugly between the stitches on the right side of the work. The bead will naturally nestle into the fabric.
- Continue knitting the remaining 4 stitches.
On the following wrong-side row, knit all stitches as usual, letting the bead sit on the surface. It will naturally stay in place.
Repeat this bead-adding row every 4th row (i.e., every other right-side row) until you have used all your beads, spacing them evenly along the length of the bracelet. If you run out of beads before reaching your desired length, simply continue knitting in garter stitch without beads. Tip: To ensure even spacing, mark where you want each bead to go with a stitch marker or a piece of contrasting yarn.
Step 5: Finish the Knitting
Once the bracelet reaches your desired length (about 7.5 inches total), bind off all stitches loosely. Here's how: Knit the first two stitches, then use your left needle to lift the first stitch over the second and off the needle. Knit one more stitch, lift the previous stitch over it, and repeat until one stitch remains. Cut the yarn, leaving a 6-inch tail, and pull it through the last stitch to secure.
Step 6: Seam the Cuff
Fold the bracelet in half lengthwise, with the beaded edge on the outside. The two short ends should meet. Using the tapestry needle and the yarn tails, sew the short ends together with a whip stitch or mattress stitch, creating a seamless cuff. Tip: Use the tail from your cast-on edge to sew one side and the tail from your bind-off edge to sew the other, distributing the bulk evenly.
Weave in all loose ends securely, making sure they're hidden within the fabric. Trim any excess yarn.
Step 7: Wear and Enjoy
Slide the cuff over your hand and adjust it so the beads sit beautifully on top of your wrist. The natural stretch of the cotton yarn will allow it to fit comfortably, and the dense garter stitch will hold its shape. Admire your handiwork—you've just created a stunning, boho-chic accessory that's uniquely yours!
Tips for Perfect Results
- Choose the right beads: Wooden beads with large holes (at least 3-4 mm) are essential for easy threading. If your beads are smaller, use a crochet hook to pull the yarn through.
- Keep your tension even: Garter stitch is forgiving, but consistent tension will make your cuff look polished. Try to knit each stitch with the same firmness.
- Customize your fit: If your wrist is larger or smaller than average, simply adjust the length of the bracelet body. Just remember to leave about 1 inch for the overlap when seaming.
- Experiment with colors: While terracotta is stunning, this pattern works beautifully with any warm earth tone. Try a dusty rose, sage green, or even a deep navy for a different vibe.
Final Thoughts
The Desert Bloom Knotted Cuff is more than just a bracelet—it's a wearable piece of art that reflects your creativity and skill. Whether you're making it for yourself or as a heartfelt gift, this pattern is sure to bring joy. The combination of soft cotton and natural wood creates a tactile experience that's both grounding and elegant.
I'd love to see your finished cuffs! Share your creations on social media with the hashtag #DesertBloomCuff and tag me so I can admire your work. Happy knitting, and may your wrists be adorned with desert beauty!


