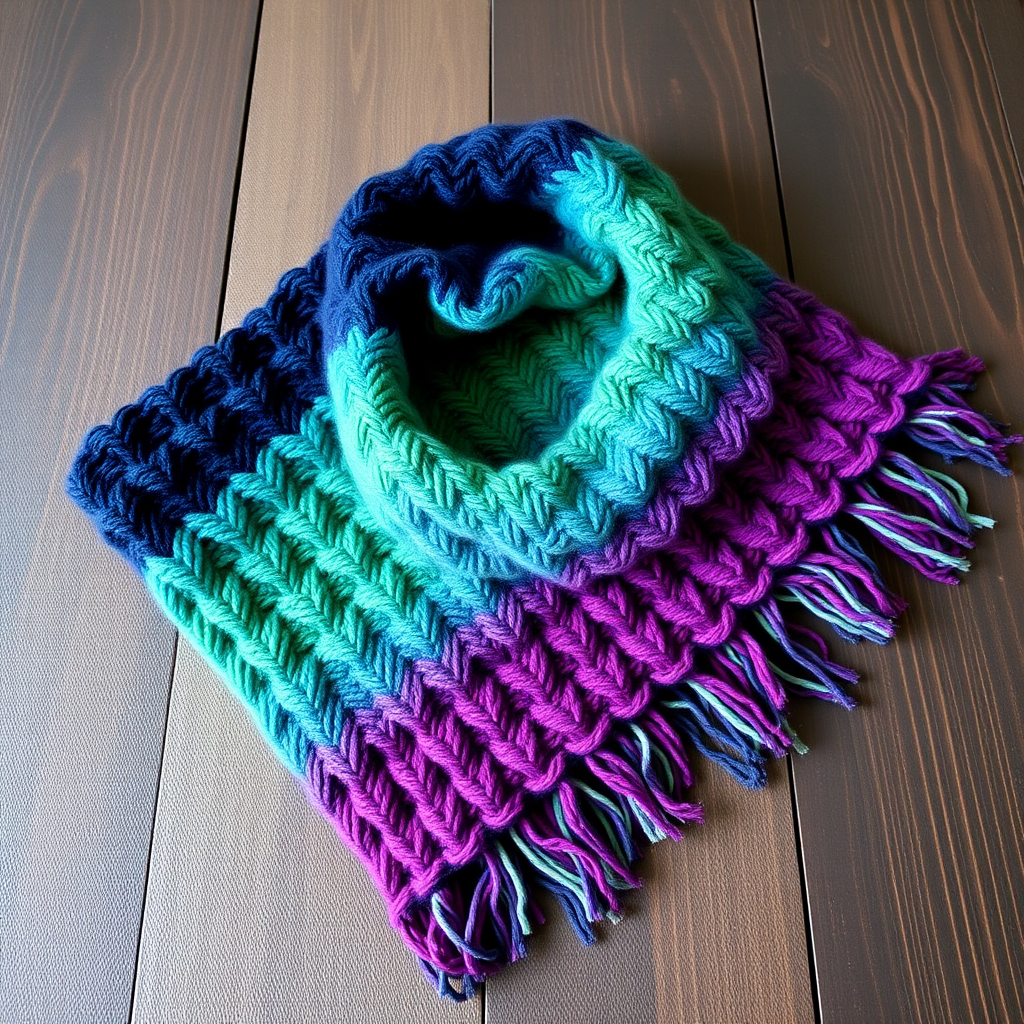
The Drifting Dune Scarf Free Pattern – Knit a Windswept Textured Wrap

The Drifting Dune Scarf Free Pattern – Knit a Windswept Textured Wrap
Wrap yourself in the quiet luxury of shifting sands with this oversized scarf, where undulating ridges and soft bobbles mimic the curves of a desert landscape. Knit in a warm, earthy palette of sand and terracotta, this statement piece feels like a gentle breeze on a sun-drenched dune. The Drifting Dune Scarf is the perfect project for knitters looking to explore texture without complicated techniques—just knits, purls, and simple increases and decreases create an organic, windswept effect that's both modern and timeless.
Whether you're a seasoned maker or a confident beginner ready for your next challenge, this free knitting pattern offers a meditative rhythm and a stunning result. The chunky super bulky yarn means it works up quickly, making it an ideal weekend project or a heartfelt handmade gift. Let's dive into the pattern and create a cozy accessory that feels like a warm desert breeze.
Materials Needed
Before you begin, gather the following materials. The Drifting Dune Scarf uses a simple palette of two complementary earthy tones, and the super bulky weight ensures a plush, cozy finish.
Yarn
- Super Bulky weight yarn (approx. 300-350 yards total)
- Main Color (MC) – Sand: A warm, light beige (approx. 200-225 yards)
- Contrast Color (CC) – Terracotta: A deep, burnt orange (approx. 100-125 yards)
Tip: If your chosen yarn doesn't meet gauge with a single strand, hold it double to achieve the correct thickness.
Needles & Notions
- US 13 (9 mm) knitting needles (or size needed to obtain gauge)
- Tapestry needle (for weaving in ends)
- Stitch markers (optional, but helpful for tracking sections)
Gauge
10 sts x 14 rows = 4 inches in stockinette stitch (with yarn held double if needed to achieve gauge).
Always take time to check your gauge—it ensures your scarf turns out the perfect size!
Step-by-Step Instructions
This scarf is knit flat in one piece, using a combination of knits, purls, and simple increases/decreases to create a unique, organic texture. The pattern is worked in two colors, with the main color forming the base and the contrast color creating the 'dune' ridges. Follow along carefully, and you'll have a beautiful, windswept scarf in no time.
Abbreviations
- CO: Cast on
- K: Knit
- P: Purl
- K2tog: Knit two stitches together (decrease)
- Kfb: Knit into the front and back of the same stitch (increase)
- St(s): Stitch(es)
- MC: Main Color (Sand)
- CC: Contrast Color (Terracotta)
- RS: Right side
- WS: Wrong side
Foundation (MC)
With your Main Color (Sand), cast on 40 stitches.
Knit 6 rows in garter stitch (knit every row). This creates a neat, sturdy border for the bottom of your scarf.
Main Body – First MC Section
Now we'll begin the stockinette base in the Main Color. This smooth section provides a beautiful contrast to the textured ridges.
- Row 1 (RS, MC): K all sts.
- Row 2 (WS, MC): P all sts.
- Row 3 (RS, MC): K all sts.
- Row 4 (WS, MC): P all sts.
- Row 5 (RS, MC): K all sts.
- Row 6 (WS, MC): P all sts.
You've now completed 6 rows of stockinette stitch. This forms the smooth "sand" base.
Begin Dune Ridges (CC)
Switch to your Contrast Color (Terracotta). This section creates the first undulating ridge, mimicking a dune's curve. The increases and decreases shape the wave.
- Row 7 (RS, CC): K1, *Kfb, K to 2 sts before end, Kfb, K1*. (You will have 42 sts)
- Row 8 (WS, CC): P all sts.
- Row 9 (RS, CC): K all sts.
- Row 10 (WS, CC): P all sts.
- Row 11 (RS, CC): K1, *K2tog, K to 3 sts before end, K2tog, K1*. (You will have 40 sts)
- Row 12 (WS, CC): P all sts.
Notice how the stitch count increases and then returns to 40. This creates the gentle slope of the dune.
Return to MC – Second Smooth Section
Switch back to your Main Color (Sand) and knit another smooth stockinette section.
- Row 13 (RS, MC): K all sts.
- Row 14 (WS, MC): P all sts.
- Row 15 (RS, MC): K all sts.
- Row 16 (WS, MC): P all sts.
- Row 17 (RS, MC): K all sts.
- Row 18 (WS, MC): P all sts.
Create Bobble Ridge (CC)
Now we'll create a more pronounced ridge with a subtle "bobble" effect. This section has two sets of increases, creating a taller wave, followed by two sets of decreases to bring it back down.
- Row 19 (RS, CC): K1, *Kfb, K to 2 sts before end, Kfb, K1*. (42 sts)
- Row 20 (WS, CC): P all sts.
- Row 21 (RS, CC): K1, *Kfb, K to 2 sts before end, Kfb, K1*. (44 sts)
- Row 22 (WS, CC): P all sts.
- Row 23 (RS, CC): K1, *K2tog, K to 3 sts before end, K2tog, K1*. (42 sts)
- Row 24 (WS, CC): P all sts.
- Row 25 (RS, CC): K1, *K2tog, K to 3 sts before end, K2tog, K1*. (40 sts)
- Row 26 (WS, CC): P all sts.
The double increase creates a taller, more rounded ridge—this is the "bobble" texture that adds tactile interest.
Return to MC – Third Smooth Section
Switch back to Main Color (Sand) for another smooth stockinette section.
- Row 27 (RS, MC): K all sts.
- Row 28 (WS, MC): P all sts.
- Row 29 (RS, MC): K all sts.
- Row 30 (WS, MC): P all sts.
- Row 31 (RS, MC): K all sts.
- Row 32 (WS, MC): P all sts.
Repeat the Pattern
Now you'll repeat the sections you've already mastered to create the full length of the scarf. Follow this sequence:
- Repeat the Dune Ridges (CC): Repeat Rows 7-12 once more.
- Return to MC: Repeat Rows 13-18 once more.
- Create Bobble Ridge (CC): Repeat Rows 19-26 once more.
- Return to MC: Repeat Rows 27-32 once more.
Continue alternating the Dune Ridges, Bobble Ridge, and MC sections until the scarf measures approximately 70 inches (178 cm) from the cast-on edge, ending with a MC section. This will give you a beautifully draped, oversized scarf.
Final Border (MC)
Once your scarf reaches the desired length, finish with a neat garter stitch border to match the beginning.
- Knit 6 rows in garter stitch (knit every row) with your Main Color (Sand).
- Bind off all stitches loosely to maintain the drape of the scarf.
Finishing Touches
Weave in all loose ends with your tapestry needle, being careful to secure them within the stitches so they don't show on the right side.
Blocking: Gently block the scarf to relax the stitches and enhance the texture. Lay it flat on a towel, mist with water, and shape it to the correct dimensions. Allow it to dry completely. This step is crucial for achieving that beautiful, windswept drape.
Your Drifting Dune Scarf is now complete! Wrap it around your neck and enjoy the cozy, organic texture that evokes the quiet beauty of a desert landscape. The combination of smooth sand sections and undulating terracotta ridges makes this a truly unique and eye-catching accessory.
Happy knitting, and may your stitches always feel like a gentle breeze!