The Enchanted Forest Burrow: A Free Knitting Pattern for a Textured, Hooded Baby Cocoon
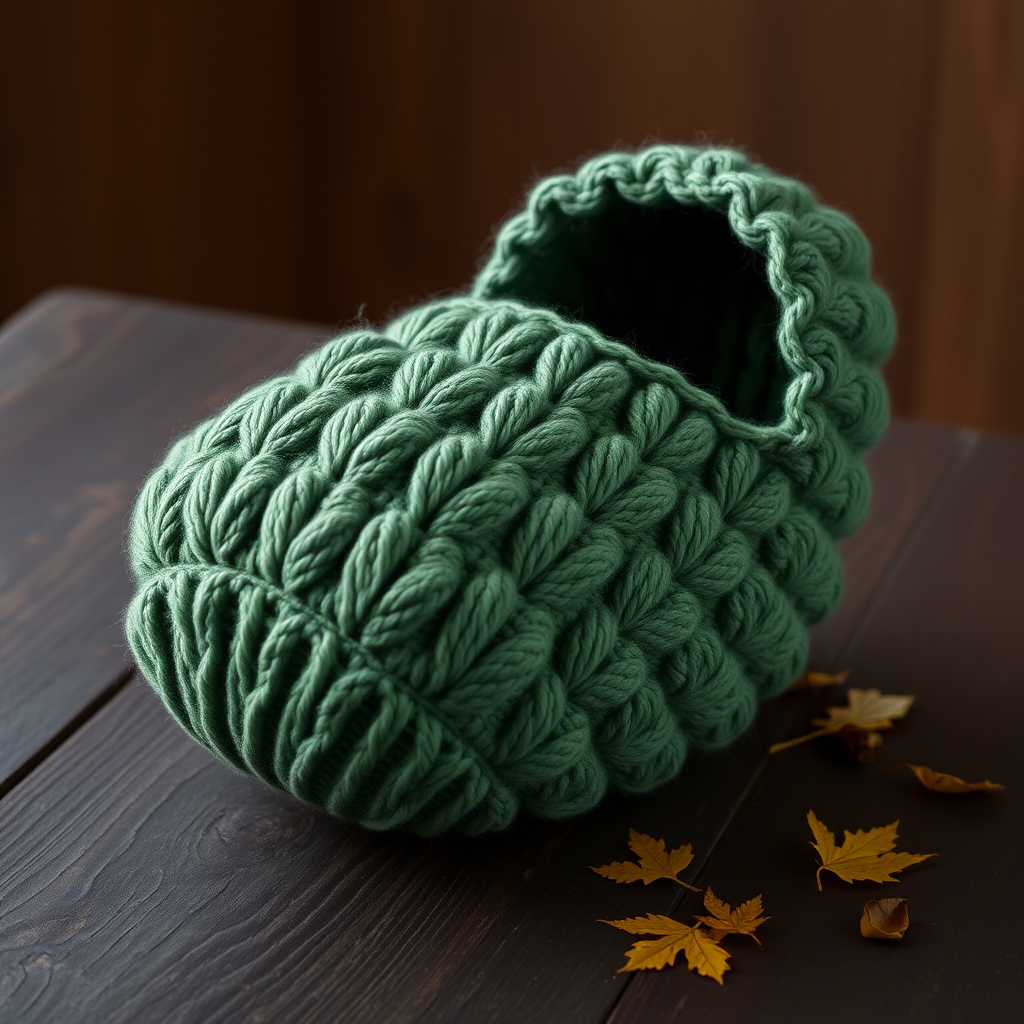
Wrap Your Little One in Cozy Forest Magic
There's something truly special about creating a handmade cocoon for a new arrival. The Enchanted Forest Burrow is more than just a baby cocoon—it's a textured, hooded masterpiece that combines the warmth of superwash merino wool with an organic, leaf-inspired motif. Knitted in a heathered forest green, this pattern is designed to be both heirloom-quality and beginner-friendly, offering a deep, snug hood and a cleverly integrated leaf pattern that feels like a gentle hug from the woods. Whether you're a seasoned knitter or just starting your journey, this free pattern will guide you through every stitch to create a cozy, stylish cocoon that your little one will love.
Materials Needed
Before you begin, gather these essentials to ensure a smooth knitting experience:
- Yarn: Worsted weight (Category 4) superwash merino wool in a heathered forest green. You'll need approximately 350-400 yards. The sample uses Malabrigo Rios in 'Piedras', but any similar worsted weight yarn will work beautifully.
- Needles: US 7 (4.5 mm) 16-inch circular needle for the cocoon body, and double-pointed needles (DPNs) in the same size for the hood and decreases.
- Notions: Stitch markers, tapestry needle for weaving in ends, and scissors.
- Gauge: 20 stitches and 28 rows = 4 inches in stockinette stitch, after blocking. Achieving the correct gauge is crucial for the perfect fit.
Step-by-Step Instructions
Follow these detailed instructions to create your Enchanted Forest Burrow. The pattern is written for 0-3 months (approx 20 inches long, 12 inches wide at the widest point).
Abbreviations
- CO: Cast on
- K: Knit
- P: Purl
- K2tog: Knit two together (right-leaning decrease)
- SSK: Slip, slip, knit (left-leaning decrease)
- M1L: Make one left (increase)
- M1R: Make one right (increase)
- St(s): Stitch(es)
- Rep: Repeat
- RS: Right side
- WS: Wrong side
- SK2P: Slip 1, knit 2 together, pass slipped stitch over (double decrease)
Pattern Notes
- The cocoon is worked flat from the bottom up, then seamed at the back. The hood is picked up and worked in the round.
- The leaf motif is created with a combination of increases and decreases, forming a raised, organic shape.
- Always count your stitches after each increase or decrease row to ensure accuracy.
Cocoon Body
Step 1: Cast On and Ribbing
CO 60 sts using your preferred method (long-tail cast on works well).
Row 1 (RS): K2, *P2, K2; rep from * to end.
Row 2 (WS): P2, *K2, P2; rep from * to end.
Rep Rows 1-2 for 1.5 inches (ribbing). This creates a sturdy, stretchy bottom edge.
Next Row (RS): Knit across, increasing 6 sts evenly (66 sts). To increase evenly, knit 10, M1L, then repeat (knit 10, M1L) five more times, knit remaining 6 sts.
Begin Leaf Motif Pattern
This is where the magic happens. The leaf motif is built over 18 rows, with increases forming the leaf shape. Work each row carefully, and use stitch markers to separate pattern repeats if needed.
Row 1 (RS): K6, *P1, K1, P1, K9; rep from * to last 9 sts, P1, K1, P1, K6.
Row 2 (WS): P6, *K1, P1, K1, P9; rep from * to last 9 sts, K1, P1, K1, P6.
Row 3: K6, *P1, M1R, K1, M1L, P1, K9; rep from * to last 9 sts, P1, M1R, K1, M1L, P1, K6. (72 sts)
Row 4: P6, *K1, P3, K1, P9; rep from * to last 9 sts, K1, P3, K1, P6.
Row 5: K6, *P1, K1, M1R, K1, M1L, K1, P1, K9; rep from * to last 9 sts, P1, K1, M1R, K1, M1L, K1, P1, K6. (78 sts)
Row 6: P6, *K1, P5, K1, P9; rep from * to last 9 sts, K1, P5, K1, P6.
Row 7: K6, *P1, K2, M1R, K1, M1L, K2, P1, K9; rep from * to last 9 sts, P1, K2, M1R, K1, M1L, K2, P1, K6. (84 sts)
Row 8: P6, *K1, P7, K1, P9; rep from * to last 9 sts, K1, P7, K1, P6.
Row 9: K6, *P1, K3, M1R, K1, M1L, K3, P1, K9; rep from * to last 9 sts, P1, K3, M1R, K1, M1L, K3, P1, K6. (90 sts)
Row 10: P6, *K1, P9, K1, P9; rep from * to last 9 sts, K1, P9, K1, P6.
Row 11: K6, *P1, K4, M1R, K1, M1L, K4, P1, K9; rep from * to last 9 sts, P1, K4, M1R, K1, M1L, K4, P1, K6. (96 sts)
Row 12: P6, *K1, P11, K1, P9; rep from * to last 9 sts, K1, P11, K1, P6.
Row 13: K6, *P1, K5, M1R, K1, M1L, K5, P1, K9; rep from * to last 9 sts, P1, K5, M1R, K1, M1L, K5, P1, K6. (102 sts)
Row 14: P6, *K1, P13, K1, P9; rep from * to last 9 sts, K1, P13, K1, P6.
Row 15: K6, *P1, K6, M1R, K1, M1L, K6, P1, K9; rep from * to last 9 sts, P1, K6, M1R, K1, M1L, K6, P1, K6. (108 sts)
Row 16: P6, *K1, P15, K1, P9; rep from * to last 9 sts, K1, P15, K1, P6.
Row 17: K6, *P1, K7, M1R, K1, M1L, K7, P1, K9; rep from * to last 9 sts, P1, K7, M1R, K1, M1L, K7, P1, K6. (114 sts)
Row 18: P6, *K1, P17, K1, P9; rep from * to last 9 sts, K1, P17, K1, P6.
Work even (no increases) for 4 inches, maintaining the pattern as established (K6, *P1, K17, P1, K9*). This means repeat Rows 17 and 18 without the increases, so you'll knit the 6 edge stitches, then *P1, K17, P1, K9* across, ending with P1, K17, P1, K6.
Begin Decreases for Cocoon Top
Now we shape the top of the cocoon by decreasing the leaf motifs. Work each decrease row carefully, and remember that the purl stitches remain as established.
Row 1 (RS): K6, *P1, SSK, K13, K2tog, P1, K9; rep from * to last 9 sts, P1, SSK, K13, K2tog, P1, K6. (108 sts)
Row 2 (WS): P6, *K1, P15, K1, P9; rep from * to last 9 sts, K1, P15, K1, P6.
Row 3: K6, *P1, SSK, K11, K2tog, P1, K9; rep from * to last 9 sts, P1, SSK, K11, K2tog, P1, K6. (102 sts)
Row 4: P6, *K1, P13, K1, P9; rep from * to last 9 sts, K1, P13, K1, P6.
Row 5: K6, *P1, SSK, K9, K2tog, P1, K9; rep from * to last 9 sts, P1, SSK, K9, K2tog, P1, K6. (96 sts)
Row 6: P6, *K1, P11, K1, P9; rep from * to last 9 sts, K1, P11, K1, P6.
Row 7: K6, *P1, SSK, K7, K2tog, P1, K9; rep from * to last 9 sts, P1, SSK, K7, K2tog, P1, K6. (90 sts)
Row 8: P6, *K1, P9, K1, P9; rep from * to last 9 sts, K1, P9, K1, P6.
Row 9: K6, *P1, SSK, K5, K2tog, P1, K9; rep from * to last 9 sts, P1, SSK, K5, K2tog, P1, K6. (84 sts)
Row 10: P6, *K1, P7, K1, P9; rep from * to last 9 sts, K1, P7, K1, P6.
Row 11: K6, *P1, SSK, K3, K2tog, P1, K9; rep from * to last 9 sts, P1, SSK, K3, K2tog, P1, K6. (78 sts)
Row 12: P6, *K1, P5, K1, P9; rep from * to last 9 sts, K1, P5, K1, P6.
Row 13: K6, *P1, SSK, K1, K2tog, P1, K9; rep from * to last 9 sts, P1, SSK, K1, K2tog, P1, K6. (72 sts)
Row 14: P6, *K1, P3, K1, P9; rep from * to last 9 sts, K1, P3, K1, P6.
Row 15: K6, *P1, SK2P (slip 1, knit 2 together, pass slipped stitch over), P1, K9; rep from * to last 9 sts, P1, SK2P, P1, K6. (66 sts)
Row 16: P6, *K1, P1, K1, P9; rep from * to last 9 sts, K1, P1, K1, P6.
Row 17: K6, *P1, K1, P1, K9; rep from * to last 9 sts, P1, K1, P1, K6.
Row 18: P6, *K1, P1, K1, P9; rep from * to last 9 sts, K1, P1, K1, P6.
Bind off loosely in pattern. To do this, knit the first stitch, then *purl the next stitch, knit the next stitch* and pass the previous stitch over. Continue in this manner, matching the pattern as you bind off.
Finishing
Seam the back: Using mattress stitch, seam the back of the cocoon from the bottom ribbing to the top bind-off edge. This creates a seamless, professional finish.
Hood
Pick up stitches: With RS facing, using DPNs, pick up and knit 60 sts evenly around the top opening of the cocoon. Join to work in the round, being careful not to twist.
Ribbing:
Round 1: *K2, P2; rep from * around.
Round 2: *P2, K2; rep from * around.
Rep Rounds 1-2 for 1 inch.
Next Round: Knit all sts.
Shape Hood: The hood is shaped with a central decrease line. Work each round carefully, and use a stitch marker to mark the center decreases.
Round 1: K28, SSK, K2tog, K28. (58 sts)
Round 2: Knit.
Round 3: K27, SSK, K2tog, K27. (56 sts)
Round 4: Knit.
Round 5: K26, SSK, K2tog, K26. (54 sts)
Round 6: Knit.
Round 7: K25, SSK, K2tog, K25. (52 sts)
Round 8: Knit.
Round 9: K24, SSK, K2tog, K24. (50 sts)
Round 10: Knit.
Round 11: K23, SSK, K2tog, K23. (48 sts)
Round 12: Knit.
Round 13: K22, SSK, K2tog, K22. (46 sts)
Round 14: Knit.
Round 15: K21,


