The Starlight Spruce Jar Cover: A Free Crochet Pattern for a Cozy, Textured Christmas Decoration
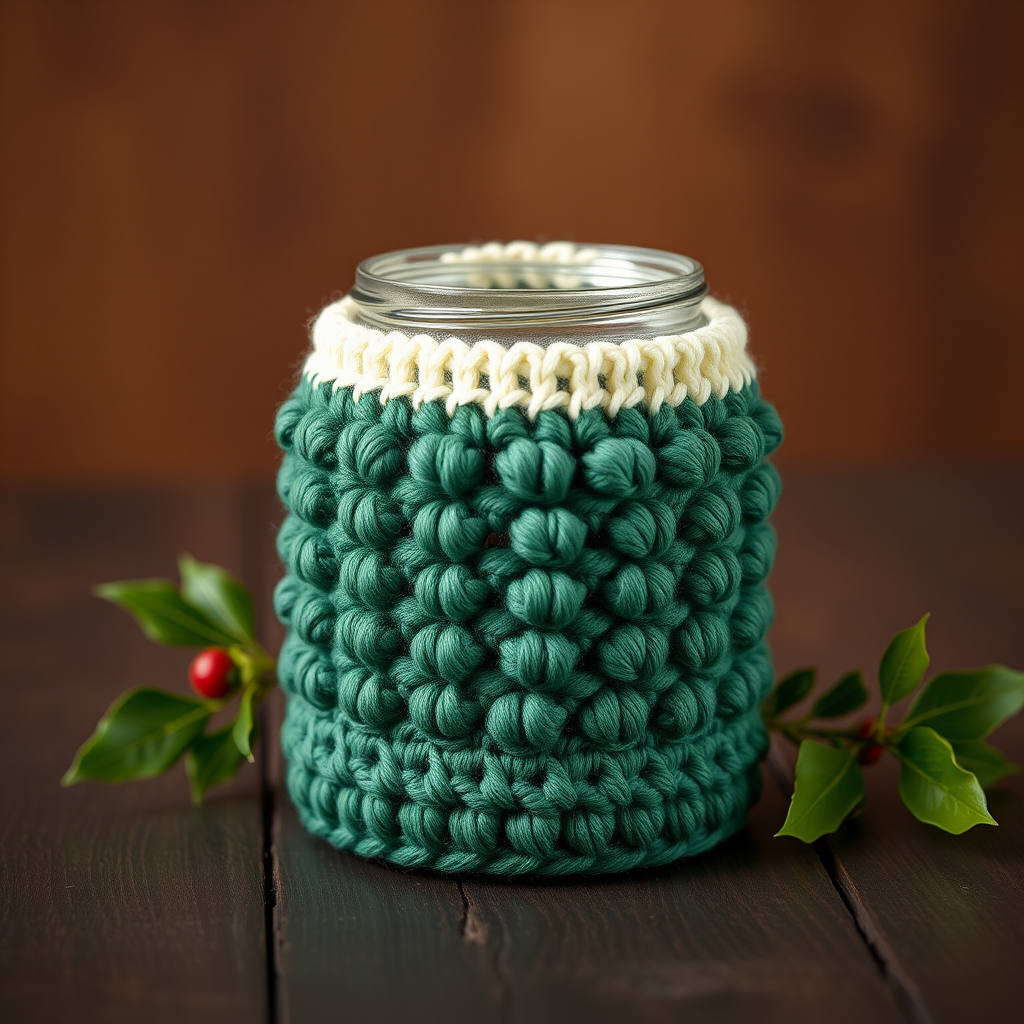
Wrap Your Home in Holiday Cheer: The Starlight Spruce Jar Cover
There’s something magical about the warm glow of a candle during the holidays. Now, imagine that light flickering through a handcrafted, tree-textured cover that feels like a forest in your living room. The Starlight Spruce Jar Cover is a modern, cozy crochet project designed to transform a simple candle jar into a festive centerpiece. With its combination of rich forest green and creamy white, plus a bumpy bobble stitch pattern that mimics pine needles, this free pattern is perfect for gifting or adding a handmade touch to your own decor. Whether you’re a seasoned crocheter or a confident beginner, you’ll love how quickly this project comes together.
Materials Needed
To create this textured jar cover, you’ll need the following supplies. The pattern is designed to fit a standard 4-inch diameter candle jar (like a 12 oz candle).
- Yarn: Worsted weight (Category 4) yarn in two colors:
- Main Color (MC) - Forest Green (approx 80 yds)
- Contrast Color (CC) - Cream or White (approx 20 yds)
- Small amounts of gold or red for optional embellishment
- Hook: US Size G/6 (4.0 mm) crochet hook
- Other: Yarn needle for weaving ends, scissors, and a candle jar (approx 4 inches in diameter)
Gauge
Getting the right gauge ensures your cover fits snugly. Work a gauge swatch before starting.
- Single crochet gauge: 16 sc x 18 rows = 4 inches (10 cm)
- Bobble stitch pattern gauge: 4 bobble repeats (12 sts) x 8 rows = 4 inches
Step-by-Step Instructions
This pattern is worked from the bottom up, in the round. The base is worked flat first, then joined to form a tube. The body is worked in continuous rounds, and the top is finished with a ribbed band. Follow these detailed steps carefully, and you’ll have a beautiful jar cover in no time.
Abbreviations
- ch: chain
- sc: single crochet
- dc: double crochet
- bobble: Bobble stitch (yo, insert hook, yo, pull up loop, yo, pull through 2 loops) 4 times in same stitch, yo, pull through all 5 loops on hook.
- sl st: slip stitch
- MC: Main Color (Forest Green)
- CC: Contrast Color (Cream)
Base (Worked Flat, Then Joined)
The base creates a flat, rectangular piece that will become the bottom of the cover. It is worked in rows, then seamed to form a ring.
- With MC, chain 22.
- Row 1: Sc in 2nd ch from hook and in each ch across. Turn. (21 sc)
- Row 2-4: Ch 1, sc in each sc across. Turn. (21 sc)
- Do not fasten off. Bring the short ends together to form a tube. Slip stitch the first and last rows together to form a ring. Ch 1, do not turn. You will now work in continuous rounds around the top edge of the base.
Body (Worked in the Round)
Now you’ll work upward from the base, creating the textured pattern with bobble stitches. The bobble stitch creates a raised, bumpy texture that mimics pine needles.
- Round 1: Sc evenly around the top edge of the base, working 1 sc in each row-end. You should have approximately 21 sc (one per row). Join with sl st to first sc. (21 sc)
- Round 2: Ch 1, sc in same st. *Bobble in next st, sc in next 2 sts.* Repeat from * to * around, ending with sc in last st. Join with sl st to first sc. (7 bobbles, 14 sc)
- Round 3: Ch 1, sc in each st around. Join with sl st. (21 sc)
- Round 4: Ch 1, sc in first 2 sts. *Bobble in next st, sc in next 2 sts.* Repeat from * to * around. Join. (7 bobbles, 14 sc)
- Round 5: Repeat Round 3.
- Round 6: Repeat Round 2.
- Round 7: Repeat Round 3.
- Round 8: Repeat Round 4.
- Round 9: Repeat Round 3.
- Round 10: Repeat Round 2.
- Round 11: Repeat Round 3.
- Fasten off MC. Join CC.
Ribbed Top Band
The top band is worked in cream or white yarn, creating a ribbed texture that hugs the jar’s neck. This band is worked in rounds, with a special back-loop-only round to create the ribbed effect.
- Round 12: With CC, ch 1, sc in each st around. Join. (21 sc)
- Round 13: Ch 1, working in back loops only, sc in each st around. Join. (21 sc)
- Round 14: Ch 1, sc in each st around (through both loops). Join. (21 sc)
- Fasten off CC. Weave in all ends.
Optional Embellishment
To add a festive touch, you can decorate the cover with small ornaments or stars. This step is completely optional but adds a lovely detail.
- Using gold or red yarn, embroider small French knots or star stitches randomly on the green sections to mimic ornaments or stars on a tree.
- Alternatively, sew on small beads or buttons for a sparkly effect.
Finishing
Once all ends are woven in, your cover is ready to use.
- Slip the cover over your jar. The ribbed top band will hold it snugly.
- For a candle, ensure the jar is cool before placing the cover.
Your Starlight Spruce Jar Cover is now complete! Enjoy the cozy, textured look it brings to your holiday decor, or gift it to someone special. Happy crocheting!


