Whimsical Woolly Garden Snail Coil Free Pattern
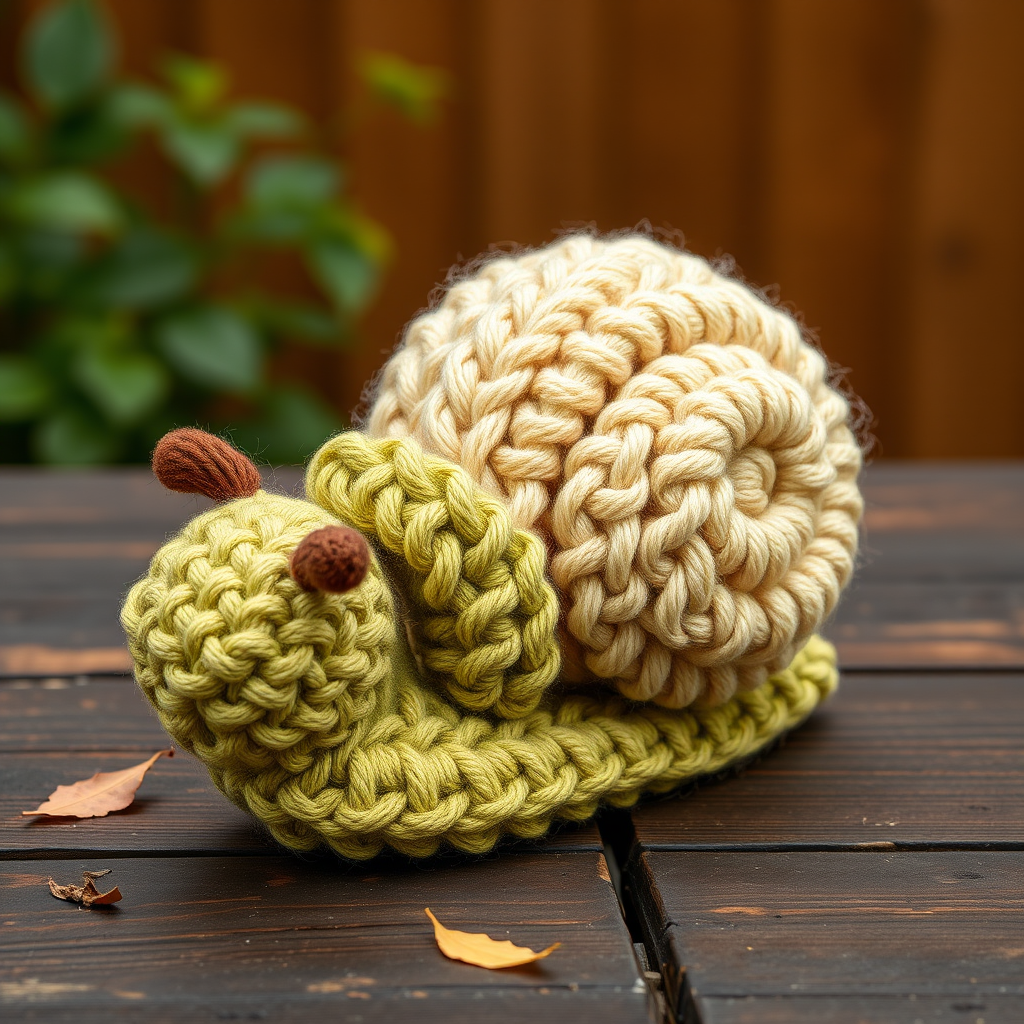
Whimsical Woolly Garden Snail Coil: A Beginner-Friendly Finger Knitting Project
Welcome to the delightful world of finger knitting! Today, we're creating something truly special: a Whimsical Woolly Garden Snail that requires absolutely no hooks or needles—just your hands and some chunky yarn. This tactile project is perfect for kids and beginners alike, building fine motor skills while producing a squishy, whimsical garden friend that will bring a smile to anyone's face. Whether you're looking for a fun afternoon activity or a unique handmade gift, this finger-knitted snail is the perfect choice. Let's dive in and create something magical together!
Materials Needed
Before we begin our finger knitting adventure, let's gather all the supplies you'll need. The beauty of this project is its simplicity—you won't need any specialized tools, just your fingers and some cozy yarn!
- Super Bulky Weight Yarn (Size 6): Approximately 30 yards in your main color (we suggest a lovely moss green for the body) and 10 yards in an accent color (like warm cream) for the shell. The chunky texture is essential for creating that squishy, plush feel.
- No Hook or Needle Required: Just your fingers! This is what makes finger knitting so accessible and fun for crafters of all ages.
- Yarn Needle: A large-eyed yarn needle for weaving in ends and assembling your snail.
- Scissors: For cutting yarn and trimming pom-poms.
- Optional: A few small pieces of dark brown yarn for the eyes and smile details.
Gauge Note: Gauge isn't critical for this project, but aim for a finger-knitted cord about 1 inch wide with 4-5 stitches per inch. This will give you the perfect proportions for your snail.
Step-by-Step Instructions
Part 1: Making the Finger-Knitted Cord
This is the foundation of your snail. You'll create two cords: one for the body (about 24 inches) and one for the shell (about 18 inches). Don't worry if they're not perfect—the organic, handmade look is part of the charm!
Step 1: Starting Your Foundation
Begin by making a slip knot on your non-dominant index finger, leaving a 6-inch tail. This tail will be used later for sewing your snail together.
Step 2: The Figure-Eight Weave
Now, weave the yarn across your fingers in a figure-eight pattern. Here's the sequence: go over your index finger, under your middle finger, over your ring finger, under your pinky. Then, reverse direction: go back over your pinky, under your ring finger, over your middle finger, and under your index finger. This creates the classic finger knitting pattern.
Step 3: Building Your Foundation
Repeat this weaving motion for 3 full passes across your fingers. This creates a loose foundation that will make your knitting easier and more even.
Step 4: The Knit-Off Technique
This is where the magic happens! With the working yarn positioned behind your pinky, lift the bottom loop over the top loop on each finger, working from your pinky toward your index finger. Gently pull the working yarn to tighten the stitches. You've just completed your first row of finger knitting!
Step 5: Continuing Your Cord
Repeat the pattern: weave across your fingers in the figure-eight, then knit off by lifting bottom loops over top loops. Continue this rhythm until your cord reaches the desired length. For the body, aim for about 24 inches; for the shell, about 18 inches. If you prefer, you can make one long cord and cut it later—just remember to bind off each section separately.
Step 6: Binding Off
When your cord reaches the desired length, it's time to bind off. Cut the yarn, leaving a 10-inch tail. Thread this tail through each loop on your fingers, one by one, then slip the loops off your fingers. Pull the tail tight to close the end, and weave in the loose end with your yarn needle. Congratulations—you've completed your finger-knitted cord!
Part 2: Assembling Your Snail
Now comes the fun part—transforming your knitted cords into an adorable garden snail!
Step 1: Creating the Body Base
Take your 24-inch body cord and coil it into a flat spiral. Start from the center and work outward, creating a spiral about 4 inches in diameter. This will form the snail's base and body. Don't worry about making it perfect—the organic spiral shape is part of the snail's charm.
Step 2: Securing the Body Coil
Using the tail end of your cord and your yarn needle, stitch through the layers of the spiral to secure the coil in place. Make a few hidden stitches to hold it firmly together. You want the spiral to stay flat and stable.
Step 3: Creating the Shell
Take your 18-inch shell cord and coil it into a tighter spiral, about 3 inches in diameter. This will sit on top of the body. Secure it the same way you did the body, using the tail end to stitch through the layers.
Step 4: Attaching the Shell
Place the shell spiral on top of the body spiral, slightly off-center toward the back. This gives your snail that classic shell-on-back look. Using the tail end of the shell cord, stitch the shell to the body, making sure it's firmly attached. Take your time with this step—you want the shell to feel secure.
Step 5: Forming the Head and Neck
Now for the snail's face! If you left the body cord attached, use the remaining end to form the head. Otherwise, take a 4-inch piece of yarn, fold it into a U-shape, and stitch it to the front of the body spiral. This creates the snail's neck and head. Position it so it peeks out from under the shell, giving your snail personality.
Step 6: Adding the Eyes
Time for some character! Create two small yarn balls for eyes: wrap yarn around two fingers about 10 times, slide it off carefully, tie it tightly in the middle, and trim the loops to create tiny pom-poms. Attach these to the top of the head with yarn stitches. These fluffy eyes give your snail that adorable, whimsical look.
Step 7: Adding a Smile (Optional)
For extra charm, add a tiny smile using a contrasting yarn stitch. A simple curved stitch in dark brown or black will do the trick. This little detail brings your snail to life!
Step 8: Finishing Touches
Weave in all loose ends carefully with your yarn needle. Give your snail a gentle squeeze to shape it, and adjust the coils if needed. Your whimsical woolly garden snail is complete and ready to wiggle and play!
Tips for Success
- Keep Your Tension Even: Try to maintain consistent tension while finger knitting. Not too tight, not too loose—just right for a squishy, plush result.
- Practice Makes Perfect: If your first cord isn't perfect, don't worry! Finger knitting gets easier with practice. The beauty of this project is that imperfections add to the handmade charm.
- Customize Your Snail: Feel free to experiment with different colors and yarn textures. A pastel pink snail with a lavender shell would be adorable, or go bold with rainbow colors!
- Make It a Family Activity: This project is perfect for kids aged 6 and up with adult supervision. It's a wonderful way to spend quality time together while creating something special.
Your Whimsical Woolly Garden Snail is now ready to join your collection of handmade treasures. Whether it becomes a beloved toy, a charming decoration, or a thoughtful gift, this little snail carries the warmth of your hands and the joy of creation. Happy finger knitting, and may your garden be filled with whimsy!


