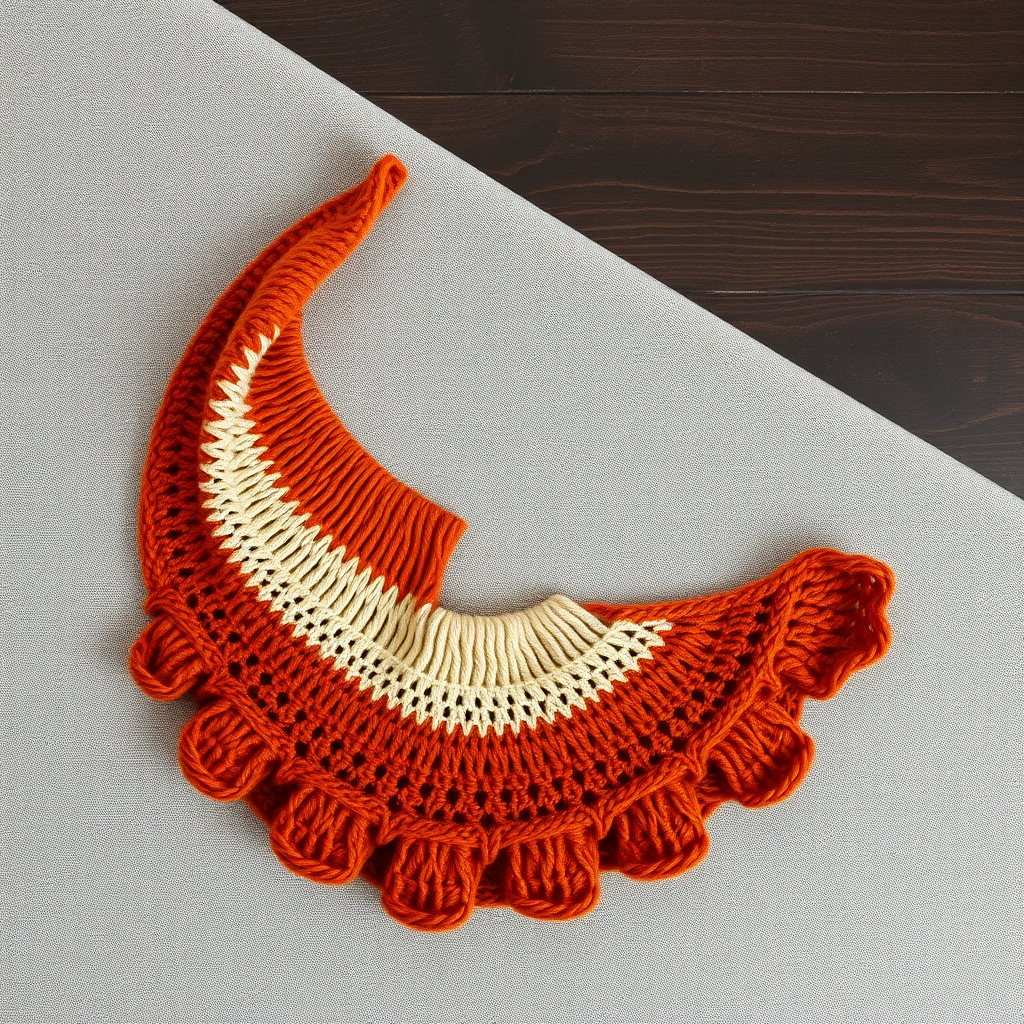
Aurora Dune Wrap Free Pattern – A Shifting Gradient Knitted Shawl

Introducing the Aurora Dune Wrap: A Shifting Gradient Knitted Shawl
Wrap yourself in the colors of a desert sunset with the Aurora Dune Wrap—a uniquely shaped, two-way knitted shawl that is as modern as it is cozy. This free pattern uses a smooth gradient of deep terracotta, warm ochre, and soft blush to create a flowing, textured piece that drapes beautifully from either shoulder. Whether you wear the point in front or back, the asymmetric crescent shape and delicate eyelet border give this wrap a contemporary, airy feel that elevates any outfit.
Designed with beginners in mind, this pattern introduces simple increases, decreases, and yarn overs in a repetitive, meditative rhythm. The result is a stunning, handmade accessory that showcases visible stitch definition and a subtle sheen. Let’s dive into the materials and step-by-step instructions so you can create your own Aurora Dune Wrap at home.
Materials Needed
Before you begin, gather the following supplies. All items are readily available at your local yarn shop or online.
- Yarn: Worsted weight yarn in 3 colors—Color A (deep terracotta), Color B (warm ochre), Color C (soft blush). Approximately 400g total. Alternatively, use a gradient yarn cake of similar weight for a seamless color transition.
- Needle: US 9 (5.5 mm) circular knitting needle with a 32-inch cable. The long cable is essential to accommodate the growing number of stitches.
- Notions: Stitch markers (at least 2), a tapestry needle for weaving in ends, and blocking pins/mat for finishing.
- Gauge: 18 stitches and 24 rows = 4 inches in stockinette stitch (blocked). Gauge is important for achieving the correct drape and size, so take a moment to swatch.
Step-by-Step Instructions
This shawl is worked from the center top down, increasing on both edges to create a wide, asymmetric crescent shape. Follow the instructions carefully, and you’ll have a beautiful wrap in no time.
Abbreviations
- k = knit
- p = purl
- yo = yarn over
- k2tog = knit two together (right-leaning decrease)
- ssk = slip, slip, knit (left-leaning decrease)
- sl1 = slip one stitch purlwise with yarn in back
- pm = place marker
- sm = slip marker
Setup: Cast On and Increase Section
With Color A, cast on 5 stitches using your preferred method (long-tail cast on works well).
- Row 1 (WS): Sl1, k to end. (5 stitches)
- Row 2 (RS): Sl1, yo, k to last stitch, yo, k1. (7 stitches)
- Row 3 (WS): Sl1, k to end. (7 stitches)
- Row 4 (RS): Sl1, yo, k to last stitch, yo, k1. (9 stitches)
Repeat Rows 3-4 until you have 33 stitches on the needle, ending with a WS row. This creates the pointed center of the shawl and establishes the edge increases.
Main Body: Section 1 – Color A (Terracotta)
Now you’ll work the textured center panel framed by stockinette edges. Place markers to separate the sections.
- Row 1 (RS): Sl1, yo, k1, pm, k2tog, yo, k1, yo, ssk, pm, k to last 2 stitches, yo, k1, yo, k1. (Increase 2 stitches—one at each edge)
- Row 2 (WS): Sl1, k to first marker, sm, p to second marker, sm, k to end.
- Row 3 (RS): Sl1, yo, k to first marker, sm, k2tog, yo, k1, yo, ssk, sm, k to last 2 stitches, yo, k1, yo, k1.
- Row 4 (WS): Same as Row 2.
Repeat Rows 3-4 until the section measures 6 inches from the cast-on edge, ending with a WS row. The stitch count will increase by 2 every RS row, so your shawl will grow steadily.
Main Body: Section 2 – Color B (Ochre)
Change to Color B. Continue working the same pattern as Section 1 (Rows 3-4) for 6 inches, ending with a WS row. The texture will remain consistent, and the color shift will begin to mimic a sunset.
Main Body: Section 3 – Color C (Blush)
Change to Color C. Continue working the same pattern for 6 inches, ending with a WS row. At this point, your shawl should measure approximately 18 inches from the cast-on edge, with a beautiful gradient from terracotta to blush.
Edge Finishing: Eyelet Border
With Color C still attached, work the following border to add a delicate, lacy finish.
- Row 1 (RS): Sl1, yo, k to first marker, sm, (k2tog, yo) repeat to second marker, sm, k to last 2 stitches, yo, k1, yo, k1.
- Row 2 (WS): Sl1, k to end.
- Row 3 (RS): Sl1, yo, k to first marker, sm, (k2tog, yo) repeat to second marker, sm, k to last 2 stitches, yo, k1, yo, k1.
- Row 4 (WS): Sl1, k to end.
Bind off loosely on the next RS row: K1, *yo, k2tog, pass both stitches over, repeat from * to end. This creates a stretchy, picot-like edge that complements the openwork border. Cut yarn and weave in all ends with a tapestry needle.
Blocking: Shape Your Shawl
Blocking is essential to open up the lace and achieve the crescent shape. Soak the shawl in lukewarm water with a drop of wool wash for 20 minutes. Gently squeeze out excess water (do not wring). Lay flat on a blocking mat, pinning the edges to create a gentle crescent shape—stretch the wings slightly and keep the center point defined. Allow to dry completely before unpinning.
Wear It Your Way
The Aurora Dune Wrap is designed to be versatile. Wear it with the point in front for a dramatic, modern look, or drape it with the point in back for a classic shawl silhouette. The gradient colors and textured panel make it a statement piece for any season. Enjoy your handmade creation, and don’t forget to share your finished wrap with the knitting community!