Aurora Ember Cowl Free Pattern – Knit a Cozy Ombre Hearth Wrap
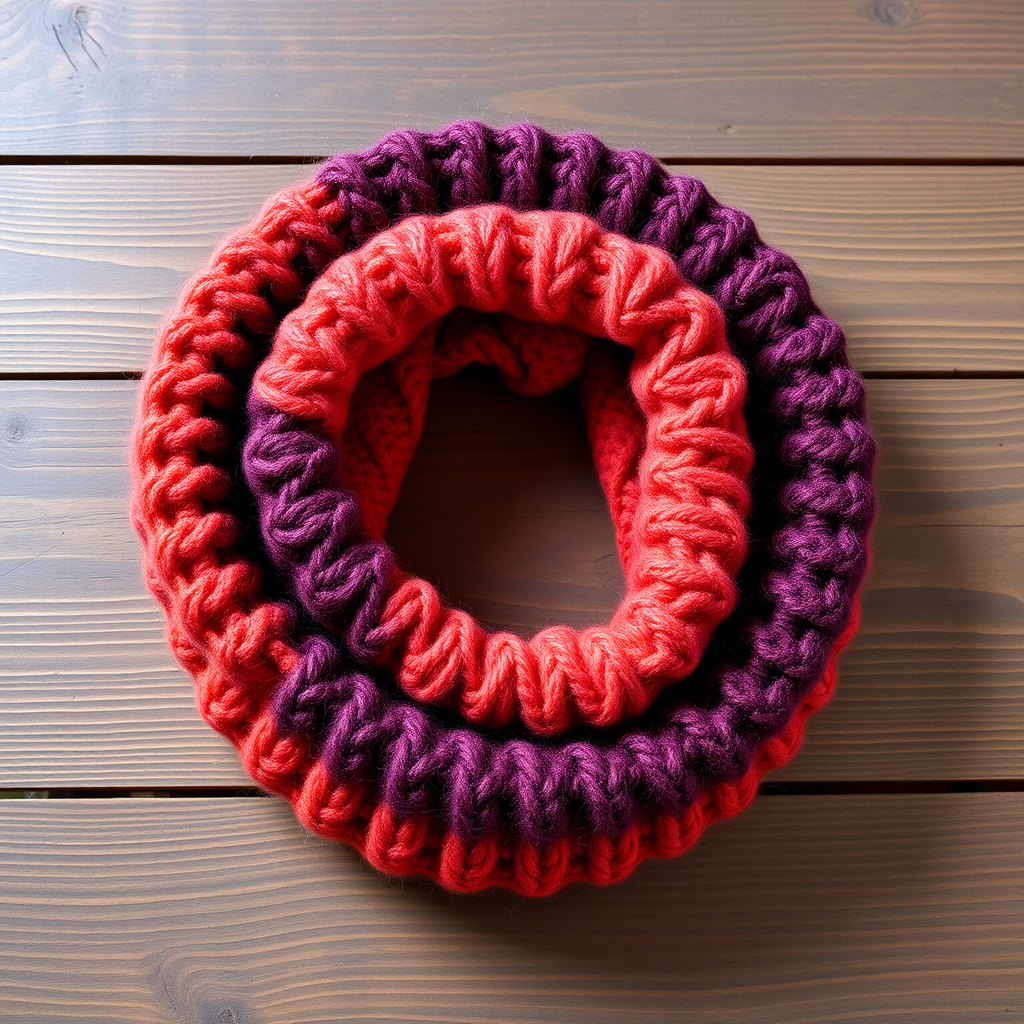
Wrap Yourself in Sunset: The Aurora Ember Cowl
There's something magical about wrapping yourself in a handmade piece that captures the warmth of a fading sunset. The Aurora Ember Cowl is exactly that—a plush, chunky knit that transitions through a breathtaking ombre of burnt orange, deep rose, and plum. This beginner-friendly pattern is perfect for those crisp autumn evenings or cozy winter mornings. With just basic knit and purl stitches, you'll create a stunning, cloud-like accessory that looks far more complex than it actually is. Let's dive into this quick and rewarding project!
Materials Needed
Before you begin, gather these simple supplies. The beauty of this pattern is its minimalism—you only need three skeins of super bulky yarn and one circular needle.
- Yarn: Super bulky weight yarn (size 6) in 3 colors:
- Color A: Burnt Orange (approx. 110 yds)
- Color B: Deep Rose (approx. 110 yds)
- Color C: Plum (approx. 110 yds)
- Needle: US 13 (9 mm) circular knitting needle, 24-inch length
- Notions: Stitch marker, tapestry needle for weaving in ends, scissors
- Gauge: 10 sts x 14 rows = 4 inches in stockinette stitch (knit flat). Note: Gauge is not critical for this cowl, but matching it will ensure your finished piece drapes as intended.
Step-by-Step Instructions
This pattern is worked in the round, creating a seamless tube. The finished cowl measures approximately 24 inches in circumference and 10 inches tall, loosely draped. Follow these detailed steps, and you'll have a gorgeous cowl in no time!
Abbreviations
- CO: Cast on
- K: Knit
- P: Purl
- St(s): Stitch(es)
- Rep: Repeat
- BO: Bind off
Step 1: Cast On
With Color A (Burnt Orange), cast on 60 stitches onto your circular needle. Place a stitch marker on the right-hand needle to mark the beginning of the round. Critical: Before joining in the round, carefully lay your needle flat and ensure all stitches are facing the same direction—no twists! Then, join by knitting the first stitch from the left needle with the working yarn from the right needle.
Step 2: Bottom Ribbing (Color A)
This ribbed edge gives the cowl its stretchy, cozy finish. Work the following rounds:
- Rounds 1-4: *K2, P2*; repeat from * to end of round. (You'll repeat this 15 times around the 60 stitches.)
Tip: Keep your tension even. The ribbing should be snug but not tight.
Step 3: Body – Color A
Now we move into the smooth stockinette body. Since you're knitting in the round, you'll simply knit every stitch—no purling needed!
- Rounds 5-8: Knit all stitches.
You've now completed 8 rounds in Burnt Orange. The bottom of your cowl is taking shape beautifully.
Step 4: Transition to Color B (Deep Rose)
Time to introduce the second color. This is where the ombre magic begins.
- Round 9: At the start of this round, drop Color A and pick up Color B (Deep Rose). Knit all stitches with Color B. Tip: Leave a 6-inch tail of Color A to weave in later, or carry it loosely up the inside of the work if you prefer (though cutting and weaving is cleaner for a chunky yarn).
- Rounds 10-16: Continue knitting all stitches with Color B. You'll complete a total of 8 rounds in Deep Rose (Rounds 9-16).
Pro Tip: When switching colors at the start of a round, give the new yarn a gentle tug after the first stitch to avoid a loose gap.
Step 5: Transition to Color C (Plum)
Now for the final color shift to the rich, deep plum.
- Round 17: At the start of this round, drop Color B and pick up Color C (Plum). Knit all stitches with Color C.
- Rounds 18-24: Continue knitting all stitches with Color C. You'll complete 8 rounds in Plum (Rounds 17-24).
Your cowl now has three distinct, beautiful color blocks. The gradient is subtle yet striking.
Step 6: Top Ribbing (Color C)
Just like the bottom, we'll finish with a stretchy ribbed edge to frame the cowl.
- Rounds 25-28: *K2, P2*; repeat from * to end of round. (Work these 4 rounds in Color C.)
Step 7: Bind Off
This is the final step to secure your work. Bind off loosely in pattern—this means you'll knit the knit stitches and purl the purl stitches as you bind off. Here's how:
- Knit the first stitch, then purl the second stitch (since it's a purl stitch in the ribbing).
- Using your left needle, lift the first stitch over the second stitch and off the right needle. One stitch bound off.
- Continue: Work the next stitch in pattern (knit the knits, purl the purls), then pass the previous stitch over it.
- Repeat until one stitch remains. Cut the yarn, leaving a 6-inch tail, and pull it through the last loop to secure.
Critical: If you bind off too tightly, the top edge will pucker. Take your time and keep the tension relaxed.
Finishing Touches
Using your tapestry needle, weave in all loose ends securely—the tail from your cast-on, the color change tails, and the bind-off tail. Weave them through the inside of the cowl, following the path of the stitches, and trim any excess yarn.
Optional: A More Dramatic Ombre
Want to amp up the gradient effect? Instead of knitting 8 rounds in each color, try alternating colors every 4 rounds. This will create a striped, more vibrant gradient that transitions more quickly through the color spectrum. The pattern is incredibly forgiving, so feel free to experiment!
Your Aurora Ember Cowl is now complete! Lay it flat to block if desired (gently wet and shape, then dry) for a more polished drape, or simply wear it immediately. The chunky texture and warm ombre will make it your go-to accessory all season long. Happy knitting!



