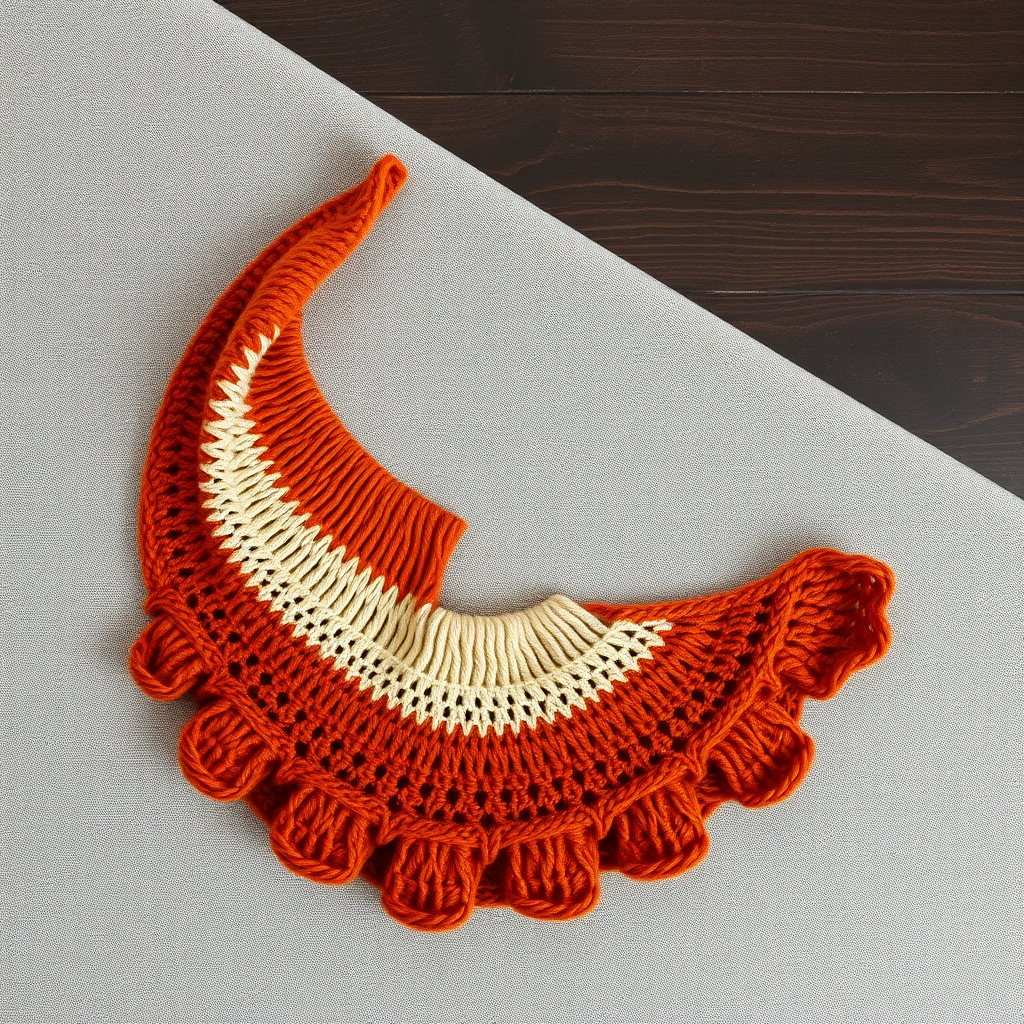
Aurora Fern Lace Shawl Free Knitting Pattern

Aurora Fern Lace Shawl: A Free Knitting Pattern for a Mesmerizing Crescent
Wrap yourself in the ethereal beauty of the Aurora Fern Lace Shawl. This crescent-shaped knit mimics the dancing lights of the northern skies, blending delicate fern lace with a subtle gradient yarn for a truly mesmerizing accessory. Whether you're a seasoned knitter looking for a new challenge or a confident beginner ready to dive into lacework, this pattern offers a rewarding project that results in a stunning, wearable piece of art. The shawl is knit from the top center down, increasing on both sides of a central spine, creating a graceful drape that is both elegant and cozy.
Materials Needed
Before you begin, gather the following materials to ensure a smooth knitting experience. The quality of your yarn and tools will greatly impact the final look and feel of your shawl.
- Yarn: Fingering weight yarn in a gradient colorway (e.g., Malabrigo Sock in 'Cielo' or similar), approx. 400-450 yards. The gradient effect is key to achieving the aurora-inspired look, but a solid or semi-solid colorway will also work beautifully.
- Needle: US 5 (3.75 mm) circular knitting needle, 32-inch or longer. The long circular needle is essential to accommodate the growing number of stitches as the shawl expands.
- Notions: Stitch markers (at least 4), tapestry needle for weaving in ends, blocking mats and pins for finishing.
Gauge: 20 stitches and 28 rows = 4 inches in stockinette stitch (blocked). While gauge is important for size, the shawl is quite forgiving. The key is to maintain consistent tension throughout your work.
Step-by-Step Instructions
This shawl is knit from the top center down, increasing on both sides of a central spine. Follow these detailed instructions carefully, and you'll be amazed at the beautiful lace pattern that emerges.
Abbreviations
- k: knit
- p: purl
- yo: yarn over
- k2tog: knit two together (right-leaning decrease)
- ssk: slip, slip, knit (left-leaning decrease)
- kfb: knit front and back (increase)
- pm: place marker
- sm: slip marker
Setup
Let's begin by casting on and establishing the foundation of your shawl.
- Cast on 5 stitches.
- Row 1 (WS): k2, p1, k2.
- Row 2 (RS): k2, yo, k1, yo, k2. (7 stitches)
- Row 3: k2, p3, k2.
- Row 4: k2, yo, k1, yo, k1, yo, k1, yo, k2. (11 stitches)
- Row 5: k2, p7, k2.
- Row 6: k2, yo, k3, yo, k1, yo, k3, yo, k2. (15 stitches)
- Row 7: k2, p11, k2.
You now have 15 stitches and the foundation is set. The center stitch (the 8th stitch) is your central spine, and the increases on either side will create the crescent shape.
Begin Lace Pattern
Now we'll place markers to separate the lace sections from the center spine and garter edges.
- Place markers: k2, pm, work lace section, pm, k1 (center stitch), pm, work lace section, pm, k2.
You now have four markers: two for the lace sections and two for the center stitch. The first and last 2 stitches are always knit for the garter edge.
Lace Section (worked on both sides of center)
This is the heart of the pattern. The lace section is repeated on both sides of the center stitch. Each row is written for one side; repeat it on the other side of the center marker.
- Row 1 (RS): k1, yo, k2, ssk, yo, k1, yo, k2tog, k2, yo, k1. (This is for one side; repeat on other side of center.)
- Row 2 and all WS rows: purl all stitches (except first and last 2 stitches which are knit for garter edge).
- Row 3: k2, yo, k1, ssk, yo, k3, yo, k2tog, k1, yo, k2.
- Row 5: k3, yo, k2tog, yo, k1, yo, ssk, yo, k3, yo, k1.
- Row 7: k4, yo, k2tog, yo, k3, yo, ssk, yo, k4.
- Row 9: k5, yo, k2tog, yo, k1, yo, ssk, yo, k5.
- Row 11: k6, yo, k2tog, yo, k3, yo, ssk, yo, k6.
- Row 13: k7, yo, k2tog, yo, k1, yo, ssk, yo, k7.
- Row 15: k8, yo, k2tog, yo, k3, yo, ssk, yo, k8.
- Row 17: k9, yo, k2tog, yo, k1, yo, ssk, yo, k9.
- Row 19: k10, yo, k2tog, yo, k3, yo, ssk, yo, k10.
- Row 21: k11, yo, k2tog, yo, k1, yo, ssk, yo, k11.
- Row 23: k12, yo, k2tog, yo, k3, yo, ssk, yo, k12.
- Row 25: k13, yo, k2tog, yo, k1, yo, ssk, yo, k13.
- Row 27: k14, yo, k2tog, yo, k3, yo, ssk, yo, k14.
Repeat Rows 1-28 until shawl measures approximately 20 inches from center spine, ending with a WS row. Note: The lace pattern naturally increases stitches each repeat, so you will need to adjust the number of repeats based on your desired size. The shawl will grow significantly with each repeat, so be patient and trust the process.
Edging
Once your shawl reaches the desired size, it's time to add a simple garter stitch edging to finish the piece beautifully.
- Work 6 rows of garter stitch (knit every row) across all stitches, maintaining the increases on RS rows (yo, k1, yo at center and edges) to keep the shawl flat. This means on the RS rows, you'll still work the increases at the beginning, center, and end of the row.
Bind Off Loosely
A loose bind-off is crucial to ensure the shawl's edge remains stretchy and doesn't pucker. Follow this stretchy bind-off method:
- Knit 2, *slip both stitches back to left needle, knit them together through back loop, knit 1, repeat from * until all stitches are bound off.
This technique creates a beautiful, elastic edge that complements the lace pattern perfectly.
Finishing
The final steps are essential to showcase the intricate lacework of your shawl.
- Weave in all ends using a tapestry needle. Be sure to weave them in securely but invisibly.
- Block aggressively to open up the lace pattern. Soak the shawl in lukewarm water with a gentle wool wash, then gently squeeze out excess water (never wring).
- Pin out the points of the edging on blocking mats, stretching the shawl to its full dimensions. The lace will open up dramatically, revealing the beautiful fern pattern.
- Allow to dry completely before unpinning. This can take 24-48 hours depending on humidity.
Once dry, your Aurora Fern Lace Shawl is ready to wear. The gradient yarn will create a stunning ombre effect, and the delicate lace will drape elegantly over your shoulders. This shawl makes a wonderful gift for a loved one or a beautiful treat for yourself. Happy knitting!