Celestial Drift Scarf Free Pattern – Knit a Shifting Sky Wrap
Celestial Drift Scarf Free Pattern – Knit a Shifting Sky Wrap
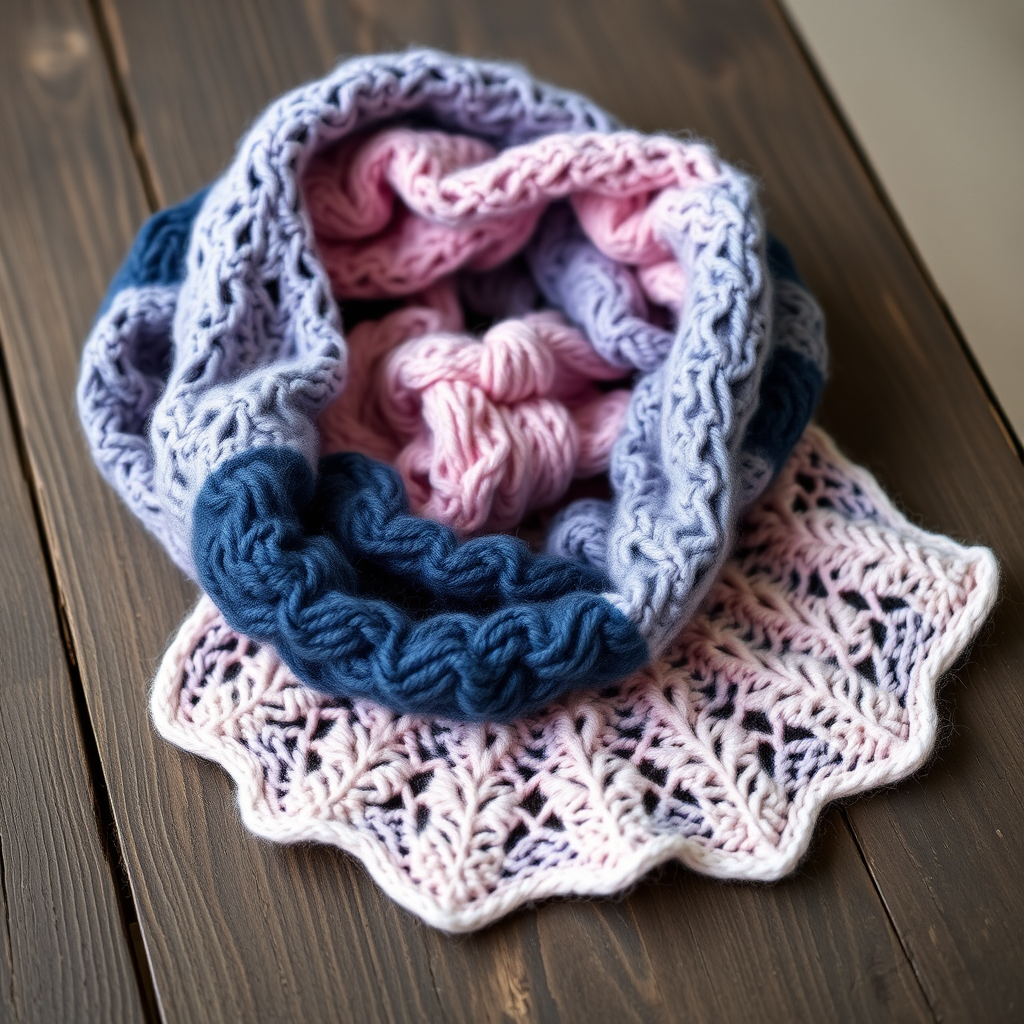
Wrap yourself in the ever-changing hues of a twilight sky with this ethereal knitted scarf. The gradient yarn and delicate lace pattern create a mesmerizing, cloud-like texture that drapes beautifully. Whether you're a seasoned knitter looking for a meditative project or a beginner ready to tackle lace, this pattern is designed to be both accessible and rewarding. The result is a stunning, one-of-a-kind accessory that captures the magic of a sunset in every stitch.
Materials Needed
Before you begin, gather the following supplies. This project is wonderfully portable and requires minimal tools, making it perfect for travel or cozy evenings at home.
- Yarn: Fingering weight yarn in a gradient colorway (e.g., from deep indigo to soft lavender to pale pink), approximately 400 yards. A gradient yarn is key to achieving the celestial effect, but you can also use a solid or variegated yarn for a different look.
- Needles: US 6 (4.0 mm) knitting needles. Straight or circular needles both work; circulars are great for long projects as they distribute the weight better.
- Gauge: 20 stitches and 28 rows = 4 inches in stockinette stitch (blocked). While gauge is important for fit, this scarf is forgiving—just ensure your fabric is airy and not too tight.
- Extras: A tapestry needle for weaving in ends, stitch markers (optional, but helpful for keeping track of pattern repeats), and blocking pins or mats for the finishing touch.
Step-by-Step Instructions
This pattern is a simple 8-row repeat that combines yarn overs (yo), knit two together (k2tog), and slip-slip-knit (ssk) to create the lace. Don't worry if you're new to these techniques—I'll break down each step clearly. The scarf is worked flat, and the lace pattern is reversible, so both sides look beautiful.
Getting Started: Cast On
Cast on 45 stitches loosely. A loose cast-on is essential for a stretchy, drapey edge. I recommend using the long-tail cast-on method, but be sure to keep the tension relaxed. If you tend to cast on tightly, use a needle one size larger just for the cast-on row, then switch to your US 6 needles.
Row 1 (Right Side):
K2, *yo, k2tog, k3; repeat from * to last 3 stitches, yo, k2tog, k1.
Detailed breakdown: Knit 2 stitches. Then, repeat the sequence in asterisks: yarn over (bring the yarn to the front, then over the right needle to create a new loop), knit 2 together (insert the right needle through the next two stitches as if to knit, and knit them together), then knit 3 stitches. Repeat this sequence until you have 3 stitches left on the left needle. On those last 3 stitches, yarn over, knit 2 together, and knit 1. This creates a beautiful eyelet pattern with a slight zigzag.
Row 2 (Wrong Side):
Purl all stitches. This row is simple—just purl across the entire row. The purl bumps will form the base of the lace, giving it texture and depth.
Row 3:
K1, *k2tog, yo, k1, yo, ssk, k1; repeat from * to last 2 stitches, k2.
Detailed breakdown: Knit 1 stitch. Then, repeat the sequence: knit 2 together, yarn over, knit 1, yarn over, slip-slip-knit (slip the next two stitches knitwise one at a time, then insert the left needle into the front of these two slipped stitches and knit them together—this creates a left-leaning decrease), and knit 1. Repeat this until you have 2 stitches left, then knit those 2. This row creates the delicate diamond shapes in the lace.
Row 4:
Purl all stitches. Another simple purl row to anchor the pattern.
Rows 5-8:
Repeat Rows 1-4 once more. Specifically:
- Row 5: K2, *yo, k2tog, k3; repeat from * to last 3 stitches, yo, k2tog, k1. (Same as Row 1)
- Row 6: Purl all stitches.
- Row 7: K1, *k2tog, yo, k1, yo, ssk, k1; repeat from * to last 2 stitches, k2. (Same as Row 3)
- Row 8: Purl all stitches.
Continuing the Pattern
Repeat Rows 1-8 until the scarf measures approximately 60 inches from the cast-on edge, or until you've used most of your yarn. The gradient will naturally shift as you knit, so you'll see the colors transition from deep indigo through lavender to pale pink. If you're using a different gradient, simply enjoy the color journey!
Binding Off
Bind off loosely on a purl row. To do this, purl the first two stitches, then pass the first stitch over the second (as in a standard bind-off). Continue purling one stitch and passing the previous stitch over until all stitches are bound off. Keep the tension loose to maintain the scarf's drape. Cut the yarn, leaving a 6-inch tail, and pull it through the last loop.
Finishing Touches
Weave in all ends using a tapestry needle. This is crucial for a professional finish—thread the needle with the yarn tail and weave it through the purl bumps on the wrong side of the scarf, then trim any excess.
Blocking: The Magic Step
Block the scarf gently to open up the lace pattern and enhance the gradient effect. Soak the scarf in lukewarm water with a drop of mild wool wash for 15-20 minutes. Gently squeeze out excess water (never wring or twist). Lay the scarf flat on a blocking mat or a clean towel. Gently stretch it to the desired dimensions, focusing on opening up the lace eyelets. Pin the edges if needed to maintain shape. Allow it to dry completely—this can take 24-48 hours. Once dry, unpin and enjoy your celestial masterpiece!
This Celestial Drift Scarf is more than just an accessory—it's a wearable piece of art. The combination of gradient yarn and lace creates a shifting, ethereal texture that catches the light beautifully. Whether you gift it to a loved one or keep it for yourself, this scarf is sure to become a cherished favorite. Happy knitting!