The Cozy Cloud Cuff Gloves Free Pattern – A Marshmallow-Soft Knit with Ribbed Fingers
The Cozy Cloud Cuff Gloves Free Pattern – A Marshmallow-Soft Knit with Ribbed Fingers
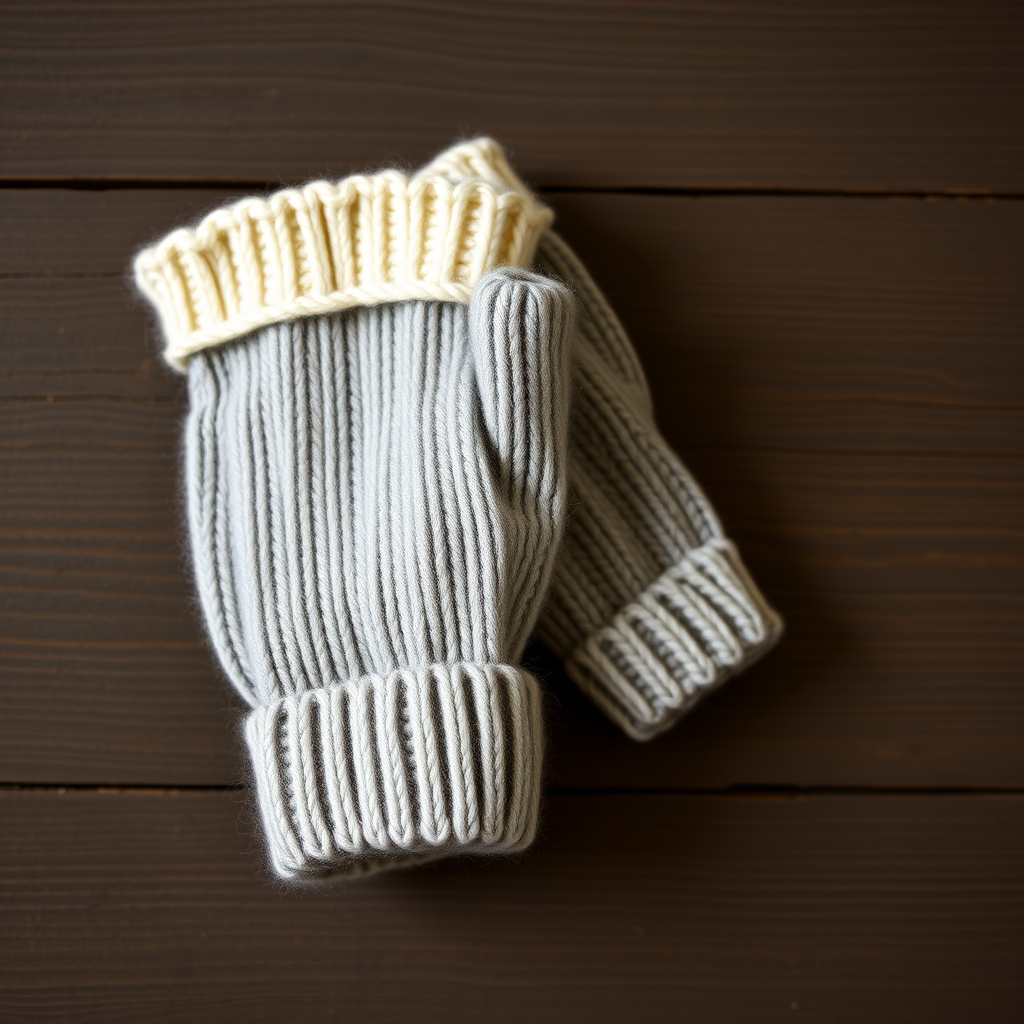
Wrap your hands in the plush embrace of these cloud-soft gloves, featuring a delicate ribbed texture that hugs every finger. This pattern transforms simple yarn into a luxurious, wearable hug that's perfect for chilly mornings and cozy evenings. Whether you're sipping hot cocoa by the fire or taking a brisk autumn walk, these fingerless gloves will keep you warm while allowing full dexterity for texting, reading, or sipping your favorite warm beverage.
What makes these gloves truly special is their individually knit fingers, which provide a tailored, glove-like fit that mass-produced mittens simply can't match. The fold-over cuff adds extra warmth at your wrists, while the soft heather gray and creamy off-white color combination creates a sophisticated, minimalist aesthetic that pairs beautifully with any winter wardrobe. Best of all, this pattern is beginner-friendly, with clear instructions and helpful tips woven throughout.
Materials Needed
Before you begin, gather the following supplies to ensure a smooth knitting experience:
Yarn
- 2 skeins of worsted weight superwash merino wool (approximately 220 yards per skein)
- Color A: Soft heather gray (for the main body)
- Color B: Creamy off-white (for the ribbed cuff)
Pro tip: Superwash merino wool is ideal for this project because it's soft against the skin, machine-washable for easy care, and has excellent stitch definition that showcases the ribbed texture beautifully.
Needles
- US 6 (4.0 mm) circular knitting needles (16-inch length) for the cuff and hand sections
- US 6 (4.0 mm) double-pointed needles (DPNs) for knitting the fingers and thumb
Additional Supplies
- Stitch markers (at least 2)
- Stitch holders or waste yarn (for holding thumb stitches)
- Tapestry needle for weaving in ends
- Scissors
Gauge
20 stitches and 28 rows = 4 inches in stockinette stitch (knit one row, purl one row) after blocking.
Important: Always knit a gauge swatch before starting your project. This ensures your gloves will fit properly. If your gauge is too loose, try smaller needles; if too tight, go up a needle size.
Step-by-Step Instructions
This pattern creates a pair of fingerless gloves with a fold-over cuff and individually knit fingers for a custom fit. The gloves are worked from the cuff up, then the fingers are picked up and knit separately. Follow along carefully, and you'll have a beautiful pair of gloves in no time!
Abbreviations
- CO: cast on
- K: knit
- P: purl
- K2tog: knit two stitches together (decrease)
- SSK: slip, slip, knit (decrease)
- M1L: make one left (increase)
- M1R: make one right (increase)
- St(s): stitch(es)
- DPNs: double-pointed needles
Cuff (Make 2)
Step 1: With the circular needle and Color B (creamy off-white), CO 48 sts using the long-tail method. Join in the round, being careful not to twist your stitches. Place a stitch marker at the beginning of the round to mark your starting point.
Step 2: Work in a 2x2 rib pattern (K2, P2) for 3 inches. This creates the stretchy, textured cuff that will fold over for extra warmth. The ribbing should feel snug but not tight against your wrist.
Step 3: Fold the cuff up (the ribbed edge will be at the bottom). Continue working in the round. The fold creates a beautiful double-layer effect that traps warmth close to your skin.
Hand (Make 2)
Step 4: Switch to Color A (heather gray) and knit 4 rounds in stockinette (knit every stitch) to establish the hand section. This smooth section will contrast beautifully with the ribbed cuff.
Step 5: Thumb Gusset – This is where we create extra room for your thumb. Work these increases carefully:
- Round 1: K24, M1R, K1, M1L, K23 (50 sts total)
- Round 2: Knit all sts (no increases)
- Round 3: K24, M1R, K3, M1L, K23 (52 sts total)
- Round 4: Knit all sts
Continue increasing in this manner every other round, adding 2 sts to the thumb gusset (the section between the M1R and M1L) until you have 15 sts in the gusset (total 62 sts on your needles). The gusset will look like a wedge shape growing from the palm area.
Step 6: Separate Thumb
- Next round: K24, place the next 15 sts on a stitch holder or waste yarn (these are your thumb stitches), CO 1 st (this creates a bridge between the thumb and hand), K23 (48 sts remain for the hand).
Step 7: Continue knitting in the round on these 48 sts until the hand measures 2 inches from the thumb separation. Try the glove on occasionally to check the fit – the hand section should reach just past your knuckles.
Fingers (Work Each Finger Separately)
Now comes the fun part – knitting each finger individually for that perfect, tailored fit. Work each finger as described below, using your DPNs.
Step 8: Index Finger
- Pick up and knit 12 sts from the top edge of the hand, plus 2 sts from the side of where the middle finger will be (14 sts total).
- Distribute onto 3 DPNs (5, 5, 4 sts).
- Knit in the round for 1.5 inches.
- Decrease round: K2tog across all sts (7 sts remain). Cut yarn, thread through remaining sts, pull tight, and weave in end.
Step 9: Middle Finger
- Pick up and knit 12 sts from the top edge, plus 2 sts from the side of the index finger and 2 sts from the side of the ring finger (16 sts total).
- Distribute onto 3 DPNs (6, 5, 5 sts).
- Knit in the round for 1.75 inches (this finger is slightly longer than the others).
- Decrease round: K2tog across all sts (8 sts remain). Finish as for index finger.
Step 10: Ring Finger
- Pick up and knit 12 sts from the top edge, plus 2 sts from the side of the middle finger and 2 sts from the side of the pinky (16 sts total).
- Distribute onto 3 DPNs (6, 5, 5 sts).
- Knit in the round for 1.5 inches.
- Decrease round: K2tog across all sts (8 sts remain). Finish as for index finger.
Step 11: Pinky Finger
- Pick up and knit the remaining 12 sts from the top edge, plus 2 sts from the side of the ring finger (14 sts total).
- Distribute onto 3 DPNs (5, 5, 4 sts).
- Knit in the round for 1 inch (the pinky is the shortest finger).
- Decrease round: K2tog across all sts (7 sts remain). Finish as for index finger.
Thumb
Step 12: Place the 15 held thumb sts back onto DPNs. Pick up and knit 1 st from the bridge (16 sts total). Distribute onto 3 DPNs (6, 5, 5 sts).
Step 13: Knit in the round for 1.5 inches. The thumb should feel comfortable and not too tight.
Step 14: Decrease round: K2tog across all sts (8 sts remain). Finish as for fingers – cut yarn, thread through remaining sts, pull tight, and weave in end.
Finishing
Step 15: Weave in all loose ends using your tapestry needle. Take your time with this step – secure ends make for a more durable, professional-looking finished product.
Step 16: Block the gloves gently by wetting them with lukewarm water, gently squeezing out excess moisture (never wring!), and laying flat to dry. Shape the fingers and thumb while damp to ensure they dry in the correct position. This step is crucial for achieving that beautiful, polished look.
Step 17: Repeat all steps for the second glove, ensuring the thumb gusset is on the opposite side for the right hand. To mirror the increases: K23, M1R, K1, M1L, K24 (instead of K24, M1R, K1, M1L, K23).
Tips for Success
- Try on as you go: The beauty of knitting gloves in the round is that you can try them on at any point. Don't be afraid to adjust the length of fingers or the hand section to fit your unique hand shape.
- Use stitch markers wisely: Place a marker at the beginning of each round and between the thumb gusset increases to keep track of your progress.
- Keep tension consistent: When picking up stitches for the fingers, maintain even tension to avoid gaps or puckering at the base of each finger.
- Blocking is essential: Don't skip the blocking step! It evens out your stitches and gives the gloves that professional, polished finish.
Customization Ideas
Once you've mastered this pattern, feel free to make it your own:
- Color variations: Try a solid color for a more minimalist look, or use a variegated yarn for a fun, playful effect.
- Add a cable: Incorporate a simple cable pattern down the back of the hand for extra visual interest.
- Extend the fingers: For full-finger gloves, simply knit each finger longer before decreasing.
- Embellish: Add buttons, beads, or embroidery to personalize your gloves.
These Cozy Cloud Cuff Gloves make wonderful gifts for friends and family – they're practical, beautiful, and made with love. The combination of the soft heather gray and creamy off-white creates a timeless look that will never go out of style. Whether you're a seasoned knitter looking for a quick weekend project or a beginner ready to tackle your first pair of gloves, this pattern is sure to become a favorite in your knitting repertoire.
Happy knitting, and may your hands always be wrapped in cloud-soft warmth!