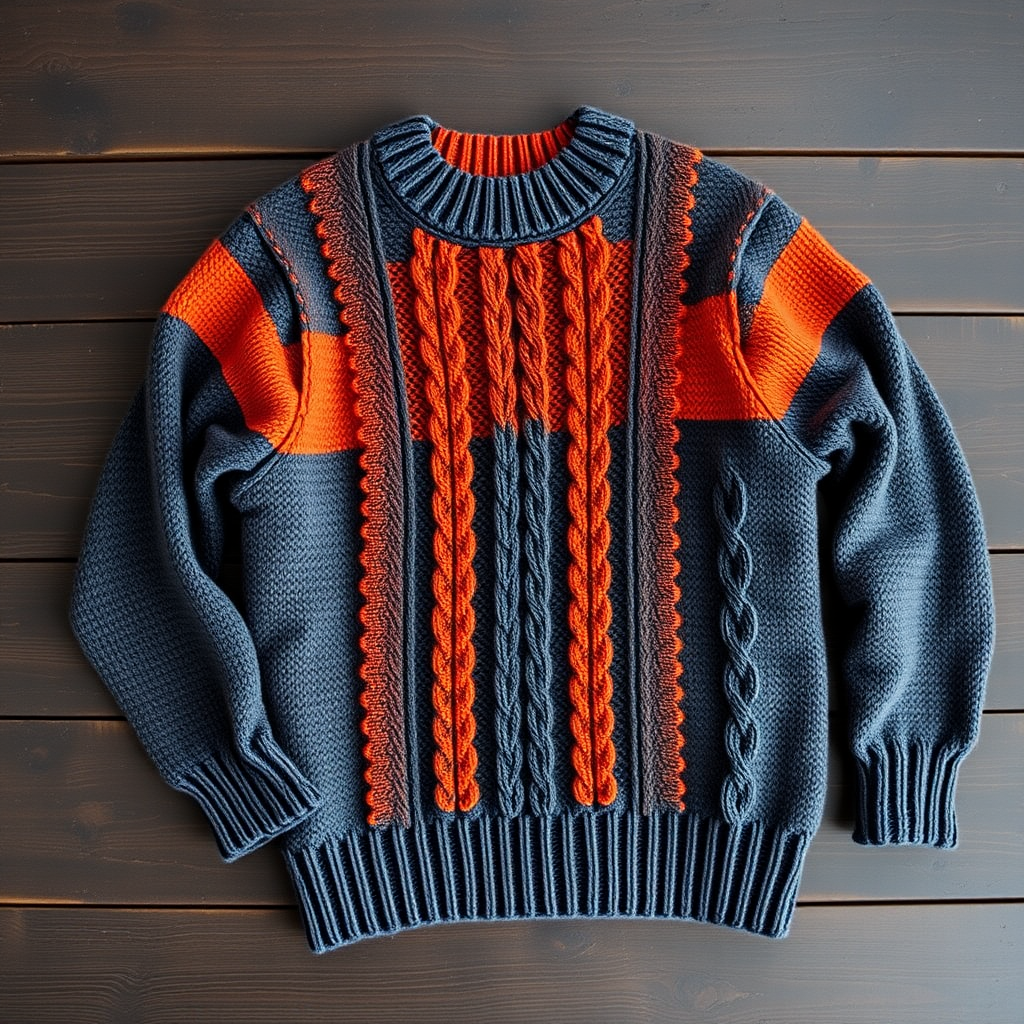
Dario Heritage Pullover Free Pattern – Knit a Rugged Nordic Yoke Sweater

Dario Heritage Pullover Free Pattern – Knit a Rugged Nordic Yoke Sweater
Wrap yourself in the timeless warmth of the Dario Heritage Pullover, a rugged yet refined knit inspired by Nordic landscapes and alpine cabins. This pattern delivers a richly textured yoke and cozy, masculine silhouette perfect for crisp autumn days. Whether you're an experienced knitter looking for a satisfying project or a confident beginner ready to tackle your first sweater, this pattern offers clear instructions and stunning results. The combination of deep forest green, oatmeal heather, and rust orange creates a classic Nordic aesthetic that never goes out of style.
Materials Needed
Before you begin, gather the following materials to ensure a smooth knitting experience:
Yarn
- Worsted weight wool or wool blend (e.g., Cascade 220) in three colors:
- Main Color (MC): Deep Forest Green – approximately 1,200 (1,350, 1,500, 1,650, 1,800) yards
- Contrast Color 1 (CC1): Oatmeal Heather – approximately 200 (225, 250, 275, 300) yards
- Contrast Color 2 (CC2): Rust Orange – approximately 200 (225, 250, 275, 300) yards
Needles
- US 7 (4.5 mm) 16-inch and 32-inch circular needles
- US 8 (5.0 mm) 16-inch and 32-inch circular needles
- Double-pointed needles (DPNs) in both US 7 and US 8 sizes for sleeves
Additional Supplies
- Stitch markers (at least 6)
- Yarn needle for weaving in ends
- Scissors
- Tape measure
Gauge
18 stitches and 24 rows = 4 inches in stockinette stitch on larger needles (US 8). Always knit a gauge swatch before starting to ensure your finished sweater matches the intended measurements.
Step-by-Step Instructions
Sizes and Measurements
This pattern is written for sizes S (M, L, XL, XXL) with a finished chest measurement of 38 (42, 46, 50, 54) inches. Choose the size that gives you 2-4 inches of positive ease for a comfortable, relaxed fit.
Abbreviations
- k = knit
- p = purl
- k2tog = knit two together (right-leaning decrease)
- ssk = slip slip knit (left-leaning decrease)
- pm = place marker
- sm = slip marker
- yo = yarn over
- MC = Main Color (Deep Forest Green)
- CC1 = Contrast Color 1 (Oatmeal Heather)
- CC2 = Contrast Color 2 (Rust Orange)
Pattern Notes
This sweater is worked in the round from the bottom up. You'll begin with the body, then knit the sleeves separately, and finally join everything together to work the yoke. Use longer circular needles for the body and switch to shorter ones as the yoke decreases the stitch count. Take your time with the colorwork sections and enjoy the meditative rhythm of the pattern.
Body
Step 1: With the smaller 32-inch circular needle and MC, cast on 180 (200, 220, 240, 260) stitches. Join in the round, being extremely careful not to twist your stitches. Place a marker to indicate the beginning of the round.
Step 2: Work K2, P2 ribbing for 2.5 inches. This creates a stretchy, comfortable hem that will hold its shape beautifully.
Step 3: Switch to the larger 32-inch circular needle. Work in stockinette stitch (knit every round) until the piece measures 14 (15, 16, 17, 18) inches from the cast-on edge. This creates the main body of the sweater.
Step 4: Place side markers: knit 90 (100, 110, 120, 130) stitches, place a marker, then knit to the end of the round. You now have two equal sections for the front and back of the sweater.
Step 5: Shape the underarms: Bind off 10 (12, 14, 16, 18) stitches at each side marker. To do this, bind off 5 (6, 7, 8, 9) stitches before the marker and 5 (6, 7, 8, 9) stitches after the marker. This creates openings where the sleeves will be attached. Place the body aside for now.
Sleeves (Make 2)
Step 1: With the smaller DPNs and MC, cast on 40 (44, 48, 52, 56) stitches. Join in the round, placing a marker at the beginning of the round.
Step 2: Work K2, P2 ribbing for 2.5 inches, matching the body's hem.
Step 3: Switch to the larger DPNs. Work in stockinette stitch, increasing 1 stitch on each side of the marker every 6 (6, 7, 7, 8) rounds. To increase, knit into the front and back of the stitch before the marker, then knit into the front and back of the stitch after the marker. Continue increasing until you have 60 (64, 68, 72, 76) stitches on your needles.
Step 4: Continue working even (without increases) until the sleeve measures 18 (19, 20, 21, 22) inches from the cast-on edge.
Step 5: Bind off 10 (12, 14, 16, 18) stitches centered under the arm, matching the body's underarm bind-off. Set the sleeve aside and knit the second sleeve identically.
Yoke
Step 1: With the larger 32-inch circular needle, place the body stitches back on the needle. Now place the sleeve stitches onto the same needle, positioning them where the underarm bind-offs are. You will have 240 (264, 288, 312, 336) stitches total. Place a marker at each of the four raglan joins (where sleeves meet the body).
Step 2: Round 1: Knit all stitches around to establish the yoke.
Step 3: Raglan decreases: *Knit to 2 stitches before the marker, ssk, slip marker, k2tog* repeat from * to * around. This creates 8 decreases per round (2 at each raglan line).
Step 4: Repeat the raglan decrease round every other round for a total of 8 (9, 10, 11, 12) decrease rounds. After completing all decreases, you will have 176 (192, 208, 224, 240) stitches remaining.
Yoke Pattern
Now you'll work the beautiful Nordic-inspired colorwork pattern. Follow these 12 rounds carefully, changing colors as indicated:
Round 1 (CC1): *K1, p1* repeat around. This creates a subtle ribbed texture.
Round 2 (CC1): Knit all stitches.
Round 3 (CC2): *K2, yo, k2tog* repeat around. The yarn overs create delicate eyelet holes.
Round 4 (CC2): Knit all stitches.
Round 5 (MC): *K3, p1* repeat around. This adds depth and dimension.
Round 6 (MC): Knit all stitches.
Round 7 (CC1): *K1, p2, k1* repeat around.
Round 8 (CC1): Knit all stitches.
Round 9 (CC2): *K2tog, yo, k2* repeat around. This mirrors Round 3's eyelets.
Round 10 (CC2): Knit all stitches.
Round 11 (MC): *P1, k3* repeat around.
Round 12 (MC): Knit all stitches.
Repeat these 12 rounds one more time to complete the yoke pattern. The combination of textures, eyelets, and color blocks creates that stunning Nordic-inspired design.
Shape Neckline
Step 1: Continue in stockinette stitch with MC. Now you'll work short rows to shape the back neck for a better fit:
- Knit to 10 stitches past the back center marker, turn your work.
- Purl to 10 stitches past the other side marker, turn again.
- Continue turning 8 stitches further each time until you have turned 4 times on each side.
Step 2: After completing the short rows, work one full round in knit stitch to even everything out.
Neckband
Step 1: Switch to the smaller 16-inch circular needle.
Step 2: Work K2, P2 ribbing for 1.5 inches. This creates a comfortable, stretchy crew neck.
Step 3: Bind off loosely in pattern (knit the knits and purl the purls as you bind off). A loose bind-off ensures the neckband doesn't pull or pucker.
Finishing
Step 1: Weave in all loose ends using your yarn needle. Take care to weave ends on the wrong side of the work so they're invisible from the outside.
Step 2: Sew the underarm gaps closed using the mattress stitch or whip stitch, matching the bind-off edges neatly.
Step 3: Block your sweater to the specified measurements. Wet blocking works beautifully with wool – soak the sweater in lukewarm water with a gentle wool wash, gently squeeze out excess water (never wring), then lay flat on towels and shape to the correct dimensions. Allow to dry completely.
Once blocked, your Dario Heritage Pullover is ready to wear! The deep forest green body pairs beautifully with the oatmeal and rust yoke, creating a sweater that's both rugged and refined. This heirloom-quality piece will keep you warm and stylish for years to come.
Happy knitting! We'd love to see your finished Dario Heritage Pullover – share your progress and finished projects in the comments below or tag us on social media.