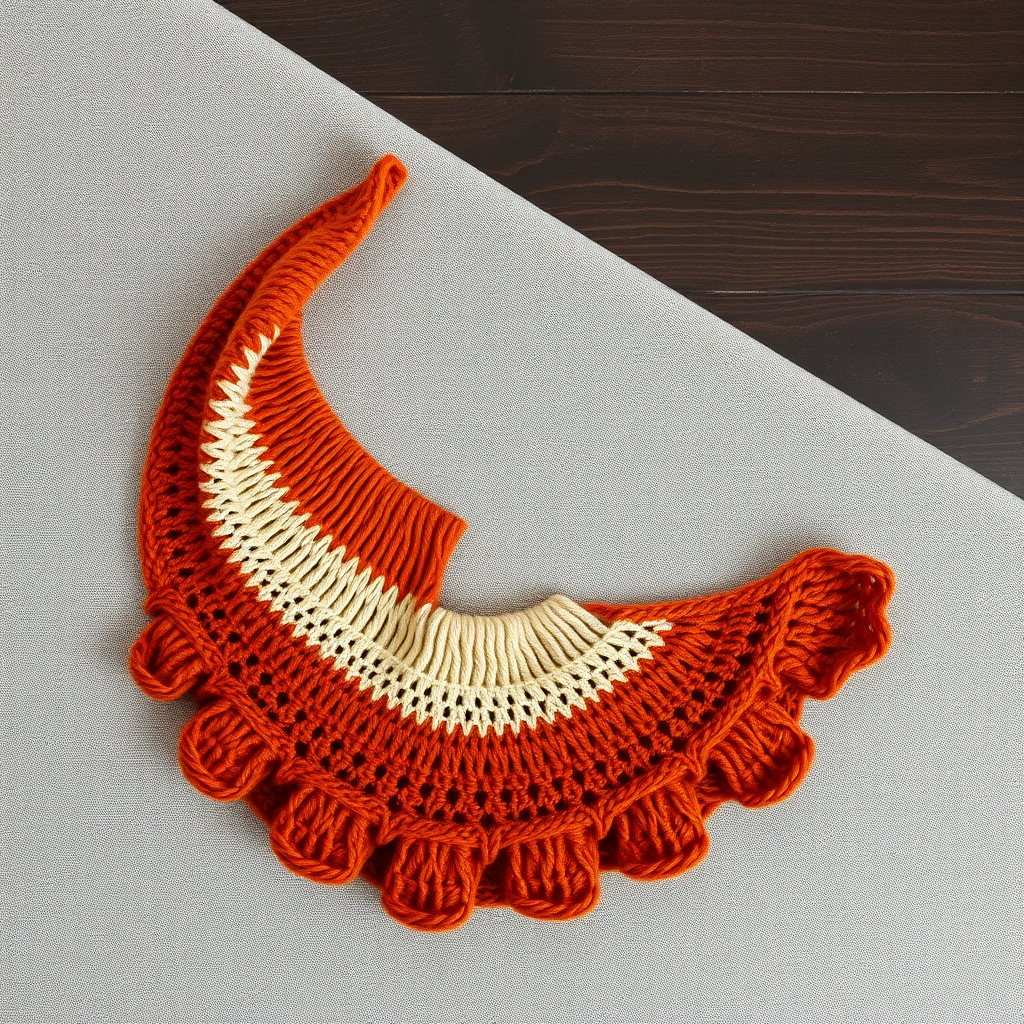
Emberfall Driftwood Wrap Free Knitting Pattern

Wrap Yourself in Autumn: The Emberfall Driftwood Wrap
There are some projects that feel less like knitting and more like capturing a feeling. The Emberfall Driftwood Wrap is exactly that—a textured crescent shawl that bottles the warm, organic beauty of a crisp autumn afternoon. With its mesmerizing play of slipped stitches and gentle waves, this wrap drapes like a cozy, artistic embrace. Knitted in a rich gradient of burnt sienna, deep amber, and soft cream, it’s the kind of piece that makes you want to curl up with a hot cup of tea and a good book.
This pattern is perfect for the beginner-intermediate knitter who is ready to move beyond simple scarves. It introduces you to the elegant slipped stitch technique, which creates a dense, woven texture that looks far more complicated than it actually is. The crescent shape is achieved through simple increases, and the color changes are a delightful way to play with gradient effects without the fuss of complicated stranding or intarsia.
Whether you’re looking for a thoughtful handmade gift or a personal treat, this wrap is a rewarding project that you’ll be proud to wear. Let’s dive into the pattern and get those needles clicking.
Materials Needed
Before you begin, gather your supplies. This project uses worsted-weight yarn, which is readily available and works up quickly, making it a satisfying weekend project.
Yarn
- Worsted weight yarn in 3 colors (approx. 220 yards each):
- Color A (Burnt Sienna): 220 yds
- Color B (Deep Amber): 220 yds
- Color C (Cream): 220 yds
- Suggested Yarn: Lion Brand Wool-Ease Worsted (or any worsted weight yarn you love).
Needles & Notions
- US 8 (5.0 mm) 32-inch circular knitting needle (or size needed to obtain gauge). The long cable is essential to hold the growing number of stitches.
- Stitch markers (optional, but helpful for tracking the center).
- Yarn needle for weaving in ends.
- Blocking mats and pins (for the final step).
Gauge
18 stitches and 24 rows = 4 inches in stockinette stitch (blocked). Gauge is important for the final size and drape, so take a moment to knit a swatch!
Step-by-Step Instructions
This shawl is worked from the top center down, increasing on each side to form a crescent shape. The stitch pattern is a simple 4-row repeat that creates a beautiful woven texture. Don’t be intimidated by the slipped stitches—they are easier than they look and create a stunning effect.
Special Stitches
- Sl1wyif: Slip 1 stitch purlwise with yarn in front. (This creates the woven texture.)
- Kfb: Knit into the front and back of the same stitch (increase).
- P2tog: Purl 2 stitches together. (Note: This is listed in the original pattern specs, but the instructions below do not use it. We will follow the step-by-step instructions provided.)
Getting Started: The Setup
We’ll begin by casting on and working a few short rows to establish the center spine of the shawl.
Setup:
Cast on 7 stitches loosely.
Row 1 (RS): Kfb, k1, sl1wyif, k1, sl1wyif, k1, kfb. (9 sts)
Explanation: You are increasing at both edges and setting up the slipped stitch pattern in the center.
Row 2 (WS): Kfb, purl to last 2 sts, k1, kfb. (11 sts)
Explanation: You are increasing at both edges. The last stitch before the increase is knit to create a neat edge.
Row 3 (RS): Kfb, k2, sl1wyif, k1, sl1wyif, k2, kfb. (13 sts)
Explanation: Continue the established pattern, adding more knit stitches on the edges.
Row 4 (WS): Kfb, purl to last 2 sts, k1, kfb. (15 sts)
The Body Pattern
Now we’ll work the main body. You will continue increasing on every row (kfb at the beginning and end), while working the center stitch pattern. The increases will create the crescent shape.
Row 1 (RS): Kfb, *k1, sl1wyif* repeat from * to * until last 2 sts, k1, kfb.
Explanation: You are creating a ribbed texture with slipped stitches.
Row 2 (WS): Kfb, purl to last 2 sts, k1, kfb.
Explanation: A simple purl row with increases at the edges.
Row 3 (RS): Kfb, *sl1wyif, k1* repeat from * to * until last 2 sts, sl1wyif, kfb.
Explanation: This row offsets the slipped stitches, creating the woven, brick-like pattern.
Row 4 (WS): Kfb, purl to last 2 sts, k1, kfb.
Repeat these 4 rows, changing colors as follows:
- Work 12 rows with Color A.
- Work 12 rows with Color B.
- Work 12 rows with Color C.
- Work 12 rows with Color B.
- Work 12 rows with Color A.
Continue repeating this color sequence until the shawl measures approximately 24 inches from the center cast-on edge, ending with a WS row. Don’t worry if it seems like it’s taking a while—the increases mean each row gets longer, and the fabric grows quickly.
Finishing Touches: Edging & Bind Off
Once you’ve reached your desired length, it’s time to add a simple, elegant border.
Edging:
Work 4 rows of garter stitch (knit every row) in Color C, continuing the increases on each edge (kfb at beginning and end of every row). This will create a slightly ruffled, organic edge that mimics the look of driftwood.
Bind Off:
Loosely bind off all stitches knitwise. Weave in all ends with your yarn needle.
Blocking: The Magic Step
Blocking is essential for this pattern. It will open up the slipped stitches, even out the fabric, and give your wrap its beautiful drape.
- Soak the shawl in lukewarm water with a gentle wool wash for 20 minutes.
- Gently squeeze out excess water (do not wring).
- Lay flat on a clean towel and roll up to remove more water.
- Lay the shawl flat on blocking mats, shape it to a crescent, and pin the edges to open up the stitch pattern.
- Allow to dry completely before unpinning.
Once dry, your Emberfall Driftwood Wrap is ready to wear. Drape it over your shoulders and enjoy the warm, artistic embrace of your handiwork. Happy knitting!