Frosted Berry Cable Cup Cozy Free Pattern – Knit a Textured Coffee Sleeve
Frosted Berry Cable Cup Cozy Free Pattern – Knit a Textured Coffee Sleeve
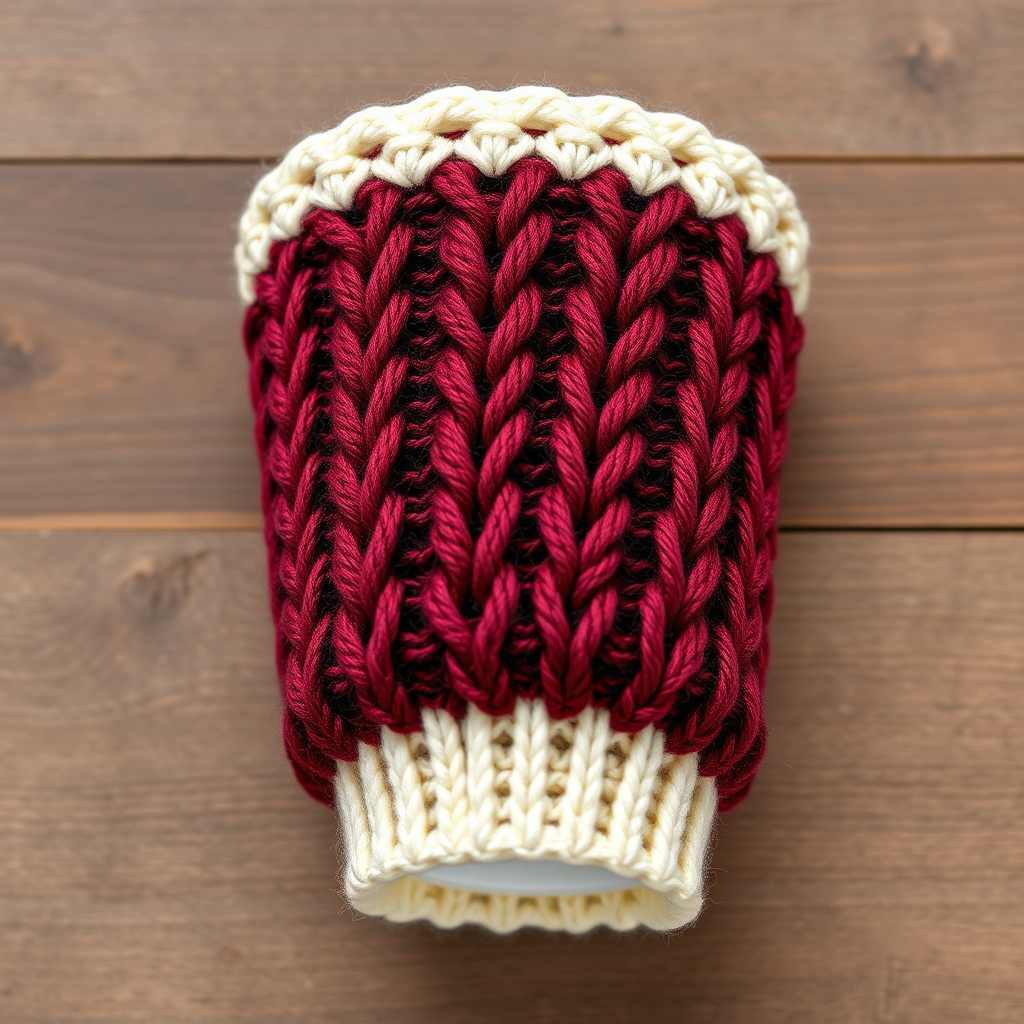
Wrap your morning brew in the plush warmth of a hand-knitted cable sleeve, inspired by winter berries and frosted vines. This quick project adds a touch of rustic elegance to any cup while keeping your hands toasty. The rich burgundy body and cream cuffs create a striking contrast that evokes a cozy winter forest, and the bold cable pattern is surprisingly simple to master—even for beginners. Whether you're crafting a gift for a coffee lover or treating yourself, this cup cozy works up in just a few evenings and makes every sip feel special.
Materials Needed
Before you begin, gather the following supplies. All items are readily available at craft stores or online.
- Yarn: Worsted weight yarn in deep burgundy (MC) and cream (CC), approximately 50g of each. A soft acrylic or wool blend works beautifully.
- Knitting Needles: US size 6 (4.0 mm) straight needles for the body, plus a set of double-pointed needles (DPNs) or a circular needle for working the cuffs in the round.
- Cable Needle: A small cable needle (or a spare DPN) for creating the cable twists.
- Tapestry Needle: For weaving in ends and finishing.
- Optional: A small button or snap, plus matching thread, if you prefer a closure.
Gauge: 20 stitches and 26 rows = 4 inches in stockinette stitch. Always check your gauge to ensure a proper fit—if your stitches are too tight, try larger needles; if too loose, go down a size.
Step-by-Step Instructions
This pattern is worked in three sections: the bottom cuff (in the round), the cable body (flat, back and forth), and the top cuff (in the round again). The finished size fits a standard 12 oz coffee cup (approximately 3.5 inches wide and 4 inches tall) and stretches slightly for a snug fit.
Abbreviations
- CO: Cast on
- K: Knit
- P: Purl
- C4F: Slip 2 stitches to cable needle, hold in front, knit next 2 stitches, then knit 2 from cable needle
- C4B: Slip 2 stitches to cable needle, hold in back, knit next 2 stitches, then knit 2 from cable needle
- K2tog: Knit two stitches together
- P2tog: Purl two stitches together
- St st: Stockinette stitch (knit on right side, purl on wrong side)
Bottom Cuff (Worked in the Round)
- With MC, CO 40 stitches. Distribute evenly across your DPNs or use the magic loop method on a circular needle. Join in the round, being careful not to twist your stitches. Place a stitch marker to mark the beginning of the round.
- Rounds 1–4: Work *K2, P2* ribbing around for 4 rounds. This creates a stretchy, snug cuff.
- Round 5: Switch to CC. Knit all stitches around. This creates a clean color transition.
- Round 6: Purl all stitches around. This purl ridge adds a subtle texture and helps define the cuff.
- Round 7: Switch back to MC. Knit all stitches around. Your bottom cuff is complete.
Body (Worked Flat, Back and Forth)
Now you'll work the cable pattern flat. Transfer your stitches to straight needles, or continue on your circular needle without joining (just work back and forth). The body is 40 stitches wide, with a 16-stitch cable panel in the center flanked by stockinette and purl borders.
- Row 1 (Right Side): K10, P2, K16, P2, K10. (The K10 sections are the side panels, the P2s are the borders, and the K16 is the cable panel.)
- Row 2 (Wrong Side): P10, K2, P16, K2, P10. (Purl the knit stitches from the previous row and knit the purl stitches—this maintains the pattern.)
- Row 3: K10, P2, C4F, C4B, C4F, C4B, P2, K10. (This row creates the first set of cable twists. Work each cable as follows: C4F—slip 2 stitches to cable needle, hold in front, knit next 2 stitches, then knit the 2 from the cable needle. C4B—slip 2 stitches to cable needle, hold in back, knit next 2 stitches, then knit the 2 from the cable needle.)
- Row 4: Repeat Row 2.
- Row 5: K10, P2, K16, P2, K10. (Work the cable panel as plain knit stitches—this lets the twists "rest" and creates the braided effect.)
- Row 6: Repeat Row 2.
- Row 7: K10, P2, C4B, C4F, C4B, C4F, P2, K10. (This row creates the second set of twists, alternating the direction for a woven look.)
- Row 8: Repeat Row 2.
- Repeat Rows 1–8 until the body measures 4 inches from the cast-on edge, ending with a Wrong Side row (Row 2, 4, 6, or 8).
Pro Tip: Keep your tension even when working cables. If your cable stitches feel tight, try using a slightly larger cable needle or loosening your yarn tension on those rows.
Top Cuff (Worked in the Round Again)
- Transfer your stitches back to DPNs or join in the round on your circular needle. Place a marker.
- With MC, knit 1 round, then purl 1 round. This mirrors the bottom cuff and creates a neat transition.
- Switch to CC. Knit 1 round, then purl 1 round.
- Switch back to MC. Work *K2, P2* ribbing for 4 rounds. This creates a stretchy top edge that grips the cup.
- Bind off loosely in pattern. To bind off in ribbing, knit the knit stitches and purl the purl stitches as you bind off. Be sure not to bind off too tightly—use a larger needle if needed, or bind off with a loose tension.
Finishing
- Weave in all loose ends with your tapestry needle. Take care to weave them in on the wrong side of the work, following the direction of the stitches for a clean finish.
- Optional: Fold the bottom cuff up over the body for a decorative contrast, or leave it down as designed. Both looks are charming!
- Closure: To close the sleeve, you have a few options:
- Sew a small button or snap on the inside edge, then overlap the edges and secure when wrapping around the cup.
- Simply overlap the edges and use a stitch holder or a small safety pin to secure while in use.
- For a permanent closure, seam the edges together with mattress stitch, leaving a small opening to slip over the cup.
- Block gently to even out the cable pattern. Wet block by soaking in lukewarm water, gently squeezing out excess, and laying flat to dry. This will relax the yarn and make your cables pop beautifully.
Your Frosted Berry Cable Cup Cozy is complete! Slip it over your favorite mug, pour a warm drink, and enjoy the handcrafted comfort. This pattern is perfect for using up small amounts of worsted weight yarn and makes a thoughtful, handmade gift. Happy knitting!



