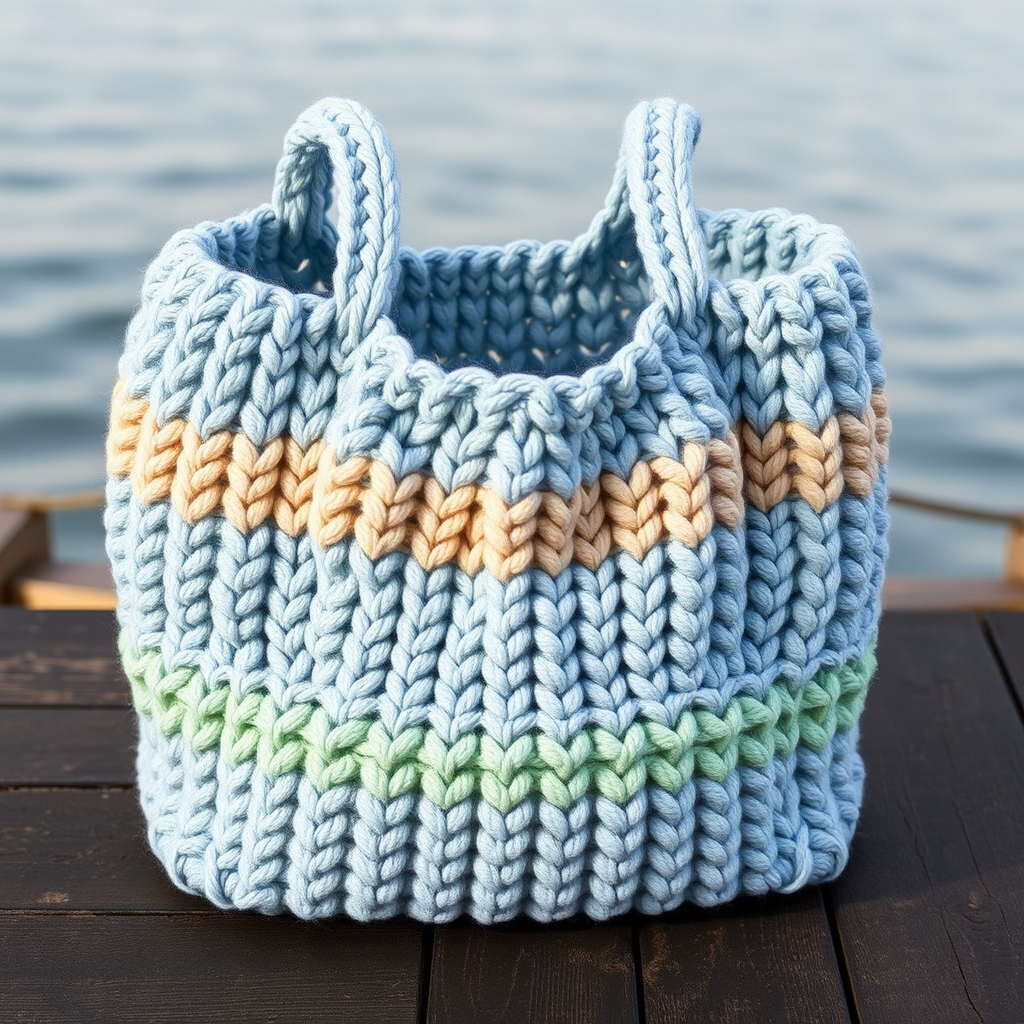
Harvest Moon Market Tote Free Pattern – A Chunky Knit Boho Bag

Harvest Moon Market Tote Free Pattern – A Chunky Knit Boho Bag
Carry your farmers market finds in this richly textured, earthy-toned tote that blends rustic charm with modern boho flair. The chunky knit construction and leather-look handles make it a statement piece you'll reach for all season long. This free knitting pattern is perfect for beginners who want to create a stylish, functional accessory with minimal fuss. The super bulky yarn works up quickly, and the simple color-block stripes add visual interest without complicated techniques.
Materials Needed
Before you begin, gather the following supplies. All items are readily available at your local craft store or online.
- Yarn: Super bulky weight yarn (approx. 250-300 yards total) in three colors: terracotta (approx. 100-120 yards), mustard (approx. 80-100 yards), and cream (approx. 80-100 yards). Look for a yarn labeled "super bulky" or "weight 6" for best results.
- Knitting Needles: US 15 (10 mm) circular knitting needle (24-inch length) and US 15 (10 mm) double-pointed needles (for working small sections if needed).
- Stitch Markers: At least one marker to indicate the beginning of the round.
- Tapestry Needle: For weaving in ends and sewing the top border.
- Scissors: For cutting yarn.
- Optional: Fabric for lining (about 12" x 16") and sewing supplies if you choose to add a lining.
Gauge: 8 stitches and 10 rows = 4 inches in stockinette stitch. Always check your gauge to ensure your bag turns out the correct size. If your gauge is off, adjust your needle size accordingly.
Step-by-Step Instructions
This bag is knit in the round from the bottom up, using a simple color-block stripe pattern and a sturdy garter stitch base. Follow these detailed instructions carefully, and you'll have a beautiful tote in no time.
Abbreviations
- CO: Cast on
- K: Knit
- P: Purl
- K2tog: Knit two stitches together (decrease)
- St(s): Stitch(es)
- Rnd(s): Round(s)
Base
Step 1: With terracotta yarn, CO 40 stitches onto your circular needle. Join in the round, being extremely careful not to twist your stitches. Place a stitch marker on your right-hand needle to mark the beginning of the round. The yarn tail should be on your left side, and the working yarn on your right.
Step 2: Work in garter stitch for 8 rounds. Garter stitch in the round is created by knitting one round, then purling the next round. Repeat this sequence (knit round, purl round) for a total of 8 rounds. This creates a sturdy, non-curling base that will give your bag structure. The ridged texture you see is the garter stitch pattern.
Body
Step 3: Switch to stockinette stitch, which means you will knit every round. Work 10 rounds in terracotta. Your knitting should now measure about 2 inches from the base. Keep your tension even for a smooth fabric.
Step 4: Switch to mustard yarn. To change colors, simply drop the terracotta yarn and start knitting with the mustard yarn, leaving a 6-inch tail to weave in later. Work 10 rounds in stockinette stitch with the mustard yarn.
Step 5: Switch to cream yarn. Work 10 rounds in stockinette stitch. You should now have three distinct color blocks: terracotta, mustard, and cream.
Step 6: Repeat the color sequence (terracotta, mustard, cream) two more times. This means you will work 10 rounds in terracotta, then 10 rounds in mustard, then 10 rounds in cream, and then repeat that entire sequence one more time. In total, you will have 3 stripes of each color. The body should measure about 10 inches from the base when you're done. If your gauge is correct, you'll have 30 rounds of stockinette after the base.
Handle Openings
Step 7: This is where we create the openings for your handles. On the next round, work as follows: K10, bind off 10 stitches, K10, bind off 10 stitches, K10. To bind off, knit two stitches, then pass the first stitch over the second stitch, and continue until you've bound off 10 stitches. After this round, you will have 20 stitches total remaining on your needle, divided into two sections of 10 stitches each. The bound-off sections create gaps in your knitting.
Step 8: Continue working each section separately in stockinette stitch for 6 rounds. This means you will knit across the first 10 stitches, then turn your work and knit back across those same 10 stitches (working flat instead of in the round). Then do the same for the second set of 10 stitches. You are essentially knitting two separate straps. This creates the handle openings. Work each section back and forth for 6 rows total.
Step 9: On the next round, you will rejoin the sections. Work as follows: K10, CO 10 stitches using the backward loop method, K10, CO 10 stitches. To do the backward loop cast on, simply make a loop with the yarn and place it on your right-hand needle, then tighten. Repeat this 10 times. You now have 40 stitches on your needle again, and the handle openings are complete.
Top Border
Step 10: Work in garter stitch for 6 rounds. Remember, garter stitch in the round is knit one round, purl one round. Repeat this sequence for 6 rounds total. This creates a nice, sturdy border at the top of your bag.
Step 11: Bind off all stitches loosely. To bind off loosely, use a larger needle if needed, or simply don't pull your stitches too tight. Cut your yarn, leaving a 12-inch tail, and pull it through the last loop to secure.
Finishing
Step 12: Fold the top border down to the inside of the bag. The garter stitch border should fold naturally over the handle openings. Using your tapestry needle and the yarn tail, sew the folded border down to the inside of the bag. This creates a neat, finished edge and reinforces the handle openings. Sew through both layers of the border and the body of the bag, making sure your stitches are secure but not too tight.
Step 13: Weave in all loose ends from your color changes and cast-on edge. Use your tapestry needle to thread the ends through the inside of the bag, hiding them completely.
Step 14 (Optional): For extra durability, add a fabric lining to the inside of the bag. Cut a piece of fabric to fit the inside dimensions, leaving a seam allowance. Sew the sides and bottom of the fabric, then insert it into the bag and hand-stitch it to the top border. This is a great way to prevent small items from falling through the knit stitches.
Your Harvest Moon Market Tote is complete! Fill it with fresh produce, a good book, or your daily essentials. The chunky yarn and earthy colors make it a versatile accessory that pairs beautifully with any outfit. Enjoy your handmade creation!