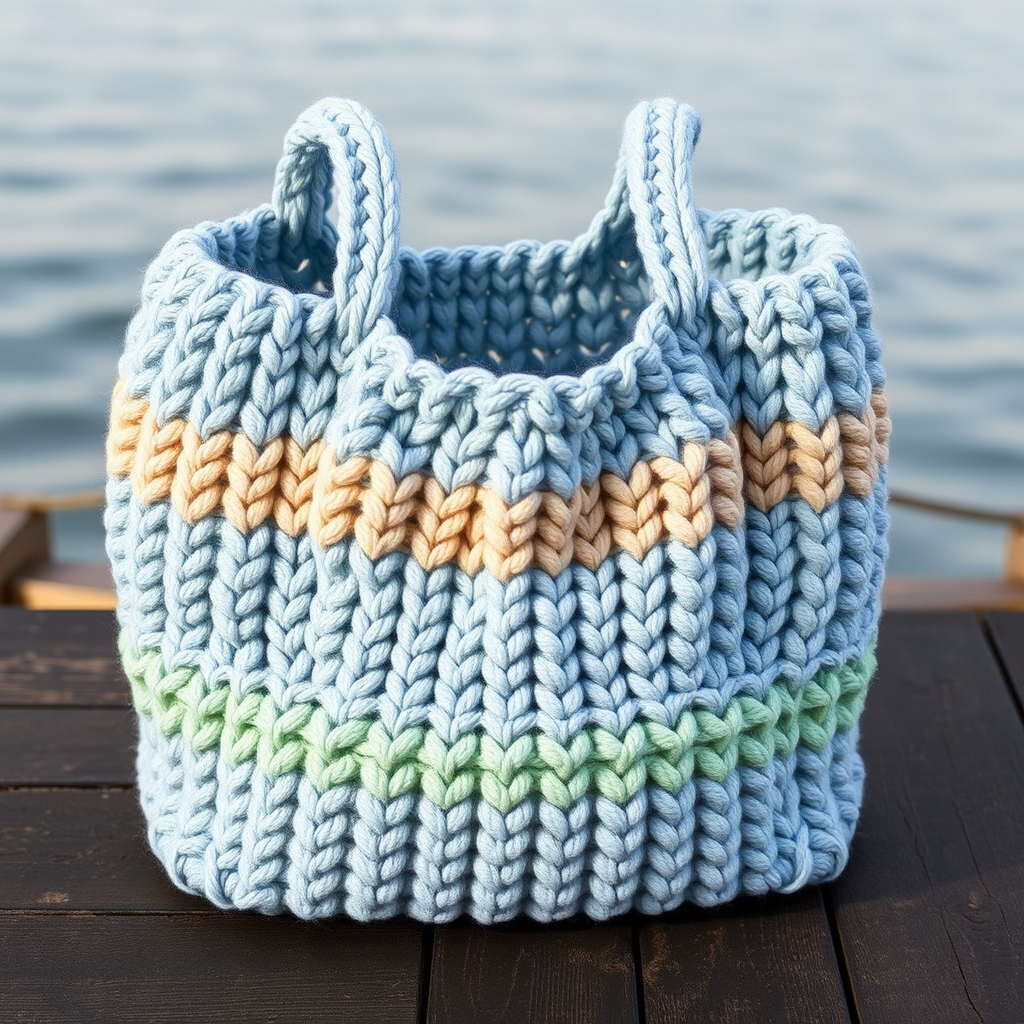
Sunwashed Terra Cotta Chunky T-Shirt Tote Free Pattern – Knit a Bohemian Market Bag

Knit a Bohemian Market Bag: The Sunwashed Terra Cotta Chunky T-Shirt Tote
There’s something deeply satisfying about creating a stylish, functional accessory with your own two hands—especially when it’s made from eco-friendly recycled materials. The Sunwashed Terra Cotta Chunky T-Shirt Tote is the perfect weekend project for knitters of all levels, from enthusiastic beginners to seasoned makers looking for a quick, gratifying knit. This modern boho essential features a rich, warm terra cotta hue and a sturdy, textured stockinette stitch that softens beautifully with every use. Whether you’re heading to the farmers market, the beach, or just need a chic everyday carryall, this bag elevates any outfit while being kind to the planet.
In this comprehensive guide, I’ll walk you through every step, from gathering your materials to seaming and attaching the handles. By the end, you’ll have a gorgeous, handmade tote that’s as unique as you are. Let’s dive in!
Materials Needed
Before you begin, gather the following supplies. The beauty of this pattern is its simplicity—you only need a few items, and the chunky yarn makes it work up incredibly fast.
- Yarn: 2 lbs of recycled t-shirt yarn in terra cotta (approximately 100 yards per 1 lb, or use 2 large t-shirt yarn skeins). The yarn should have a slight stretch and a soft, fabric-like drape.
- Needles: US 15 (10 mm) circular knitting needle, 24-inch length, or straight needles if you prefer.
- Extras: A tapestry needle for seaming and weaving in ends, plus a small length of t-shirt yarn for the seams.
- Gauge: 8 stitches and 12 rows = 4 inches in stockinette stitch (knit on US 15 needles). Tip: Always check your gauge to ensure your bag turns out the right size.
Step-by-Step Instructions
This pattern is worked flat in one piece for the bag body, then seamed at the sides and bottom. The handle is knitted separately and attached at the end. Follow along carefully, and you’ll have a beautiful tote in no time.
Bag Body
Note: The bag is worked flat. Use a slip knot to cast on. The pattern creates a smooth stockinette stitch with a subtle garter stitch edge on the sides, giving it a polished, professional look.
- Row 1 (Right Side): Cast on 36 stitches loosely. This loose cast-on is crucial for a stretchy, comfortable top edge.
- Row 2: Knit all stitches.
- Row 3: Purl all stitches.
- Row 4: Knit all stitches.
- Row 5: Purl all stitches.
- Rows 6–25: Repeat Rows 2–5 five more times. You will now have a total of 20 rows of stockinette stitch, with the garter stitch edge forming naturally on the sides.
- Row 26 (Right Side): Knit all stitches.
- Row 27: Purl all stitches.
- Row 28: Knit all stitches.
- Row 29: Purl all stitches.
- Rows 30–49: Repeat Rows 26–29 five more times. This gives you another 20 rows, for a total of 40 rows of stockinette.
- Row 50: Bind off all stitches loosely in knit. A loose bind-off ensures the top of the bag doesn’t pull or pucker.
Your knitted rectangle should measure approximately 18 inches wide by 20 inches tall (based on gauge). This will create a roomy tote perfect for all your essentials.
Seaming the Bag
Now it’s time to transform your flat rectangle into a three-dimensional bag. This step is simple and requires just a few minutes.
- Fold the knitted rectangle in half with the right sides together, matching the cast-on and bind-off edges. The fold will become the bottom of the bag.
- Thread a tapestry needle with a length of t-shirt yarn (about 18-20 inches should suffice).
- Using a whip stitch, sew the side seams together, starting from the bottom fold and working your way up to the top edge. Leave the top open—this is your bag opening.
- Once both sides are sewn, turn the bag right side out. Gently shape it so the corners are neat and the bottom lies flat.
Knitting the Handle
The handle is a simple, sturdy strip that will comfortably rest on your shoulder. You can adjust the length to your preference, but the pattern calls for a 20-inch handle, which is perfect for carrying by hand or over the shoulder.
- Row 1: Cast on 8 stitches.
- Row 2: Knit all stitches.
- Row 3: Purl all stitches.
- Rows 4–60: Repeat Rows 2–3 until the handle measures approximately 20 inches long (or your desired length). The stockinette stitch will curl slightly, but that’s normal and will settle once attached.
- Bind off all stitches loosely in knit.
Attaching the Handle
This final step brings everything together. Take your time to ensure the handle is securely attached for years of happy use.
- Fold the handle in half to find the center point. Mark it with a stitch marker or a piece of scrap yarn.
- Place the center of the handle on the top edge of the bag, aligning it with one of the side seams. The handle should sit on the inside of the bag, with the ends extending upward.
- Thread your tapestry needle with a fresh length of t-shirt yarn.
- Using a whip stitch, sew the handle securely to the inside of the bag. Stitch through both layers of the handle and the bag fabric, making sure to catch the yarn firmly. Work your way across the width of the handle (about 2 inches) to create a strong attachment.
- Repeat the process on the other side of the bag for the second handle attachment point. Ensure the handle isn’t twisted before you sew it down.
- Weave in all loose ends with your tapestry needle, trimming any excess yarn.
Final Thoughts
Congratulations! You’ve just created a stunning, eco-friendly tote that’s as practical as it is beautiful. The rich terra cotta color and chunky texture make it a standout accessory, whether you’re strolling through a farmers market or heading to a casual brunch. Because t-shirt yarn softens with use, your bag will only get better with time, molding to your lifestyle.
This pattern is wonderfully versatile—feel free to experiment with different colors or add a wooden bead tassel for extra boho flair. If you enjoyed this project, be sure to check out our other tote bag knitting patterns for more inspiration. Happy knitting!