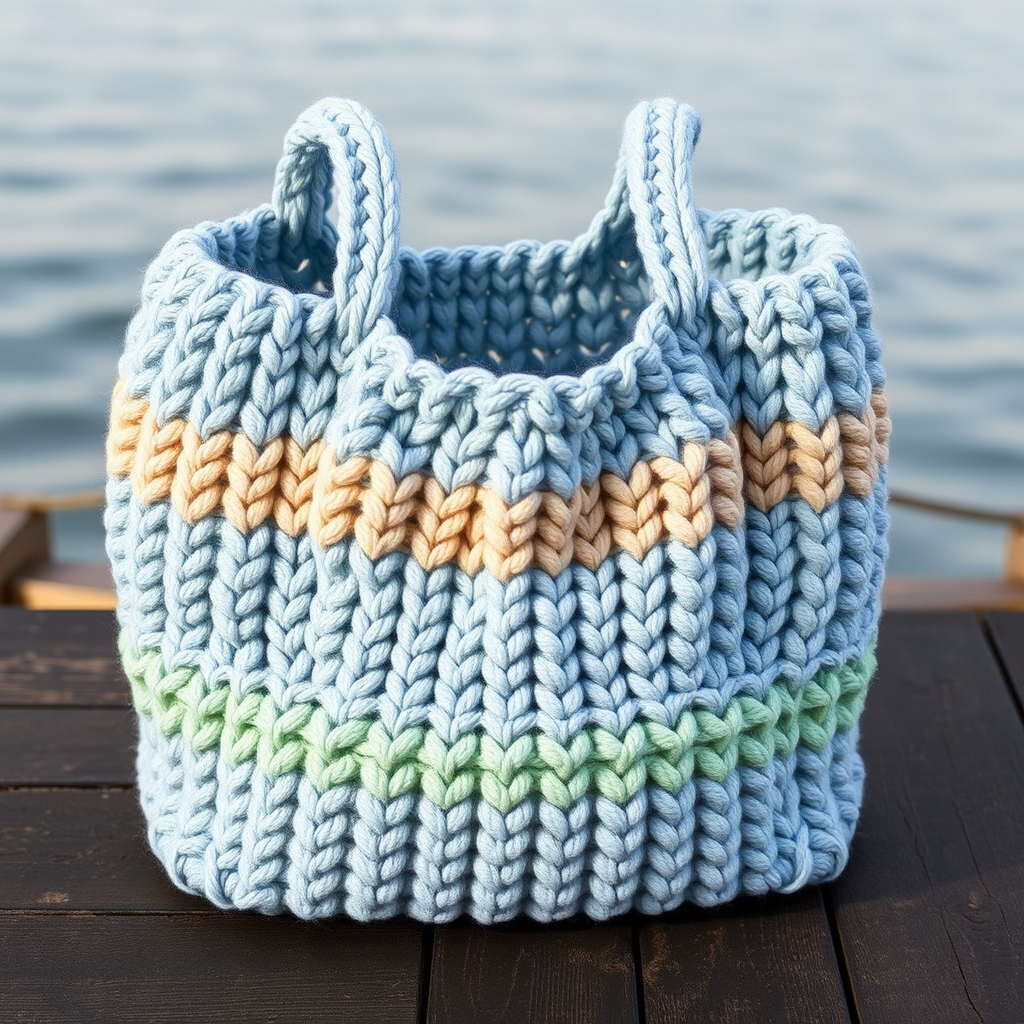
Meadow Breeze Market Tote Free Pattern – Knit a Chunky Boho Carryall

Meadow Breeze Market Tote – Free Beginner Knitting Pattern
Imagine strolling through a sun-drenched farmers' market, your fresh produce nestled in a beautifully handcrafted tote that turns heads. The Meadow Breeze Market Tote is exactly that—an airy, textured carryall that combines boho charm with practical eco-friendly design. Knitted flat in one piece using a simple seed stitch, this pattern is perfect for beginners who want to create something stunning without complicated techniques. The warm terracotta and cream stripes evoke golden meadows and earthy sunsets, making every trip to the market or beach feel like a small adventure.
This pattern uses chunky yarn, so it works up quickly—you'll have a stylish, sturdy bag in just a weekend. Best of all, you'll learn two essential techniques: the classic seed stitch and the clever i-cord handle. Let's dive in and create your new favorite accessory!
Materials Needed
Before you begin, gather these simple supplies. The beauty of this pattern is its minimalism—just yarn, needles, and a tapestry needle.
- Yarn: 2 skeins of Lion Brand Wool-Ease Thick & Quick (or any bulky weight yarn) in Terracotta (Color A) and 1 skein in Cream (Color B). Total approximately 200g. This chunky yarn gives the bag its structure and cozy feel.
- Needles: US 11 (8 mm) straight knitting needles. You'll also need a spare needle or stitch holder for the handles (or a double-pointed needle if you prefer the traditional i-cord method).
- Extras: A tapestry needle for seaming and weaving in ends, plus matching thread or yarn for attaching handles.
- Gauge: 12 stitches and 16 rows = 4 inches in seed stitch (blocked). Don't skip the gauge swatch—it ensures your bag is the perfect size.
Step-by-Step Instructions
Follow these detailed steps, and you'll have a beautiful tote in no time. The pattern is written for flat knitting, so you'll work back and forth on straight needles. Take your time, and remember: every stitch is a step toward your handmade masterpiece.
Part 1: Knitting the Bottom (Worked in Cream)
This is the foundation of your bag. The seed stitch creates a dense, sturdy fabric that won't stretch out of shape.
- Cast on: With Cream (Color B), cast on 40 stitches using your preferred method (long-tail cast on works beautifully).
- Row 1: *K1, P1* repeat from * to end of row. (You'll end with a knit stitch.)
- Row 2: *P1, K1* repeat from * to end of row. (Notice how you're now purling the knit stitches and knitting the purl stitches—this creates the seed stitch texture.)
- Repeat: Continue alternating Rows 1 and 2 until the piece measures 6 inches from the cast-on edge. End with a wrong-side row (a row where the bumpy side is facing you). This ensures your next row starts on the right side.
Part 2: Knitting the Body (Striped Pattern)
Now we add the beautiful terracotta and cream stripes. The two-row stripe sequence creates a clean, modern look.
- Switch to Terracotta (Color A): Cut the Cream yarn, leaving a 6-inch tail, and join Terracotta. Continue in seed stitch, working 2 rows in Terracotta.
- Switch to Cream: Cut Terracotta (leave a tail) and join Cream. Work 2 rows in Cream.
- Repeat the stripe sequence: Continue alternating 2 rows of Terracotta and 2 rows of Cream until the body measures 12 inches from the cast-on edge. This brings your total height to 18 inches—the perfect tote depth.
- End correctly: Finish with a wrong-side row so you're ready to start the top edge on the right side.
Part 3: Knitting the Top Edge (Worked in Cream)
This clean border frames the bag opening and gives it a polished finish.
- Switch to Cream: Cut Terracotta, leaving a tail, and join Cream.
- Work 4 rows in seed stitch: Continue the same K1, P1 pattern for 4 rows. This creates a neat, sturdy top band.
- Bind off loosely: Bind off in pattern (knit the knits and purl the purls) but do it loosely—this prevents the top edge from pulling tight. Cut yarn, leaving a long tail (about 12 inches) for seaming.
Part 4: Finishing the Bag Body
Now we transform your flat rectangle into a 3D tote. This is where the magic happens!
- Fold the piece: Fold the knitted rectangle in half with right sides together (the pretty side facing inward). Match the cast-on edge to the bind-off edge. The left and right edges become your side seams.
- Seam the sides: Thread your tapestry needle with the long tail from the bind-off (or a new piece of Cream yarn). Using a whip stitch, sew the side seams together. Start at the bottom (cast-on edge) and work upward.
- Leave the opening: Stop seaming when you're 4 inches from the top (bind-off edge). This leaves a gap for the bag opening. Repeat on the other side.
- Weave in ends: Use your tapestry needle to weave in all loose yarn tails along the seams and edges. Trim any excess.
Part 5: Knitting the Handles (I-Cord, Make 2)
These sturdy, chunky handles are knitted as i-cords—a clever technique that creates a round, cord-like tube. They're surprisingly easy!
- Cast on: With Terracotta (Color A), cast on 4 stitches onto a double-pointed needle. (If you don't have one, you can use a regular straight needle—just slide the stitches to the other end after each row.)
- Knit the i-cord: *Knit 4 stitches. Then, without turning your work, slide the stitches to the other end of the needle. Pull the yarn tightly across the back of the work.* Repeat from * until the i-cord measures 18 inches.
- Bind off: Cut yarn, leaving a 6-inch tail. Thread the tail through the 4 stitches on your needle and pull tight to close. Weave in the end.
- Make a second handle: Repeat steps 1-3 to create a second i-cord of the same length.
Part 6: Attaching the Handles
This final step brings your bag to life. Secure handles properly for durability.
- Fold each handle: Take one i-cord and fold it in half to form a loop. The folded end will be the top of your handle.
- Position the handles: Place the folded end at the top edge of the bag, about 2 inches from each side seam. The two ends of the i-cord should hang down inside the bag.
- Sew securely: Thread your tapestry needle with Terracotta yarn. Sew the ends of the i-cord to the inside of the bag, using a whip stitch. Make several passes through the yarn to reinforce—this is where the weight of your bag will rest, so be generous with your stitches.
- Repeat for the second handle: Attach the other i-cord on the opposite side, mirroring the first.
- Weave in all ends: Tuck any remaining yarn tails inside the bag and weave them in securely.
Optional Lining (For Extra Strength)
While the knitted structure is surprisingly sturdy, you can add a fabric lining for extra durability—especially if you plan to carry heavy items. Simply cut a piece of cotton fabric to match the bag's interior dimensions, sew it into a pouch, and hand-stitch it to the inside of the bag just below the top edge. This is completely optional but adds a professional touch.
Your Handmade Masterpiece Awaits
Congratulations! You've just knitted a beautiful, functional Meadow Breeze Market Tote. This bag is perfect for farmers' market hauls, beach days, or as a thoughtful handmade gift. The seed stitch gives it a lovely texture that only gets better with use, and the chunky yarn ensures it holds its shape beautifully.
As you use your tote, you'll appreciate the craftsmanship in every stitch. And because you made it yourself, it's truly one-of-a-kind. Happy knitting, and enjoy your new eco-friendly companion!